Companion slides and quick-reference notes
These are teaching notes for every slide in the four companion presentations.
Each original slide remains readable locally.
The linked chapter supplies the full derivation and worked applications; corrections to compressed slide statements are explicit.
PPT/Structural Steelwork Design L1.pptx · slide 1: Introduction: what you are learning
Make the next decision from the known conditions
Read the specific task below and identify the quantity or explanation it asks for.
Prediction, then explanation. Changing a load value may preserve the method. Changing the support or failure mechanism can require a different method.
Separate given, lookup, calculated and assumed values. State why the model applies. Keep necessary intermediate steps and units beside the equations.
A conditional answer states the exact condition required for its conclusion. It does not fill missing data with a guess.
Scope. A repeated result is not an independent verification. Use equilibrium, dimensions, a reverse substitution or an appropriate limiting case.
Check and takeaway. The explanation and answer are shown together in this edition. No response, score or completed interaction is needed to continue.
Apply the reasoning to this section’s data and conditions
A design answer compares a demand caused by loads with a resistance supplied by steel.
First calculate the loads and forces; then check the chosen component.
A failure of any required check means the proposal needs revision.
Study the full explanation and applications.
Original slide 1, introduction: what you will learn.
The title is Structural Steelwork Design; Chapter 1 covers foundations, steel metallurgy and HK Code 2011.
The module is CON4334 Civil Engineering and the lecturer is credited as King Lai.
Do not infer dimensions from slide scale.Open full-size image
Mechanism detailsFollow the calculation sequence
The complete mechanism is explained below.
Read each stage together with its stated conditions; playback and interaction are not required.
- Locate the load, supports, connection geometry and any stated assumptions.
- Keep given values, table lookups and calculated values distinct; reconcile their units.
- The calculation player steps through the existing expressions in their original order.
Compare demand with resistance or the relevant limit.
Keep missing inputs and conditional conclusions explicit.
PPT/Structural Steelwork Design L1.pptx · slide 2: The course roadmap
Separate stiffness, strength and ductility
Two steels may resist similar elastic deformation but start permanent deformation at different stresses.
Prediction, then explanation. Raising the yield level alone need not change the initial slope. The same elastic load can therefore give similar deformation.
Stress is force per area. Strain is extension divided by original length. Their elastic ratio defines Young’s modulus.
σ is stress in N/mm²; ε is dimensionless strain; E is Young’s modulus in N/mm².
Scope. Use this linear relationship only in its elastic range. Ductility concerns deformation before fracture, not the value of E.
Check and takeaway. When elastic load is removed, elastic strain recovers. Yielded steel can retain strain after unloading.
Repeated loading can grow a crack
A detail experiences many load cycles. A single static resistance check does not describe its fatigue behaviour.
Prediction, then explanation. More cycles or a larger stress range can increase fatigue damage. Remaining below yield is not a universal fatigue guarantee.
A local notch or weld detail concentrates stress. Repeated changes can extend a crack from that region.
Δσ is stress range in N/mm². Maximum and minimum stresses must refer to the same location and stress component.
Scope. The sketch is a mechanism explanation, not a life prediction. Fatigue design requires the applicable detail category and load history.
Check and takeaway. A static pass does not remove the need for a fatigue check when repeated loading is relevant.
Interrupt the corrosion process
Steel exposed to moisture and oxygen can lose material. Explain what each protection system does.
Prediction, then explanation. If a barrier coating is damaged, the exposed region can corrode. Zinc can also provide sacrificial protection where conditions permit.
Paint works mainly as a barrier. Galvanizing adds a zinc layer with barrier and sacrificial effects. Surface preparation affects performance.
No universal coating thickness or life follows from this mechanism sketch.
Scope. Weathering steel still needs suitable exposure and detailing. A protection label does not replace inspection or maintenance.
Check and takeaway. The useful comparison is the protection mechanism, exposure and maintenance need. Do not describe all coatings as identical barriers.
Apply the reasoning to this section’s data and conditions
Learn foundations before connections, beams and columns.
The same equilibrium equations recur: vertical forces balance, horizontal forces balance, and moments balance.
The shape and restraints decide which resistance checks are needed.
Study the full explanation and applications.
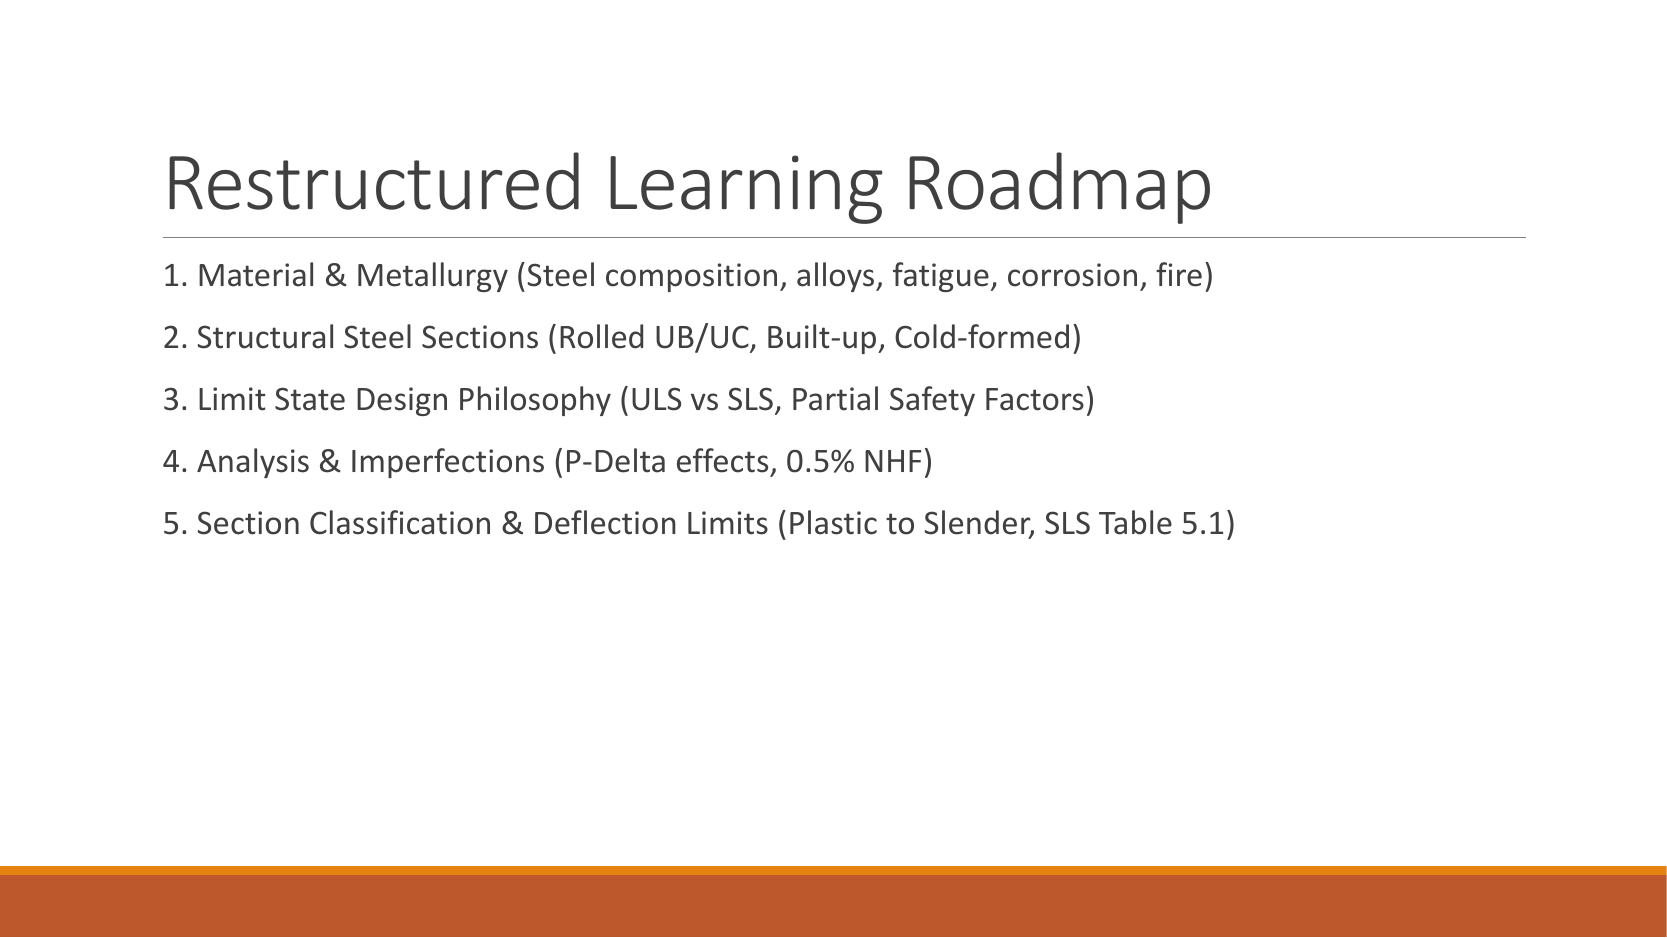
Original slide 2, Learning Roadmap.
The five topics are: materials and metallurgy (composition, alloys, fatigue, corrosion and fire protection); steel sections (hot-rolled UB/UC, built-up and cold-formed); limit state design (ULS/SLS and partial safety factors); analysis and initial imperfections ( effects and notional horizontal forces, NHF); and classification/deflection limits (plastic through slender classes, SLS Table 5.1).
Do not infer dimensions from slide scale.Open full-size image
Mechanism detailsFollow the calculation sequence
The complete mechanism is explained below.
Read each stage together with its stated conditions; playback and interaction are not required.
- Locate the load, supports, connection geometry and any stated assumptions.
- Keep given values, table lookups and calculated values distinct; reconcile their units.
- The calculation player steps through the existing expressions in their original order.
Compare demand with resistance or the relevant limit.
Keep missing inputs and conditional conclusions explicit.
PPT/Structural Steelwork Design L1.pptx · slide 3: Steel behaviour and protection
Use the same mechanism: Separate stiffness, strength and ductility. Raising the yield level alone need not change the initial slope. The same elastic load can therefore give similar deformation.
Use the same mechanism: Repeated loading can grow a crack. More cycles or a larger stress range can increase fatigue damage. Remaining below yield is not a universal fatigue guarantee.
Use the same mechanism: Interrupt the corrosion process. If a barrier coating is damaged, the exposed region can corrode. Zinc can also provide sacrificial protection where conditions permit.
Apply the reasoning to this section’s data and conditions
The slide describes steel as mostly iron, with controlled carbon and manganese.
Carbon raises strength but can reduce ductility and weldability.
Fatigue is repeated-load crack growth; corrosion removes material; heat reduces stiffness and strength.
For an exam explanation, link each protection method to the damage mechanism it prevents.
Study the full explanation and applications.
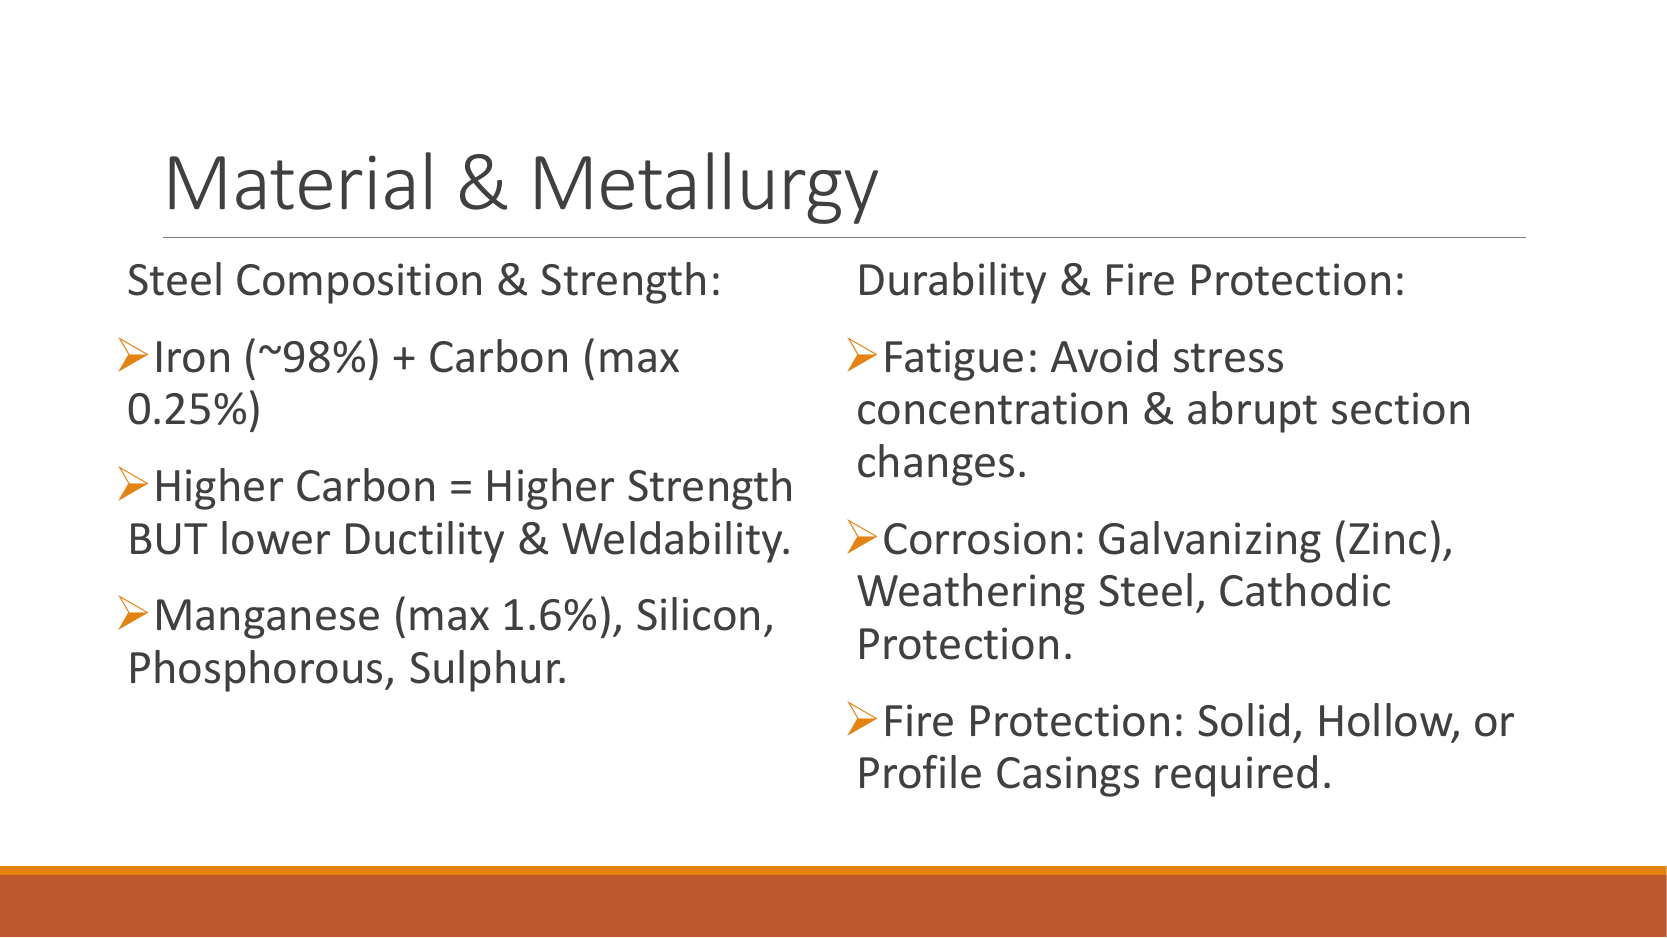
Original slide 3, Material & Metallurgy.
The left column lists composition: approximately iron, up to carbon, up to manganese, plus silicon, phosphorus and sulphur.
Higher carbon increases strength but reduces ductility and weldability.
The right column says to avoid stress concentrations and abrupt section changes for fatigue; corrosion protection includes galvanising, weathering steel and cathodic protection; fire protection uses solid, hollow or profile casing.
The percentages are the slide's statements, not complete material specifications for every grade.
Do not infer dimensions from slide scale.Open full-size image
Mechanism detailsElasticity, yielding and ductility
The complete mechanism is explained below.
Read each stage together with its stated conditions; playback and interaction are not required.
Stress is force divided by area.
Strain measures change in length relative to original length.
Before yielding, stress is approximately .
E controls the elastic slope.
Further strain includes permanent deformation.
Higher yield strength does not by itself increase E.
Strength, stiffness and ductility answer different questions.
This schematic is not a measured stress–strain curve.
PPT/Structural Steelwork Design L1.pptx · slide 4: Recognise the section
Use the property for the physical question
A section table contains several numbers. Choose the property that matches the calculation and bending axis.
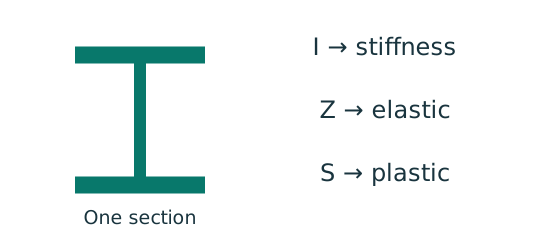
Prediction, then explanation. Moving equal area away from an axis increases I about that axis. It does not increase total area.
Each small area contributes its area multiplied by squared distance. Sum those contributions to obtain I.
I is second moment of area in mm⁴. y is distance from the chosen axis in mm. A is area in mm². r is radius of gyration in mm.
Scope. Z is elastic section modulus; S is plastic section modulus in this course. Neither is interchangeable with I.
Check and takeaway. A nominal section designation is a row identifier. Use the actual dimensions and units in that exact row.
Apply the reasoning to this section’s data and conditions
An I or H section has two flanges and a web; angles and channels are open, unsymmetrical shapes.
Rolled means formed hot at a mill.
Built-up means plates or sections joined into a member.
Identify the section family before choosing dimensions, axes or buckling curves.
Study the full explanation and applications.
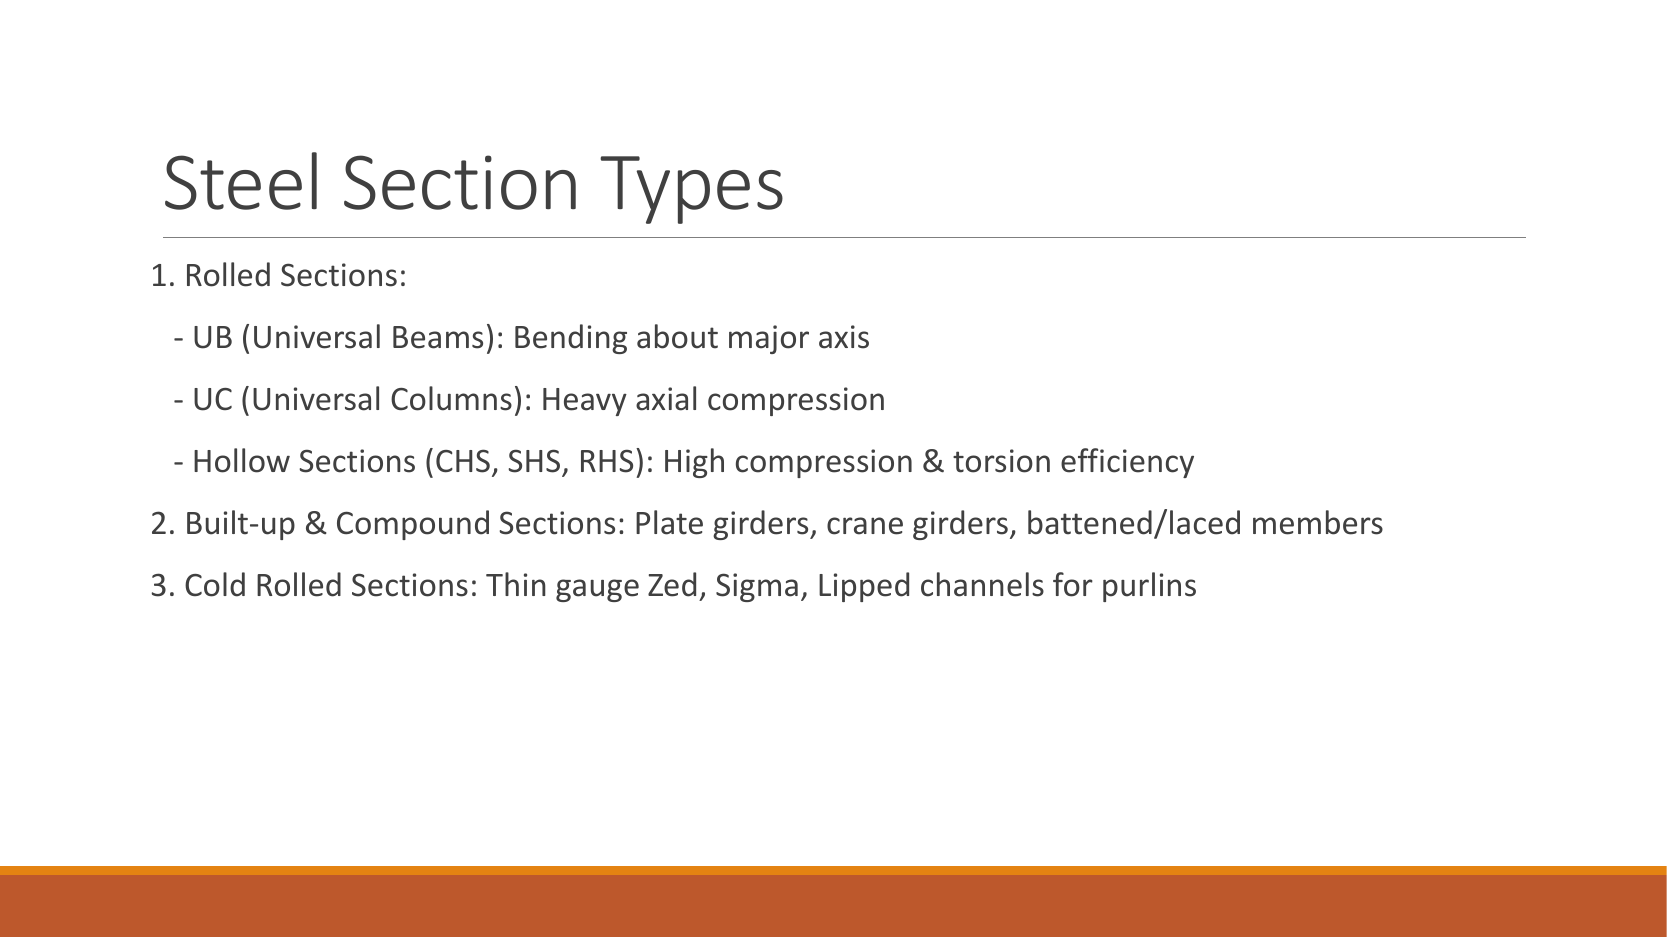
Original slide 4, Steel Section Types.
Hot-rolled UBs mainly resist major-axis bending; UCs accommodate larger axial compression.
CHS/SHS/RHS hollow sections are efficient in compression and torsion.
Built-up and compound sections include plate girders, crane girders, and battened/laced members.
Cold-formed thin-walled Z, sigma and lipped channel sections can serve as purlins.
Do not infer dimensions from slide scale.Open full-size image
Mechanism detailsExplore section geometry and axes
The complete mechanism is explained below.
Read each stage together with its stated conditions; playback and interaction are not required.
The flanges are the wide plates.
The web connects them.
Rotate the I-section to see both.
- The same section has different stiffness and resistance about its two principal axes.
I controls elastic curvature.
is elastic section modulus.
Plastic modulus S comes from plastic stress blocks.
Nominal section labels are not every actual dimension.
Keep the row, axis and units together.
PPT/Structural Steelwork Design L1.pptx · slide 5: ULS versus SLS
Ask two separate design questions
Decide whether the check concerns failure or unacceptable behaviour during use.
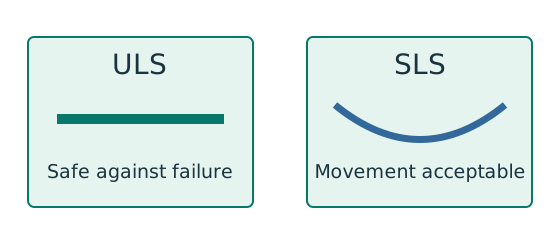
Prediction, then explanation. A larger section may improve both results, but a pass on one branch does not prove a pass on the other.
ULS addresses relevant strength and stability failure modes. SLS addresses specified service conditions such as deflection.
δ is the calculated displacement; δlimit is the permitted displacement. Both must use the same length unit.
Scope. Use each check’s own load combination and limit. A strength load factor does not change the physical stiffness.
Check and takeaway. Write separate conclusions for strength, stability and serviceability where requested. A single unexplained “safe” hides those distinctions.
Apply the reasoning to this section’s data and conditions
ULS checks strength and stability using the prescribed factored load combination.
SLS checks usable behaviour such as deflection.
Do not carry the ULS load into an imposed-load-only deflection check.
is permanent load, imposed load and wind action.
Study the full explanation and applications.
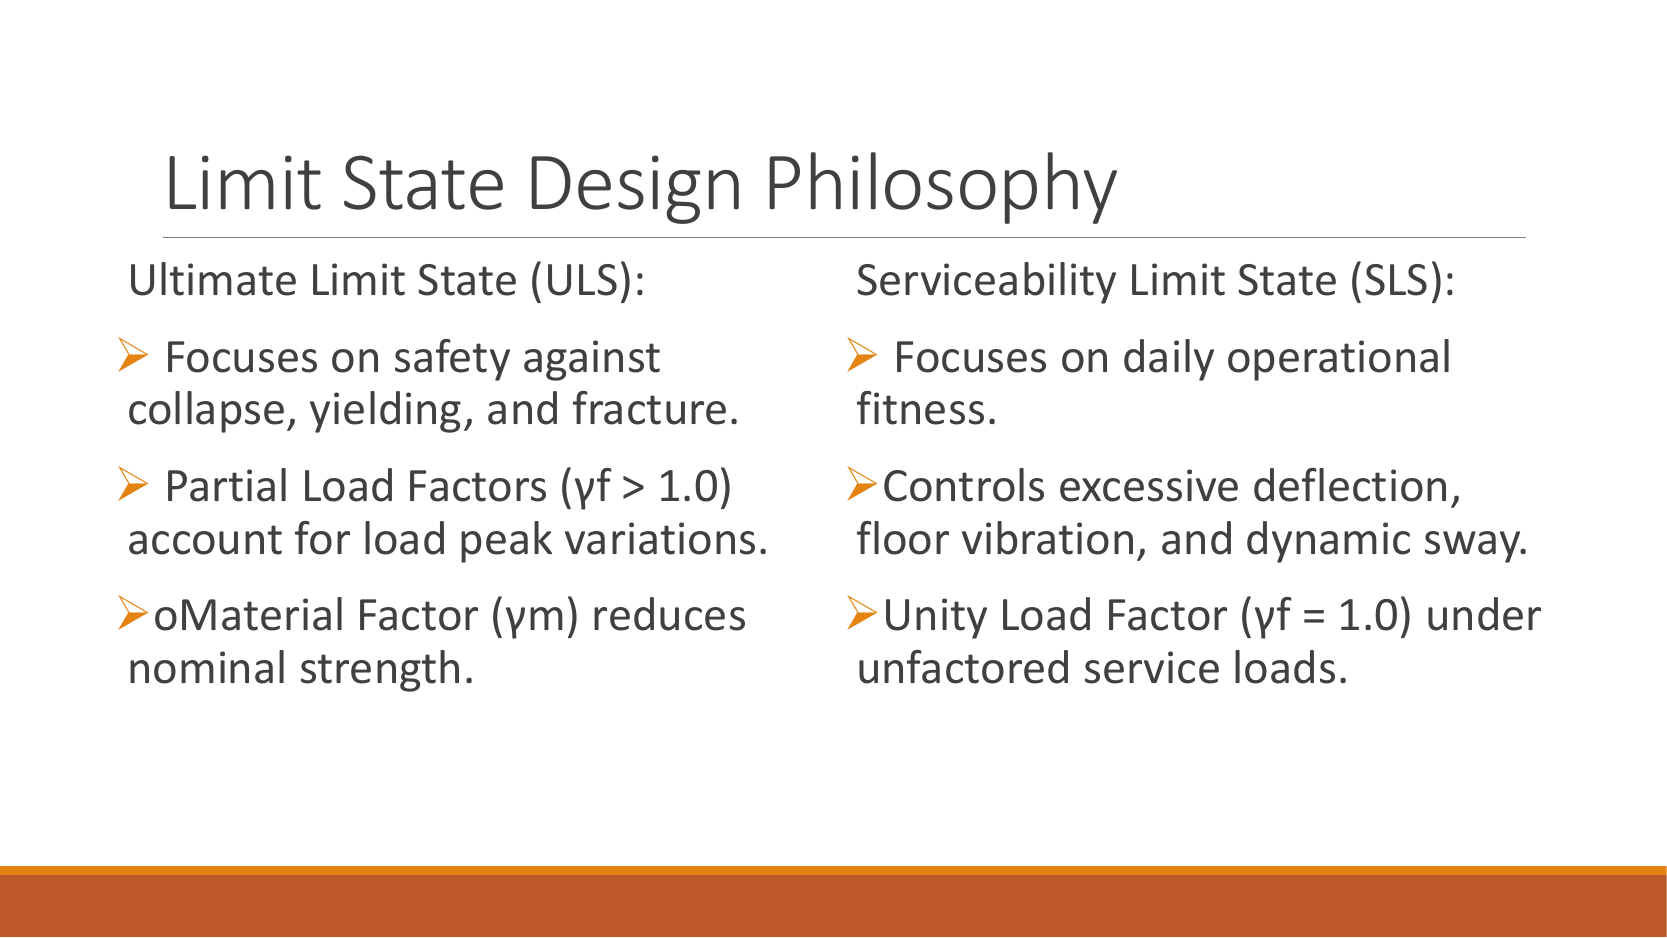
Original slide 5, Limit State Design Philosophy.
The left column describes ULS protection against collapse, yielding and fracture; denotes the partial load factor, and the material factor reducing nominal strength.
The right column describes everyday serviceability, controlling excessive deflection, floor vibration and dynamic sway.
It lists unfactored service loads .
Factors must still be selected for the actual combination and course rules.
The left-column summary is not a universal rule for all favourable/unfavourable loads.
Do not infer dimensions from slide scale.Open full-size image
Mechanism detailsTwo different design questions
The complete mechanism is explained below.
Read each stage together with its stated conditions; playback and interaction are not required.
- ULS compares factored actions with the applicable resistance to yielding, rupture or instability.
- SLS checks movement, vibration or another specified use requirement.
A beam can be strong enough but deflect too much.
The two checks need their own loads and denominators.
A resistance pass cannot stand in for a serviceability pass.
Complete all requested checks.
PPT/Structural Steelwork Design L1.pptx · slide 6: Choose a load combination
Keep load categories separate
A floor carries permanent material and changing occupancy loads. Find the design load for the stated check.
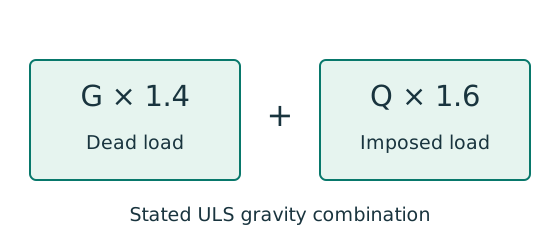
Prediction, then explanation. Increasing imposed load changes its own term. It does not change the dead-load factor or the steel stiffness.
First convert mass to weight where required. Next collect G and Q in compatible units. Apply the combination specified by the course problem.
G is characteristic dead load; Q is characteristic imposed load. Wu is the design load for this course gravity combination.
Scope. This combination is not universal. Use the specified service load for deflection and the stated factors for other standards or cases.
Check and takeaway. Illustration: G = 10 kN and Q = 5 kN give 22 kN. Factoring their sum by one guessed factor loses the distinction.
Apply the reasoning to this section’s data and conditions
The slide lists , and .
These are different cases, not extra multipliers applied one after another.
Choose the relevant adverse combination and consider whether an action is beneficial.
For example, and gives .
Study the full explanation and applications.
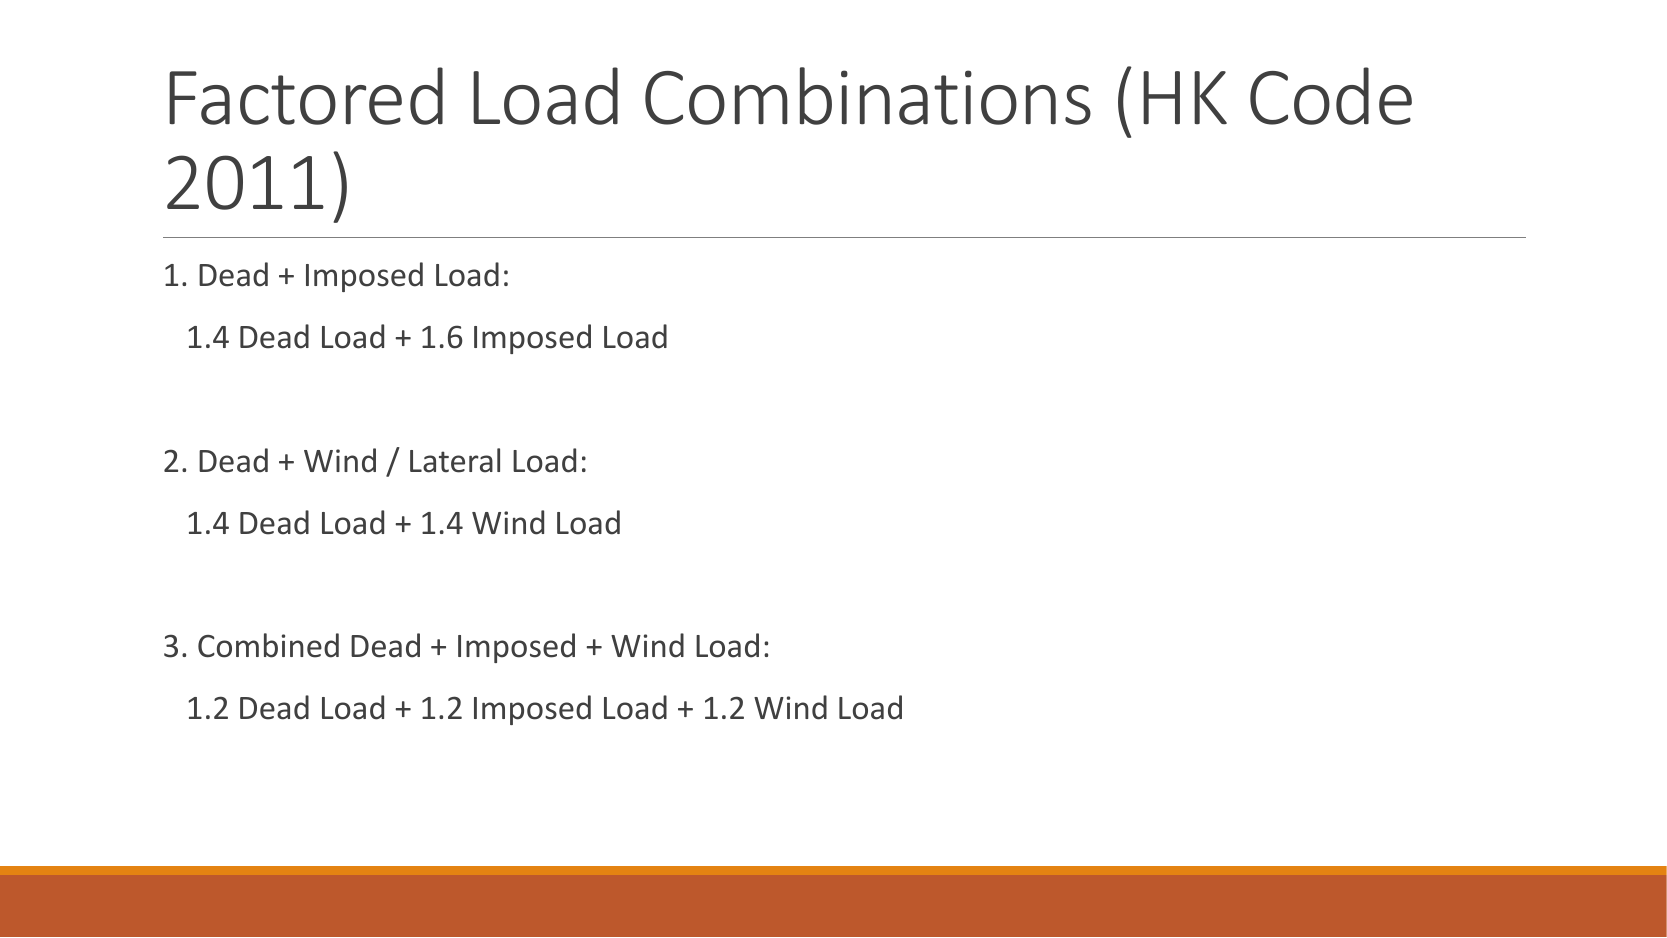
Original slide 6, Factored Load Combinations (HK Code 2011).
The three source expressions are:; ; .
Dead, imposed and wind loads correspond respectively to // above.
Do not infer dimensions from slide scale.Open full-size image
Mechanism detailsFrom characteristic to design load
The complete mechanism is explained below.
Read each stage together with its stated conditions; playback and interaction are not required.
G is permanent load; Q is imposed load.
A surface load and a line load also have different units.
This illustration uses the course gravity case .
Other combinations in the original text retain their own factors.
- For illustrative , the separate load contributions show what changes when Q increases.
Do not carry this ULS total automatically into deflection.
Follow the stated SLS load case.
PPT/Structural Steelwork Design L1.pptx · slide 7: Choose the analysis model
Restraints define the analysis model
Choose an analysis model that represents the actual joints, restraints and possible sway.
Prediction, then explanation. A joint that permits beam rotation does not automatically remove all column moment. Eccentric reactions may still bend the column.
First identify the joint behaviour. Next identify how horizontal forces reach the foundations. Then assess sway sensitivity using the course criterion.
Simple, continuous and semi-continuous construction describe joint modelling. Sway classification describes overall frame response.
Scope. The schematic does not establish restraint stiffness or a stability threshold. Use the stated data and classification rules.
Check and takeaway. An ideal straight frame may still require notional horizontal forces to represent imperfections under the applicable method.
Compression acts on the displaced shape
A compressed member moves away from its initial load line. Explain why the bending moment can increase.
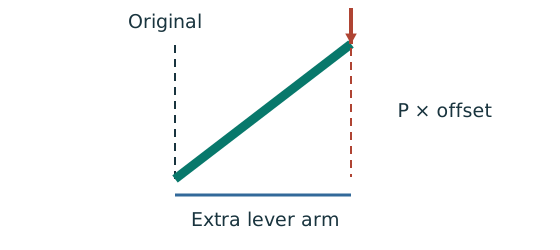
Prediction, then explanation. At fixed axial force, a larger offset creates a larger additional moment. This can further increase the displacement.
Force acting through an offset forms a moment. Second-order analysis includes that changed geometry in equilibrium.
P is axial force. Δ and δ are the relevant perpendicular displacements. Consistent force and length units give moment units.
Scope. Use the amplification or analysis method stated for the frame. Do not amplify an already amplified moment a second time.
Check and takeaway. Zero offset removes this additional moment in the ideal sketch. Real design may still require imperfections and code checks.
Apply the reasoning to this section’s data and conditions
Simple construction treats joints as nominally pinned for global analysis; continuous construction transfers joint moments.
First-order analysis uses the undeformed shape; second-order analysis includes extra moments caused by displacement under axial force.
Do not infer moment fixity from a visually thick line in a sketch.
Study the full explanation and applications.
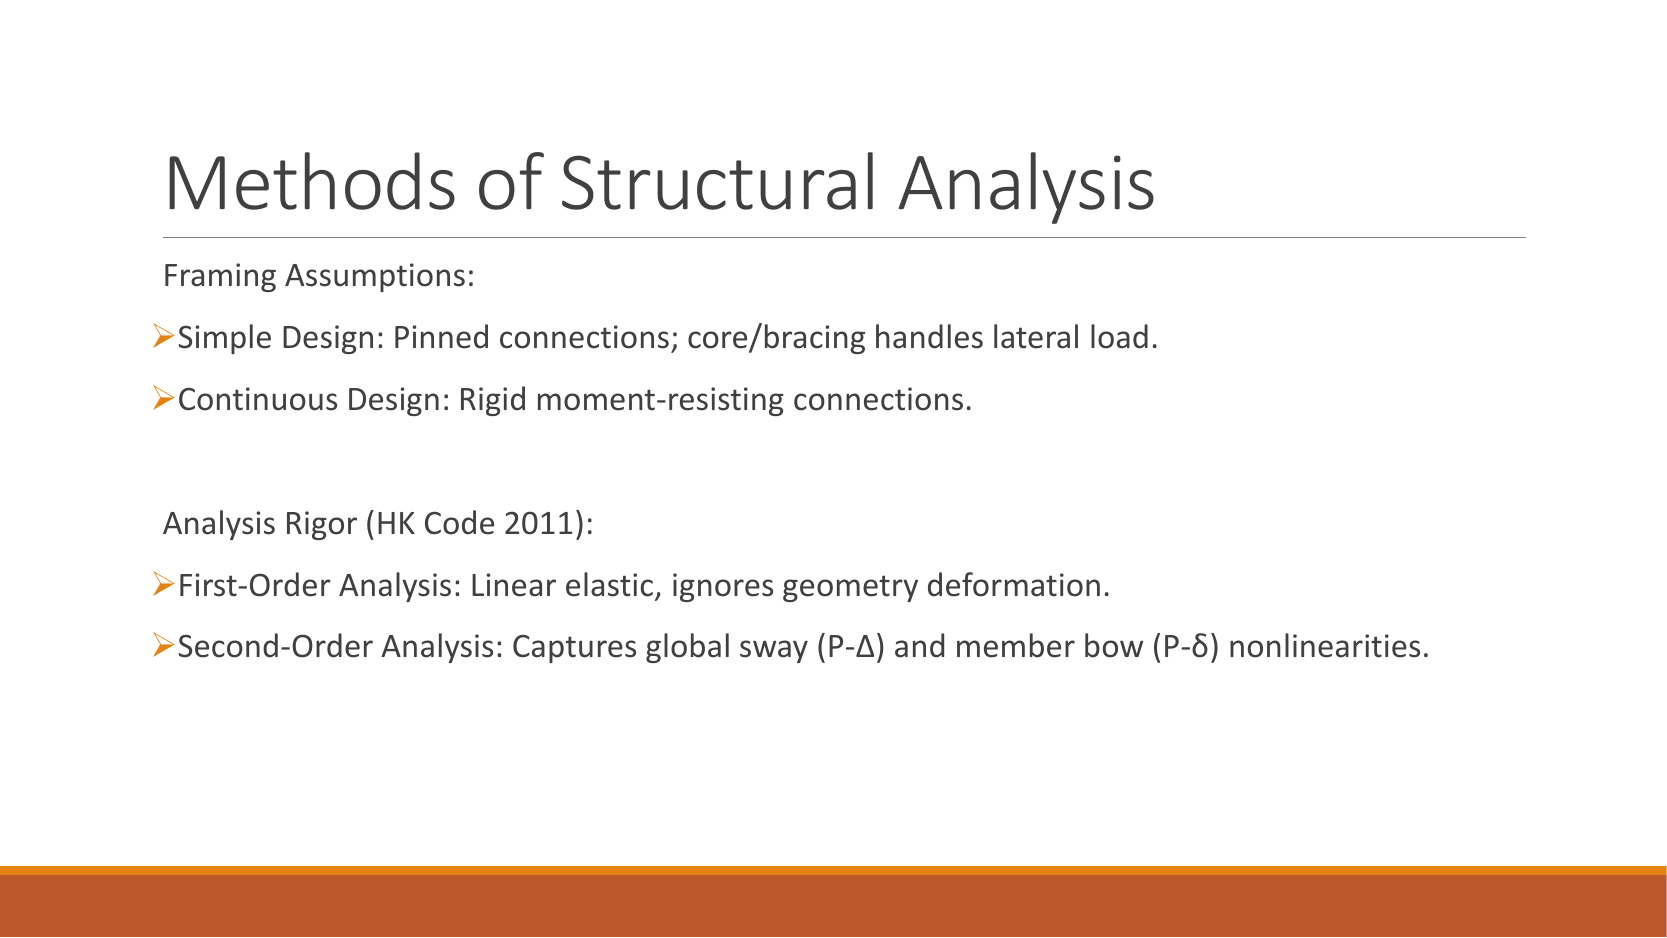
Original slide 7, Methods of Structural Analysis.
Simple design uses pinned connections with cores/bracing resisting lateral loads; continuous design uses rigid moment-resisting connections.
First-order linear-elastic analysis ignores geometric deformation; second-order analysis includes geometric nonlinearity from overall sway and member bending .
The slide identifies HK Code 2011.
Do not infer dimensions from slide scale.Open full-size image
Mechanism detailsRestraints, sway and imperfections
The complete mechanism is explained below.
Read each stage together with its stated conditions; playback and interaction are not required.
- A frame needs a defined path for horizontal force as well as gravity.
- Pinned joints alone do not provide frame moment resistance; sway restraint needs a real structural system.
Diagonal bracing carries horizontal action through axial forces.
This sketch does not assign a numerical frame classification.
Use the specified imperfection/notional-force model and critical-load criteria.
Avoid counting alternative imperfection models twice.
PPT/Structural Steelwork Design L1.pptx · slide 8: Imperfections and notional forces
Use the same mechanism: Restraints define the analysis model. A joint that permits beam rotation does not automatically remove all column moment. Eccentric reactions may still bend the column.
Use the same mechanism: Compression acts on the displaced shape. At fixed axial force, a larger offset creates a larger additional moment. This can further increase the displacement.
Apply the reasoning to this section’s data and conditions
Real members are not perfectly straight or vertical.
The slide uses a nominal frame imperfection and notional horizontal force times vertical load.
For a vertical action, that force is .
Apply it in the stated analysis case.
It does not replace actual wind automatically.
Member initial bow and frame lean are different imperfections.
Study the full explanation and applications.
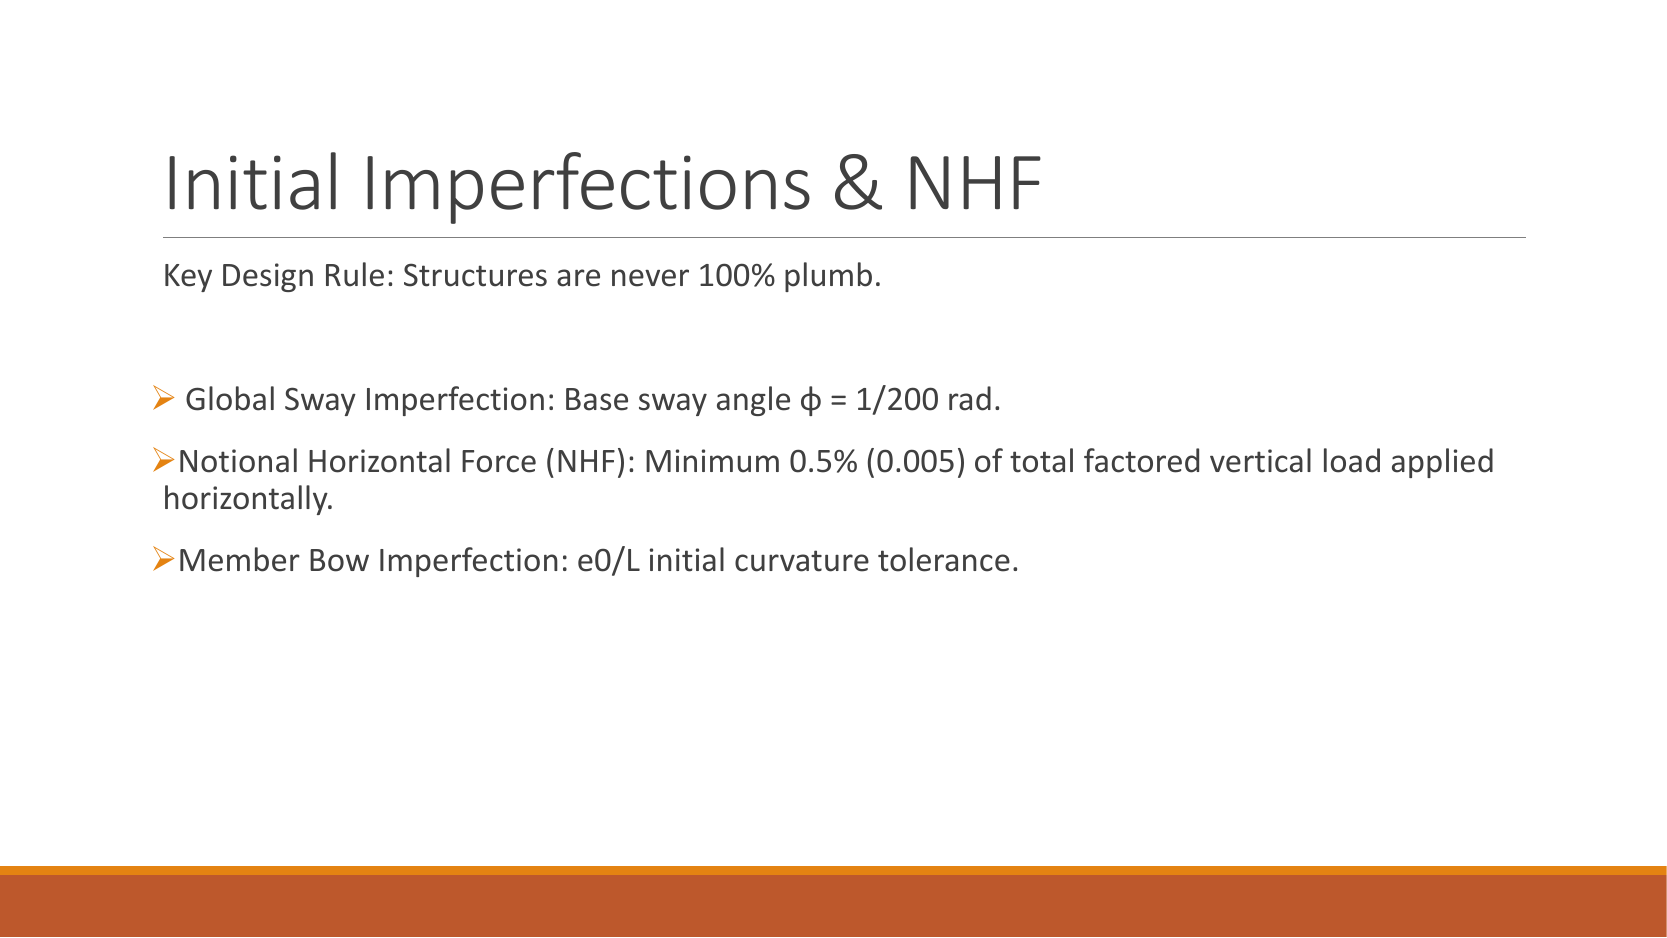
Original slide 8, Initial Imperfections & NHF.
The slide says a structure is not perfectly vertical.
The reference angle for overall inclination is ; NHF acts horizontally and is at least the following fraction of total factored vertical load: ().
Initial member bow is represented by .
Do not infer dimensions from slide scale.Open full-size image
Mechanism detailsRestraints, sway and imperfections
The complete mechanism is explained below.
Read each stage together with its stated conditions; playback and interaction are not required.
- A frame needs a defined path for horizontal force as well as gravity.
- Pinned joints alone do not provide frame moment resistance; sway restraint needs a real structural system.
Diagonal bracing carries horizontal action through axial forces.
This sketch does not assign a numerical frame classification.
Use the specified imperfection/notional-force model and critical-load criteria.
Avoid counting alternative imperfection models twice.
PPT/Structural Steelwork Design L1.pptx · slide 9: Serviceability limits
A safe beam can still sag too far
Check whether the beam displacement exceeds the permitted service limit.
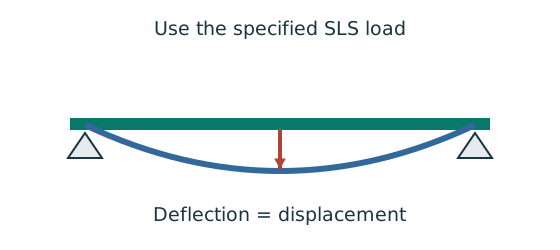
Prediction, then explanation. For the same UDL and stiffness, doubling span multiplies deflection by sixteen. Doubling I halves deflection.
Load bends each beam segment. The curvature accumulates along the span. Material stiffness E and geometric stiffness I resist that deformation.
Use w in N/mm, L in mm, E in N/mm² and I in mm⁴. The resulting midspan deflection is in mm.
Scope. The formula assumes a prismatic, simply supported, linear-elastic beam with full-span UDL. Use the stated service load and deflection limit.
Check and takeaway. A higher yield grade does not automatically increase E. Passing a strength check therefore does not prove acceptable deflection.
Apply the reasoning to this section’s data and conditions
For imposed-load vertical deflection, use the applicable row: brittle finishes , other beams , cantilevers .
The slide also mentions crane and frame .
The full course table states the conditions, so a limit must be selected by function and displacement type.
A span of at permits .
Study the full explanation and applications.
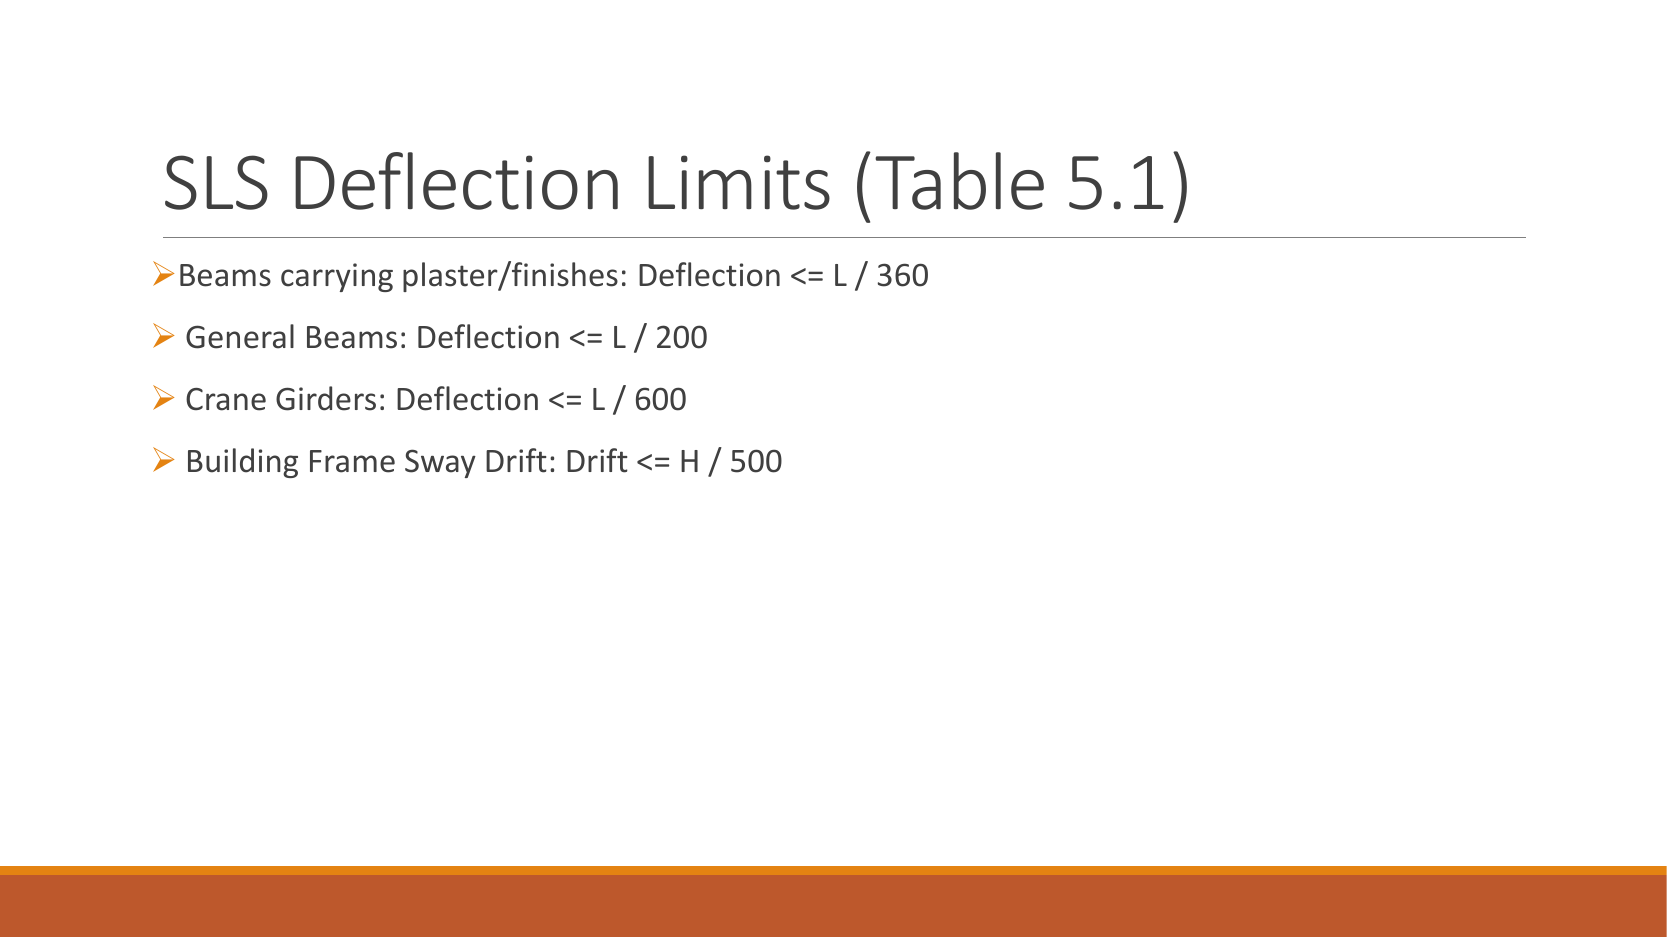
Original slide 9, SLS Deflection Limits (Table 5.1).
The four rows are: beams supporting plaster/finishes, ; general beams, ; crane girders, ; building-frame sway, .
This reproduces the source summary table; actual uses and load conditions must follow the full table.
Do not infer dimensions from slide scale.Open full-size image
Mechanism detailsSee stiffness and deflection
The complete mechanism is explained below.
Read each stage together with its stated conditions; playback and interaction are not required.
Use the specified SLS load, span and support arrangement.
The demonstrator has a full-span UDL.
The loaded beam bends.
The deformation is exaggerated so its shape can be seen.
For a simply supported full-span UDL, .
Double L with w, E and I unchanged: δ becomes 16 times as large.
The readout uses , and .
Select the finish/support-specific limit from the original table.
PPT/Structural Steelwork Design L1.pptx · slide 10: Strength depends on thickness
A table value has conditions
Find a design property without mixing a row, column or standard from a different case.
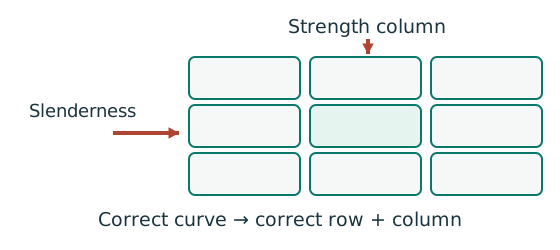
Prediction, then explanation. A different flange thickness can select a lower design strength even when the steel grade name remains unchanged.
Match the complete section designation. Read the relevant axis and unit. For strength tables, select material, thickness and curve before interpolating.
Given values come from the question. Lookup values come from a named table. Assumed values require an explicit condition.
Scope. A missing row or omitted restraint cannot be recovered from a schematic’s scale. Keep the result conditional when required data are absent.
Check and takeaway. Record the table, row, column and unit beside the substitution. That makes a later check possible.
Apply the reasoning to this section’s data and conditions
S355 is a grade name, not a promise that every thickness has design strength .
Read the maximum-thickness row: a flange falls in the row, giving .
Then .
Use the controlling plate thickness for the relevant property check.
Study the full explanation and applications.
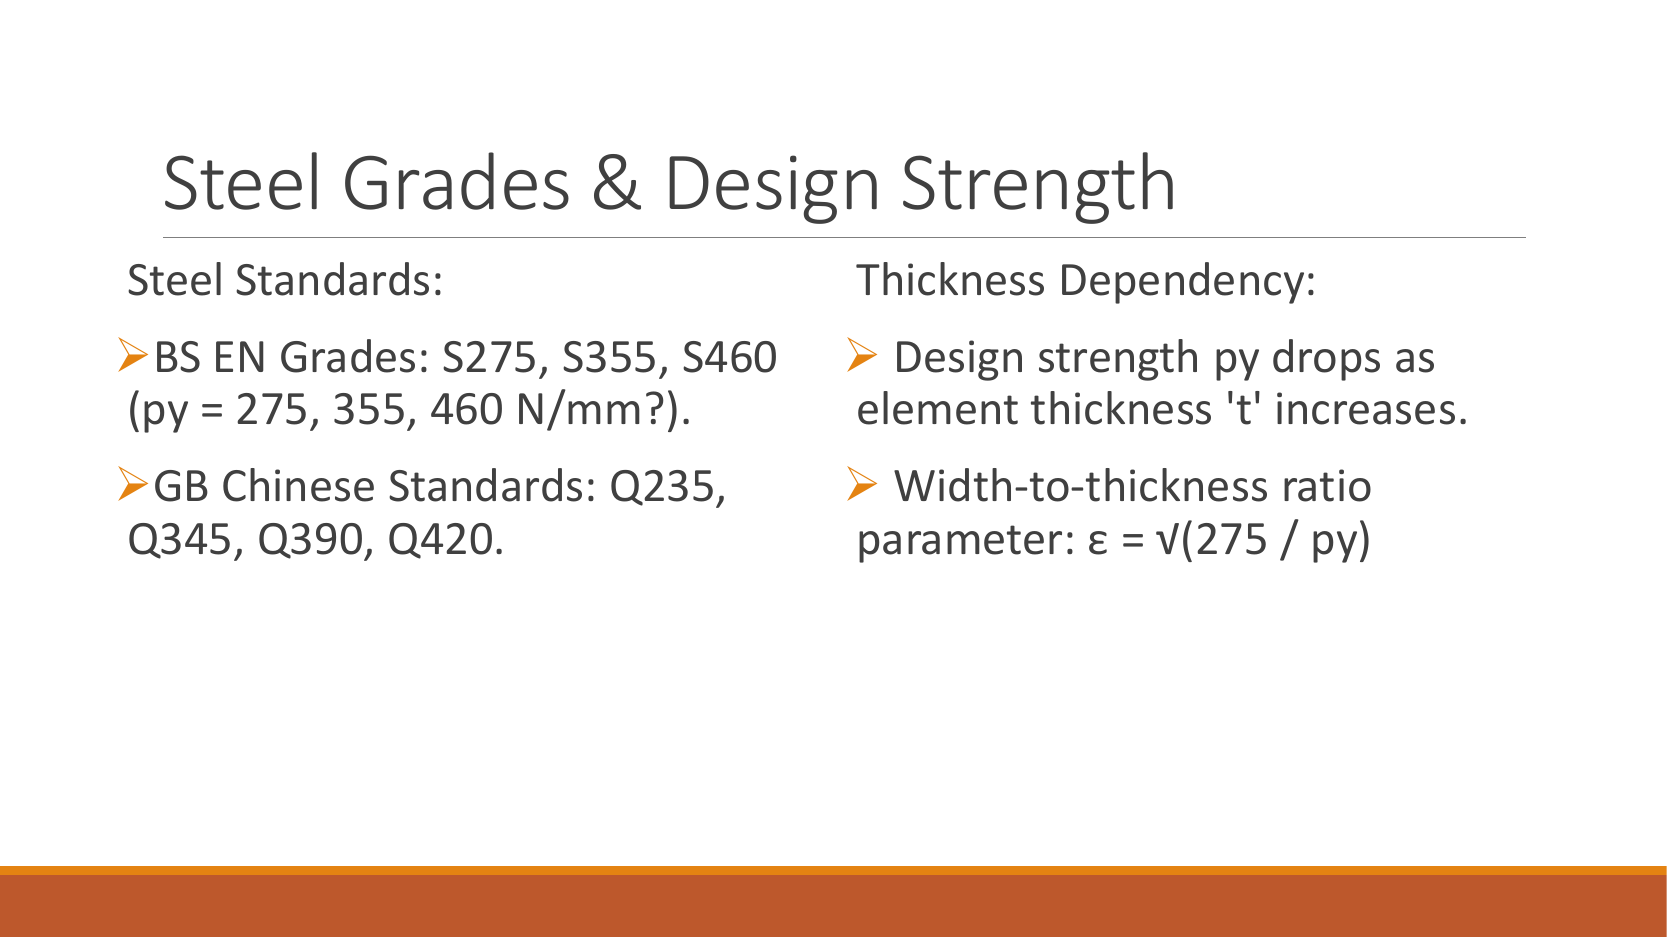
Original slide 10, Steel Grades & Design Strength.
The left column lists BS EN grades S275, S355 and S460, with the shorthand .
It also lists GB grades Q235, Q345, Q390 and Q420.
The right column says increasing reduces , and gives the width/thickness parameter .
The left-column unit has a question-mark-like superscript.
Here it is transcribed as using the strength table from the same course, while retaining the source image.
The left-column shorthand is not a universal lookup value across all thicknesses.
Do not infer dimensions from slide scale.Open full-size image
Mechanism detailsRead a table without losing the keys
The complete mechanism is explained below.
Read each stage together with its stated conditions; playback and interaction are not required.
- Name the required property: material strength, section property, buckling strength or a moment factor.
- Keep section size, steel grade, thickness band, curve and axis as separate lookup keys.
, and require different conversion powers.
Do not use adjacent columns interchangeably.
Use bracketing rows within the same valid column.
The original page remains the source of all table values.
PPT/Structural Steelwork Design L1.pptx · slide 11: Section classes
Find which plate buckles first
Before using plastic bending resistance, check whether the flange and web can sustain the required stress distribution.
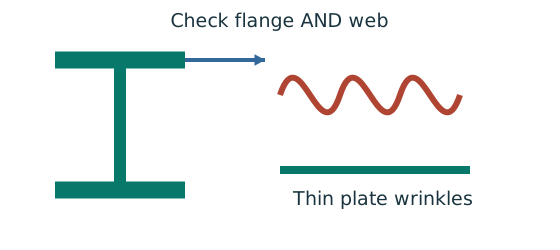
Prediction, then explanation. At fixed width, a thinner plate has a larger width-to-thickness ratio. Local buckling then becomes more restrictive.
Calculate the flange and web ratios separately. Compare each with the limits for its stress condition. The worse class governs.
py is the design yield strength in N/mm². ε is a dimensionless scale used in the supplied classification limits.
Scope. Pure bending and uniform compression use different web limits. Class 2 allows plastic resistance but not the Class 1 rotation capability.
Check and takeaway. A Class 1 web and Class 2 flange give a Class 2 section. Do not average the class numbers.
Apply the reasoning to this section’s data and conditions
Class 1 permits a plastic hinge with rotation.
Class 2 reaches plastic moment with less rotation.
Class 3 uses elastic capacity.
Class 4 requires effective properties.
Check flange and web separately under their actual stress distributions, then take the worse class.
A stocky flange does not make a slender web Class 1.
Study the full explanation and applications.
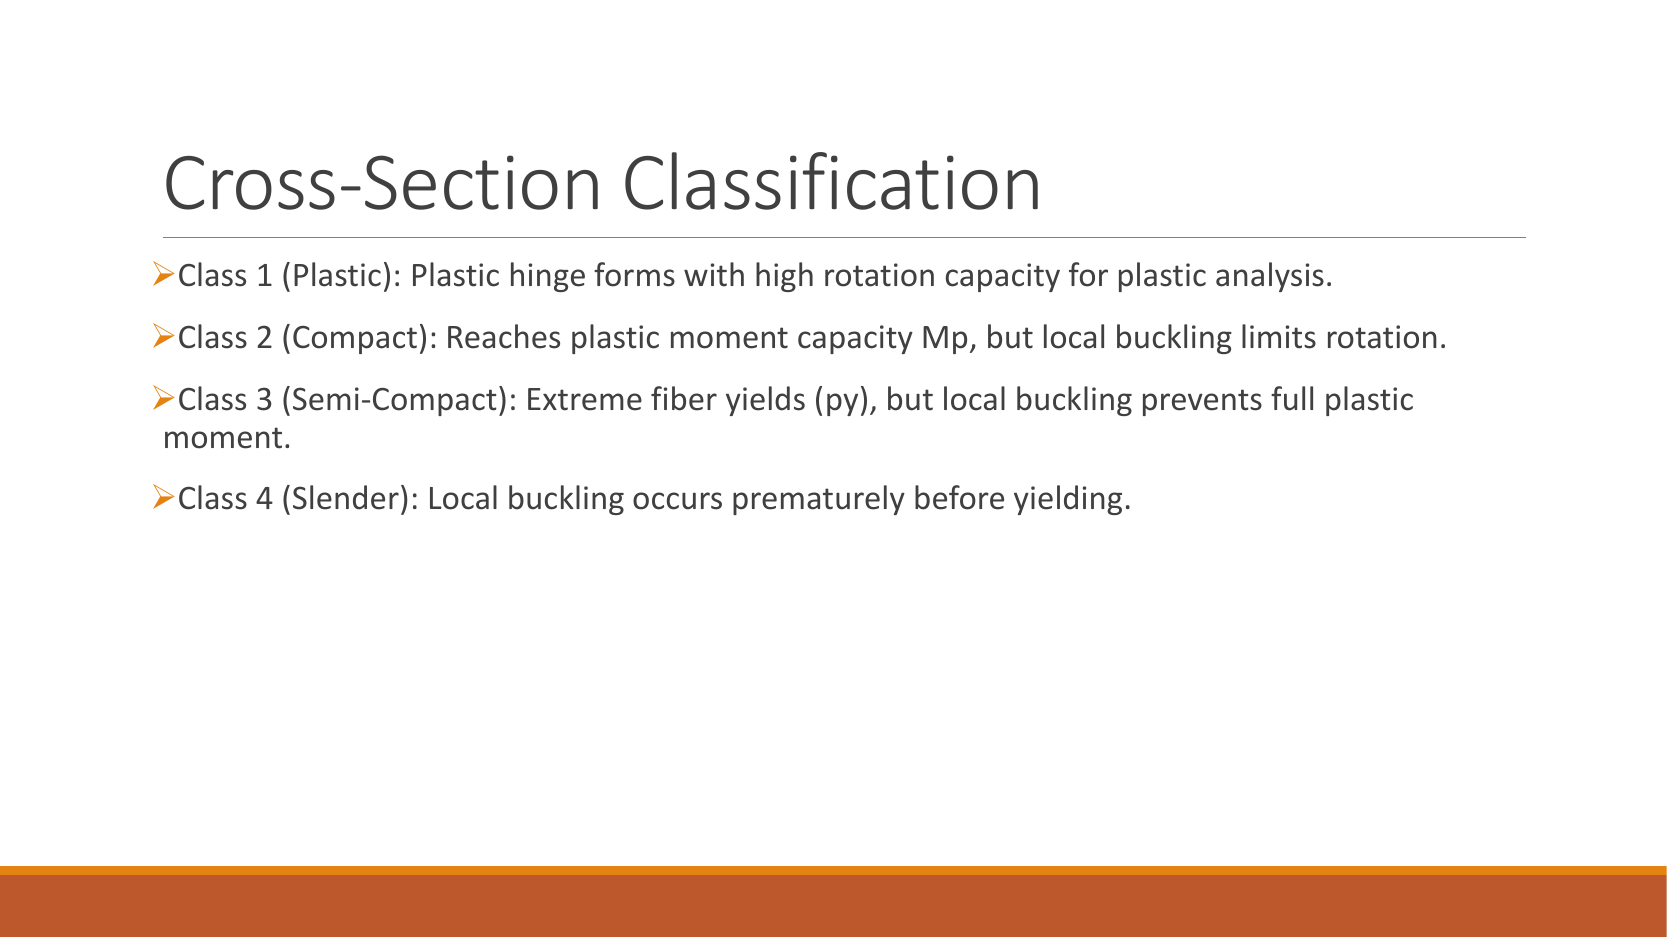
Original slide 11, Cross-Section Classification.
Class 1, Plastic: a plastic hinge has sufficient rotation capacity.
Class 2, Compact: the section can reach plastic moment , but local buckling limits rotation.
Class 3, Semi-Compact: the extreme fibre reaches , but local buckling prevents full plastic moment.
Class 4, Slender: local buckling occurs before yielding.
Do not infer dimensions from slide scale.Open full-size image
Mechanism detailsWhy thin elements buckle locally
The complete mechanism is explained below.
Read each stage together with its stated conditions; playback and interaction are not required.
- The flange outstand and web have different widths, thicknesses and edge support conditions.
- A thinner plate can wrinkle locally before the complete member loses stability.
Class 1 allows plastic rotation.
Class 2 reaches plastic resistance.
Class 3 reaches elastic resistance.
Class 4 requires effective properties.
Check every relevant compression element with the supplied limits and stress distribution.
The deformation shown is qualitative.
PPT/Structural Steelwork Design L1.pptx · slide 12: Turn discussion into a self-test
Vertical bending can trigger sideways motion
A beam has enough local bending resistance. Check whether its compression flange can move sideways and twist.
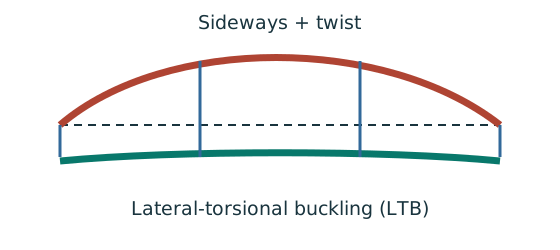
Prediction, then explanation. Adding a valid lateral restraint shortens a stability segment. It need not change the beam’s vertical reaction or moment diagram.
Identify the compressed flange and effective restraints. Calculate the specified slenderness, read buckling strength and compare resistance with the segment demand.
LE and ry use the same length unit. pb uses N/mm²; Sx uses mm³; Mb uses N·mm. mLT is dimensionless.
Scope. Use the specified section class, effective-length branch and loading condition. Load height alone does not prove a destabilizing case.
Check and takeaway. Removing a lateral restraint requires a new segment stability check. The old shorter-segment result cannot establish the longer segment’s adequacy.
Check buckling about both axes
Determine which buckling direction limits the compressed member.
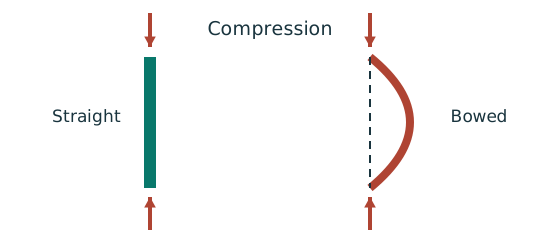
Prediction, then explanation. At fixed radius, longer effective length raises slenderness. The supplied buckling curve generally gives lower compressive strength.
Calculate slenderness about each axis. Select each axis’s curve from section type and thickness. Then obtain and compare the two compressive resistances.
Effective lengths and radii use mm. pc is compressive strength in N/mm²; Ag is gross area in mm²; Pc is in N.
Scope. Do not select the governing axis using radius alone. Effective length and buckling curve can differ. A combined column also needs interaction checks.
Check and takeaway. A short-section yield resistance is not the same as long-member buckling resistance. Keep py and pc distinct.
A bolt diameter is not a hole diameter
Check that bolts fit and leave enough material between holes and plate boundaries.
Prediction, then explanation. At fixed pitch, a larger hole leaves a shorter clear ligament. Increasing bolt diameter may also increase minimum edge-distance requirements.
Measure pitch along the bolt line and gauge across lines. Distinguish end distance along the load from edge distance across it.
lc is clear ligament between holes; p is centre-to-centre pitch; d₀ is hole diameter. All use mm.
Scope. Apply the supplied edge-preparation and minimum/maximum spacing rules. Passing a bearing calculation does not prove the layout passes.
Check and takeaway. For pitch 60 mm and hole diameter 22 mm, the ligament is 38 mm. Using a 20 mm bolt diameter here gives the wrong ligament.
Apply the reasoning to this section’s data and conditions
Three distinctions connect these lessons.
A beam can pass section bending but fail LTB.
A column has a slenderness ratio for each axis.
Bolt diameter differs from hole diameter.
Answers: instability depends on unrestrained length; radii/restraints differ by axis; holes need clearance.
The linked chapters connect each distinction to its diagram and calculation.
Study the full explanation and applications.
Original slide 12, Questions & Discussion: no calculation question or dimension is given.
The discussion topics are turned into self-checks above and are not presented as original exam questions.
Do not infer dimensions from slide scale.Open full-size image
Mechanism detailsA beam bends sideways and twists
The complete mechanism is explained below.
Read each stage together with its stated conditions; playback and interaction are not required.
- For the illustrated sagging beam the top flange is compressed.
- The unrestrained compression flange can move sideways while the complete cross-section twists.
Only effective restraints divide the member into unbraced segments.
They do not automatically add vertical supports.
Use the segment effective length, section properties and matching moment factor.
This is an exaggerated mode shape, not a calculated displacement.
PPT/Joint Connections L2.pptx · slide 1: Joint connections: purpose
Count cuts through each loaded bolt
Find how many shear planes transfer the force through one side of the connection.
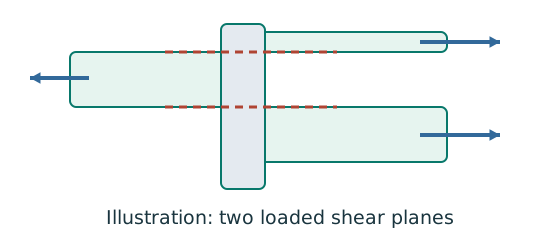
Prediction, then explanation. For equal sharing and unchanged bolt area, two active planes provide twice one plane’s shear resistance.
Select the area at the actual shear plane. Multiply by bolt shear strength. Count only the bolts and planes in the same transfer stage.
ps is bolt shear strength in N/mm²; As is the appropriate area in mm². nb counts bolts; ns counts equally loaded shear planes.
Scope. Use the thread area when threads cross the plane as required. Check bearing, plate failure and detailing separately.
Check and takeaway. Both halves of a butt splice carry the full transmitted force in sequence. Counting both halves together would double the apparent resistance.
The weld resists through its throat
Convert a visible fillet leg into resistance per effective length.
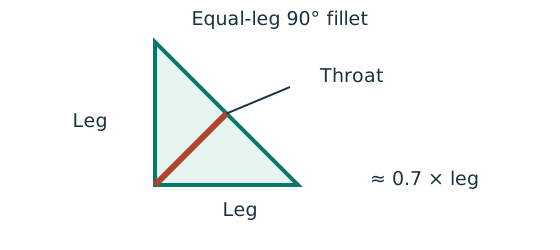
Prediction, then explanation. At fixed weld strength, doubling the leg doubles throat and line resistance in this model. Detailing limits can prevent that choice.
For the course right-angle equal-leg fillet, take throat as 0.7 times leg. Multiply throat area per unit length by weld strength.
s and a are leg and throat in mm. pw is weld strength in N/mm². qcap is resistance in kN/mm.
Scope. Use effective length, the correct steel/electrode strength and permitted leg limits. Full-penetration butt welds use a different model.
Check and takeaway. Illustration: a 6 mm leg at 250 N/mm² gives .
Apply the reasoning to this section’s data and conditions
A connection transfers forces between members.
Sketch the complete force path before calculating an individual bolt or weld.
A strong fastener cannot rescue a weak connected plate.
Study the full explanation and applications.
Original slide 1: Steelwork Design: Joint Connections; Module CON4334, Chapter 2; Bolted & Welded Connections.
Do not infer dimensions from slide scale.Open full-size image
Mechanism detailsCount the bolt shear planes
The complete mechanism is explained below.
Read each stage together with its stated conditions; playback and interaction are not required.
- Load must cross an interface between the connected plates.
- A lap joint gives one shear plane through a bolt.
A symmetric double-cover joint may provide two shear planes.
Count load-transfer interfaces, not just visible plates.
Use the source’s area and shear strength.
Then check bearing, plate resistance and detailing separately.
PPT/Joint Connections L2.pptx · slide 2: Bolts and welds
Use the same mechanism: Count cuts through each loaded bolt. For equal sharing and unchanged bolt area, two active planes provide twice one plane’s shear resistance.
An eccentric bracket pulls bolts differently
An out-of-plane moment rotates the bracket about the stated pivot. Determine the bolt tension pattern.
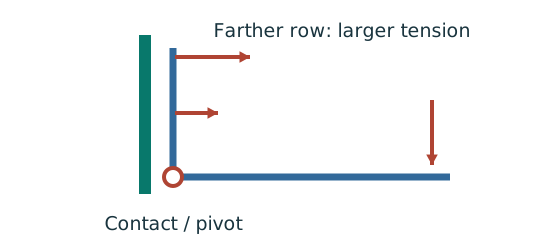
Prediction, then explanation. For unchanged geometry, doubling the applied moment doubles the modelled bolt tensions. Changing the pivot changes the distribution.
Use compatibility to relate tension to distance. Moment equilibrium then determines the proportionality factor.
M is moment in kN·mm. yi is distance from the stated pivot in mm. Ft,i is tension in kN.
Scope. Apply only to the stated active bolt set and pivot model. Flexible plates can create prying; use the supplied assumptions and resistance definitions.
Check and takeaway. A bolt’s lever arm is measured from the pivot used in the equation. It is not automatically its distance from the group centroid.
Follow contact pressure into the plate
The bolt may survive shear while the connected plate deforms or tears near the hole.
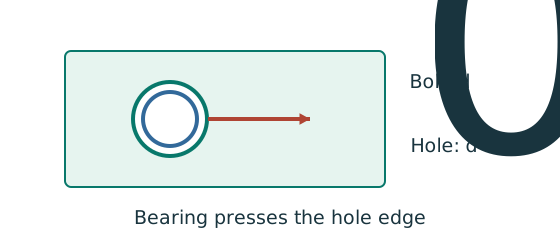
Prediction, then explanation. At fixed geometry and strength, a thicker plate raises plate resistance. Moving a hole too near the end can still govern.
Calculate every bound required by the supplied rule. The smallest applicable bound limits the connection at that layer.
pbs is the applicable bearing strength in N/mm²; d is nominal bolt diameter in mm; t is plate thickness in mm.
Scope. This diameter term alone is not the complete check. End-distance and clear-ligament limits, bolt bearing and each connected layer also matter.
Check and takeaway. Two covers and one main plate do not necessarily have the same thickness or strength. Compare the actual force share in each layer.
Apply the reasoning to this section’s data and conditions
Bolts transfer force through shear, bearing, tension, or specified friction-grip action.
Welds transfer force through fused metal along an effective throat.
This course’s ordinary-bolt equations do not establish slip resistance for a friction-grip joint.
Study the full explanation and applications.
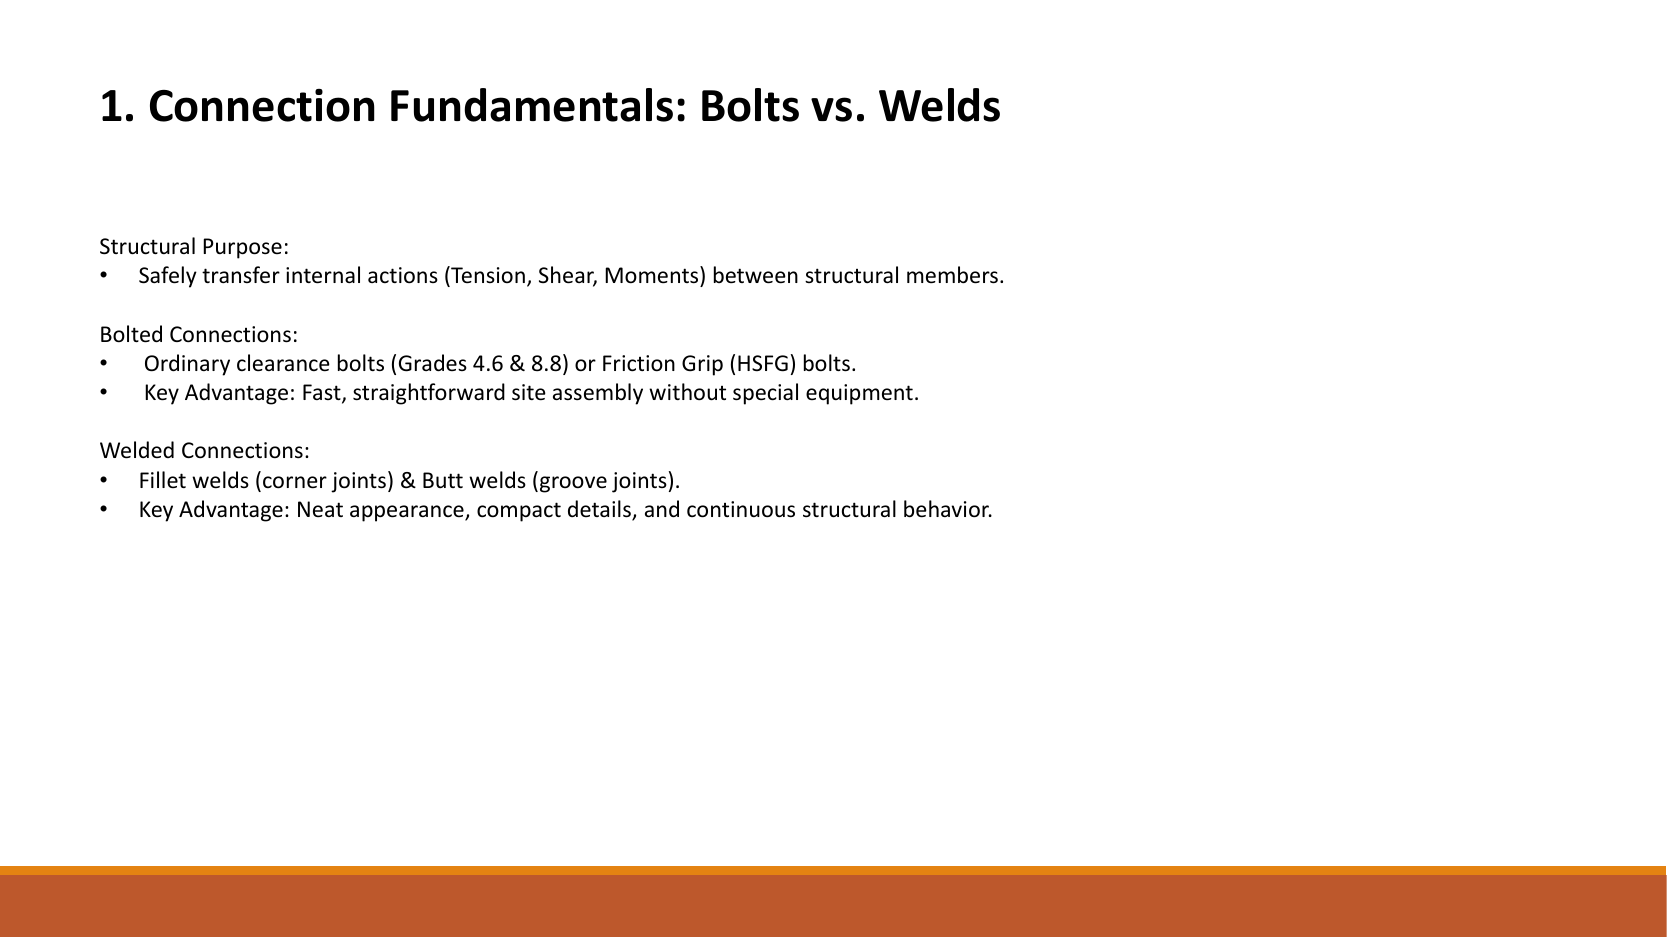
Original slide 2, connection fundamentals: bolts and welds.
Their structural purpose is to transfer tension, shear and moment safely between members.
Ordinary clearance bolts are listed as Grades 4.6/8.8; high-strength friction-grip (HSFG) bolts are also listed.
Bolts permit quick, straightforward site assembly without special equipment.
Fillet welds join corners; butt welds join prepared grooves.
Welding offers a neat appearance, compact details and structural continuity.
Do not infer dimensions from slide scale.Open full-size image
Mechanism detailsCount the bolt shear planes
The complete mechanism is explained below.
Read each stage together with its stated conditions; playback and interaction are not required.
- Load must cross an interface between the connected plates.
- A lap joint gives one shear plane through a bolt.
A symmetric double-cover joint may provide two shear planes.
Count load-transfer interfaces, not just visible plates.
Use the source’s area and shear strength.
Then check bearing, plate resistance and detailing separately.
PPT/Joint Connections L2.pptx · slide 3: Read the bolt layout
Use the same mechanism: A bolt diameter is not a hole diameter. At fixed pitch, a larger hole leaves a shorter clear ligament. Increasing bolt diameter may also increase minimum edge-distance requirements.
Apply the reasoning to this section’s data and conditions
Pitch runs along the force transfer direction; gauge separates lines; end distance is from a hole centre to the end in that direction.
Hole diameter is used in net area, nominal bolt diameter in projected bearing.
Check standard-hole clearance and minimum/maximum spacing before claiming a layout is valid.
Study the full explanation and applications.
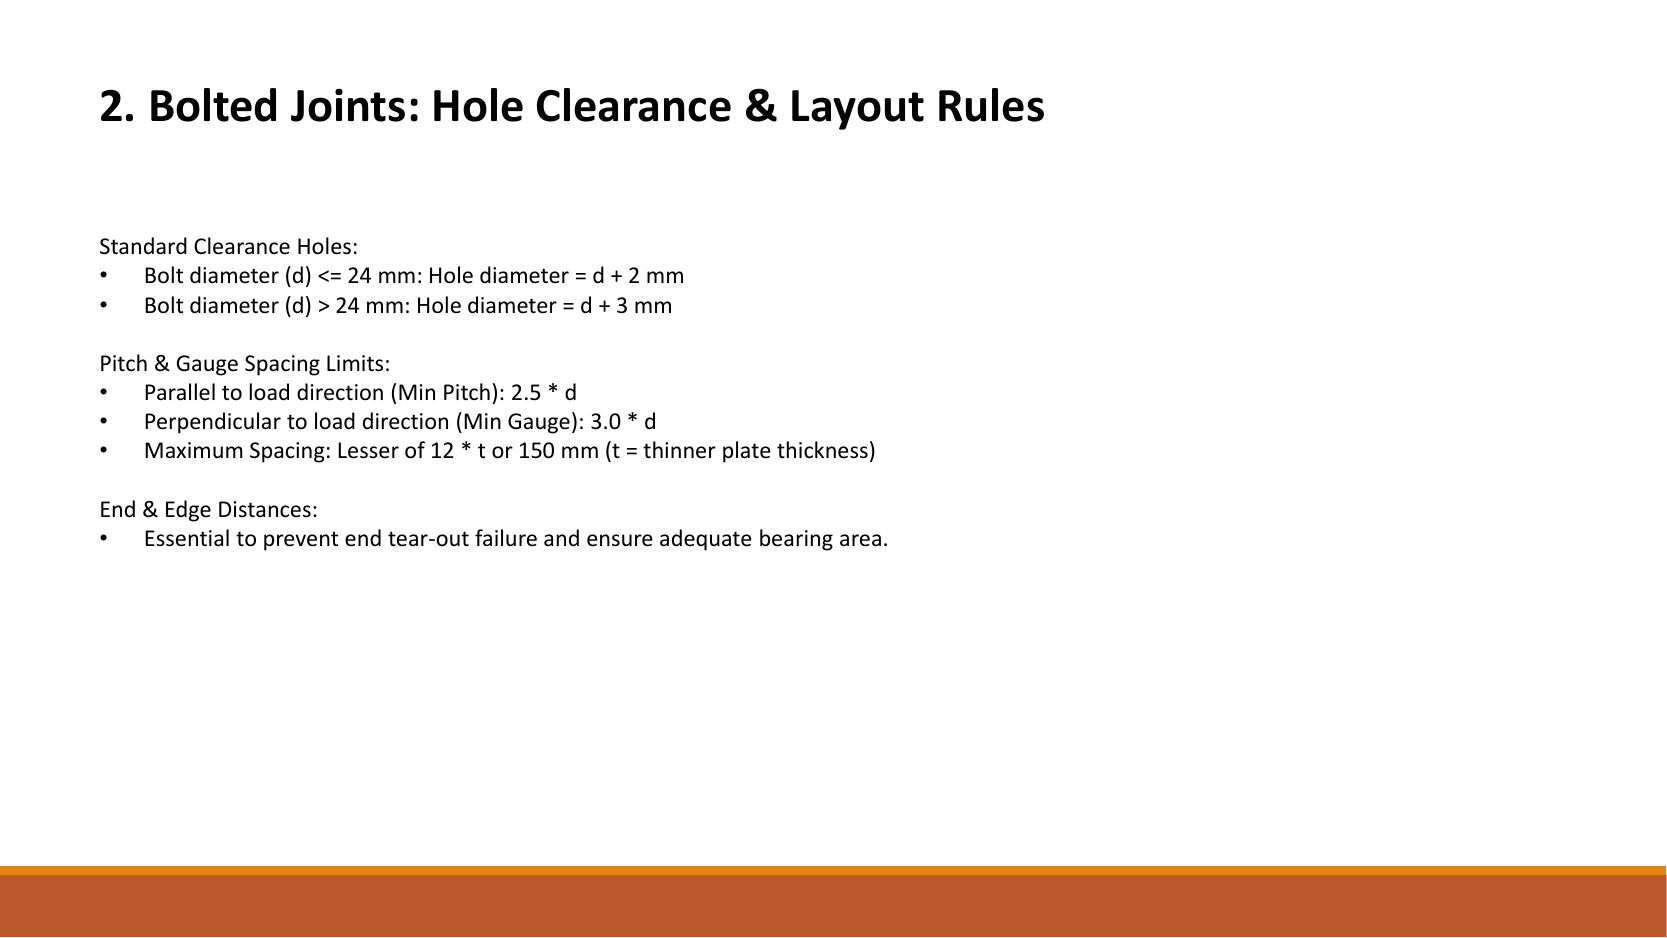
Original slide 3, hole clearance and layout rules.
Standard holes: if ,; if ,.
Minimum pitch along the load direction ; minimum transverse spacing perpendicular to the load ; maximum spacing , is the thinner plate thickness.
End and edge distances prevent end tear-out and provide sufficient bearing area.
Do not infer dimensions from slide scale.Open full-size image
Mechanism detailsBolt centres, holes and edges
The complete mechanism is explained below.
Read each stage together with its stated conditions; playback and interaction are not required.
Hole diameter d₀ differs from nominal bolt diameter d.
Net-section deductions use the specified hole.
- Pitch runs along the load direction; gauge measures spacing across rows.
End and edge distances start at the hole centre.
The remaining ligament starts at the hole boundary.
- Minimum spacing, edge distances, grip and plate thickness come from the specified rules, not this scaled illustration.
PPT/Joint Connections L2.pptx · slide 4: Five failure modes
A block leaves along two types of path
A connection can lose a block of plate without a single straight tensile fracture across the full width.
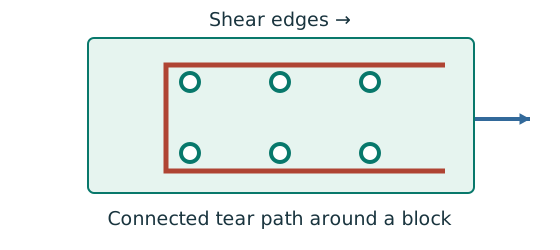
Prediction, then explanation. Changing the end distance changes the shear-path geometry. Adding plate width elsewhere may not strengthen the controlling block.
Draw the possible block first. Label shear and tension segments. Apply the course deductions and strength terms to their respective areas.
Shear and tension areas use mm². Their strength coefficients refer to different mechanisms and are not interchangeable.
Scope. Do not replace the supplied block-shear expression with the simple net-tension formula. Geometry and deductions depend on the actual path.
Check and takeaway. A complete path must release a block. A dashed line that does not enclose a removable piece is not that failure mechanism.
Use the same mechanism: An eccentric bracket pulls bolts differently. For unchanged geometry, doubling the applied moment doubles the modelled bolt tensions. Changing the pivot changes the distribution.
Use the same mechanism: Count cuts through each loaded bolt. For equal sharing and unchanged bolt area, two active planes provide twice one plane’s shear resistance.
Apply the reasoning to this section’s data and conditions
Inspect bolt shear, bolt tension where present, bearing of the bolt/connected part, tensile rupture of the net section and block shear.
For each mode draw what separates or deforms.
Capacity is the smallest applicable resistance along the force path, not the sum of unrelated failure resistances.
Study the full explanation and applications.
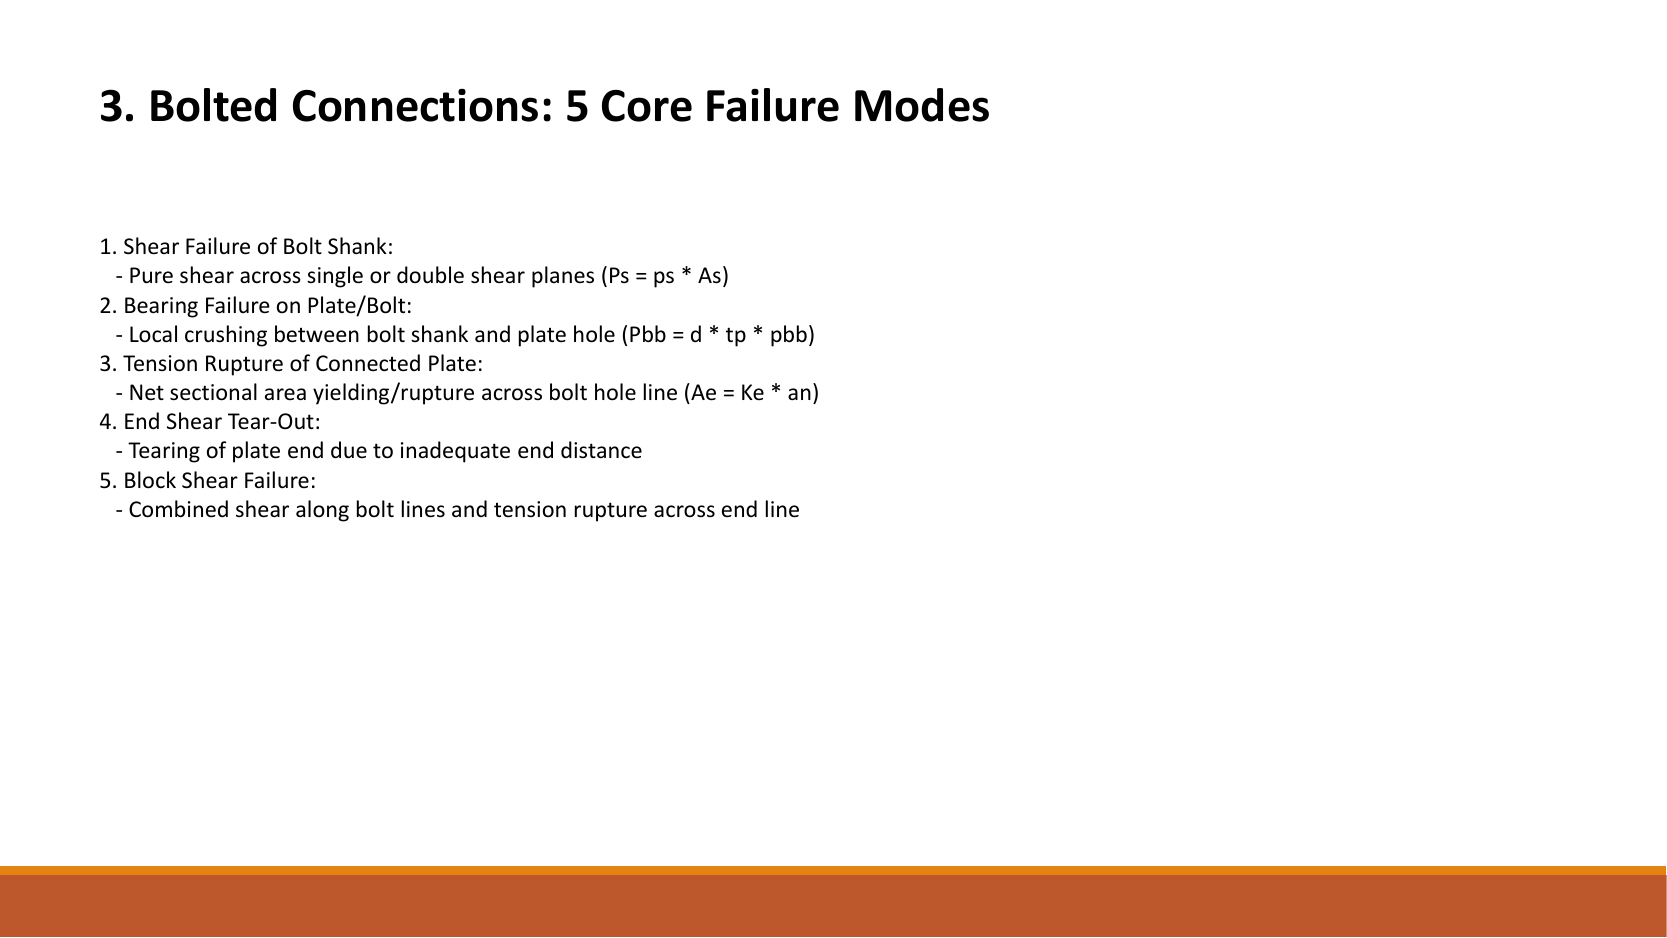
Original slide 4, five core failure modes of bolted connections. (1) Bolt-shank shear: per plane in single/double shear, ; (2) local bearing at the plate/bolt hole: the slide gives ; (3) net-section tensile rupture of the connected plate: the slide gives , still subject to rules including the gross-area cap; (4) end shear tear-out when end distance is insufficient; (5) block shear along the bolt rows with tension across the end line.
This five-mode source list uses a different grouping from the comprehensive checklist above.
Bolt tension must still be checked separately whenever tension exists.
Do not infer dimensions from slide scale.Open full-size image
Mechanism detailsSeparate the block-shear paths
The complete mechanism is explained below.
Read each stage together with its stated conditions; playback and interaction are not required.
- A block containing the connection can detach from the surrounding plate.
- The paths parallel to the applied force carry shear.
- The closing path across the end of the block carries tension.
Use the specified gross/net deductions and resistance expression.
This is different from a single straight net-section fracture.
PPT/Joint Connections L2.pptx · slide 5: Weld types and inspection
Use the same mechanism: The weld resists through its throat. At fixed weld strength, doubling the leg doubles throat and line resistance in this model. Detailing limits can prevent that choice.
Penetration changes the resisting section
Determine whether the weld develops the full joint thickness or only an effective part.
Prediction, then explanation. Keeping the same plate thickness does not make partial and full penetration equivalent.
Identify the weld preparation and effective thickness. Apply the supplied resistance and inspection requirements to that actual detail.
Penetration describes how deeply the joint is fused. A fillet leg is a different dimension.
Scope. Do not apply the fillet factor 0.7 to a butt weld merely because both are welds. Inspection and workmanship remain part of the specified requirements.
Check and takeaway. A sketch must show the effective fused region. The outside plate outline alone cannot distinguish penetration types.
Apply the reasoning to this section’s data and conditions
A fillet weld joins surfaces at an angle and is sized by leg length.
A butt weld joins prepared edges; penetration matters.
Visual inspection checks shape and visible defects; penetrant and magnetic-particle methods seek surface defects; ultrasonic and radiographic methods seek internal defects.
Strong arithmetic assumes acceptable fabrication.
Study the full explanation and applications.
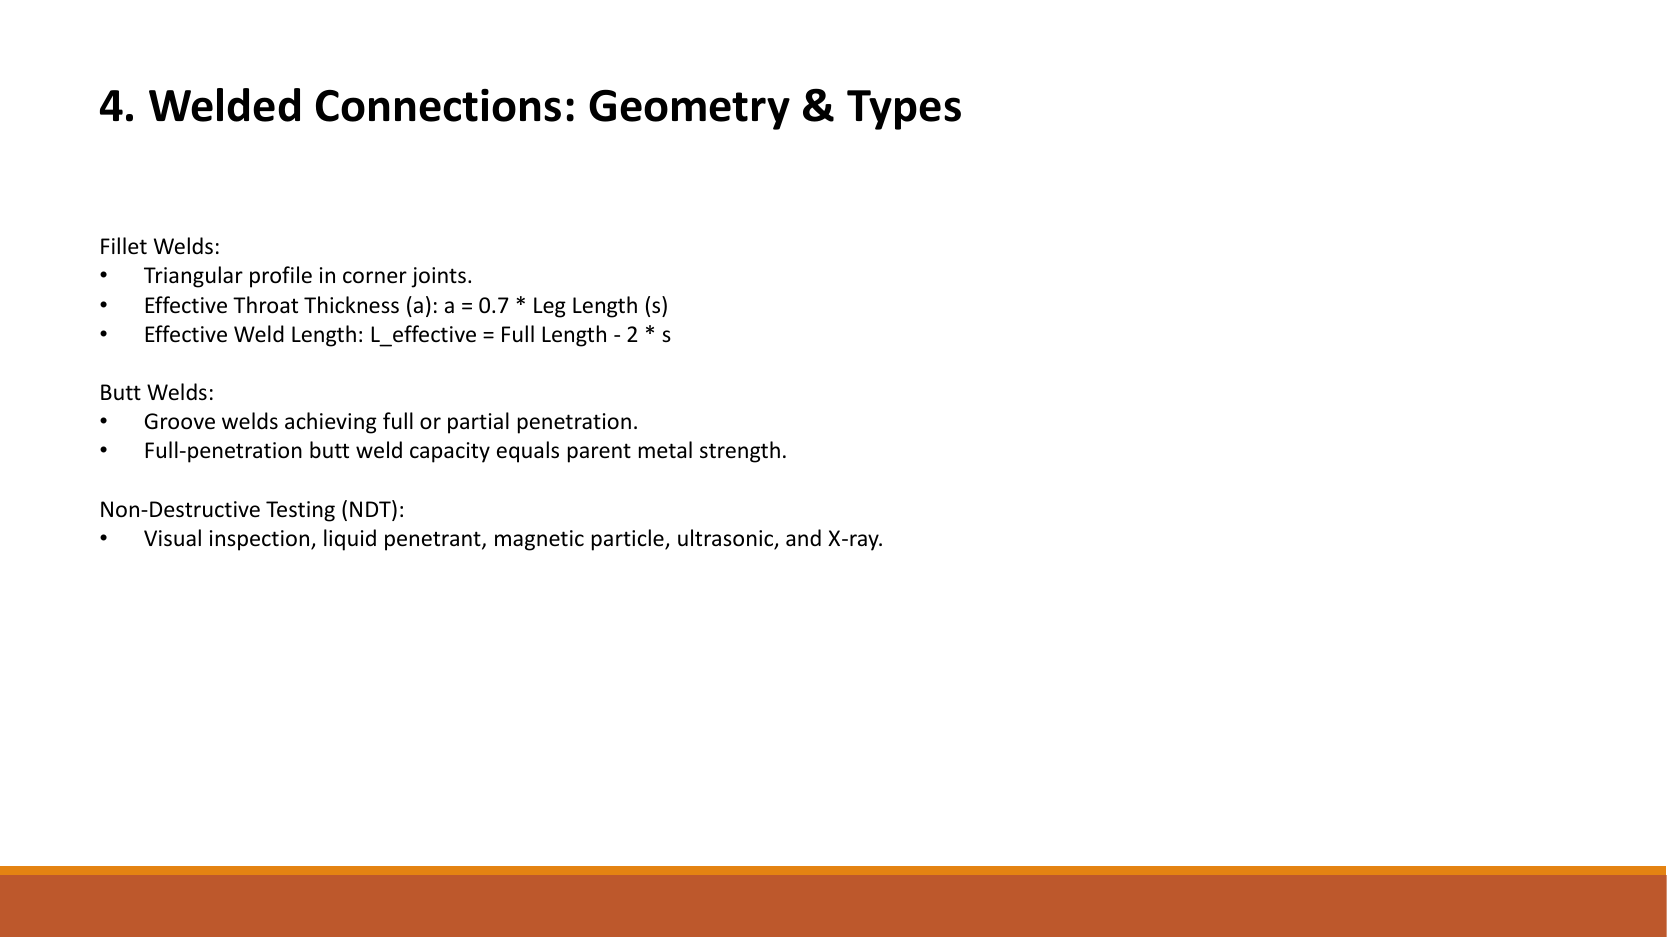
Original slide 5, weld geometry and types.
A fillet weld has a triangular section, effective throat and effective length .
Butt welds may be full- or partial-penetration.
The slide equates full-penetration resistance to parent-metal strength, subject to the course welding and inspection conditions.
NDT means non-destructive testing; listed methods include visual, penetrant, magnetic-particle, ultrasonic and X-ray inspection.
Do not infer dimensions from slide scale.Open full-size image
Mechanism detailsFrom fillet leg to effective throat
The complete mechanism is explained below.
Read each stage together with its stated conditions; playback and interaction are not required.
- An equal-leg fillet between perpendicular plates has an approximately right-triangular section.
For this geometry, throat .
It is shorter than the leg.
Effective resisting area = .
With here, capacity per length is .
- Use the course end allowances, minimum size and length rules; increasing the geometric length alone does not resolve every detailing check.
PPT/Joint Connections L2.pptx · slide 6: The unnumbered 6 mm weld calculation
Use the same mechanism: The weld resists through its throat. At fixed weld strength, doubling the leg doubles throat and line resistance in this model. Detailing limits can prevent that choice.
Change the ruler, keep the quantity
A section table uses centimetres, but the strength calculation uses millimetres. The numbers must describe the same section.
Prediction, then explanation. Would every property increase by ten? No. The exponent determines how many factors of ten are needed.
First identify the physical quantity. Next convert each length factor. Keep force and length conversions separate when converting a moment.
Here n is the length exponent: 2 for area, 3 for section modulus and 4 for second moment of area.
Scope. Changing units changes neither the load nor the section. A conversion factor cannot repair a formula for the wrong physical quantity.
Check and takeaway. Illustration: . The fourth power belongs to the unit, not the number 2.
Use the same mechanism: A table value has conditions. A different flange thickness can select a lower design strength even when the steel grade name remains unchanged.
Apply the reasoning to this section’s data and conditions
Given S355 steel and Class 42 electrode, Table 9.2a gives .
A fillet of leg has throat .
Per millimetre of effective weld, area=; resistance=.
Thus .
Required length for direct force is effective; physical straight length is before other detailing constraints.
Study the full explanation and applications.
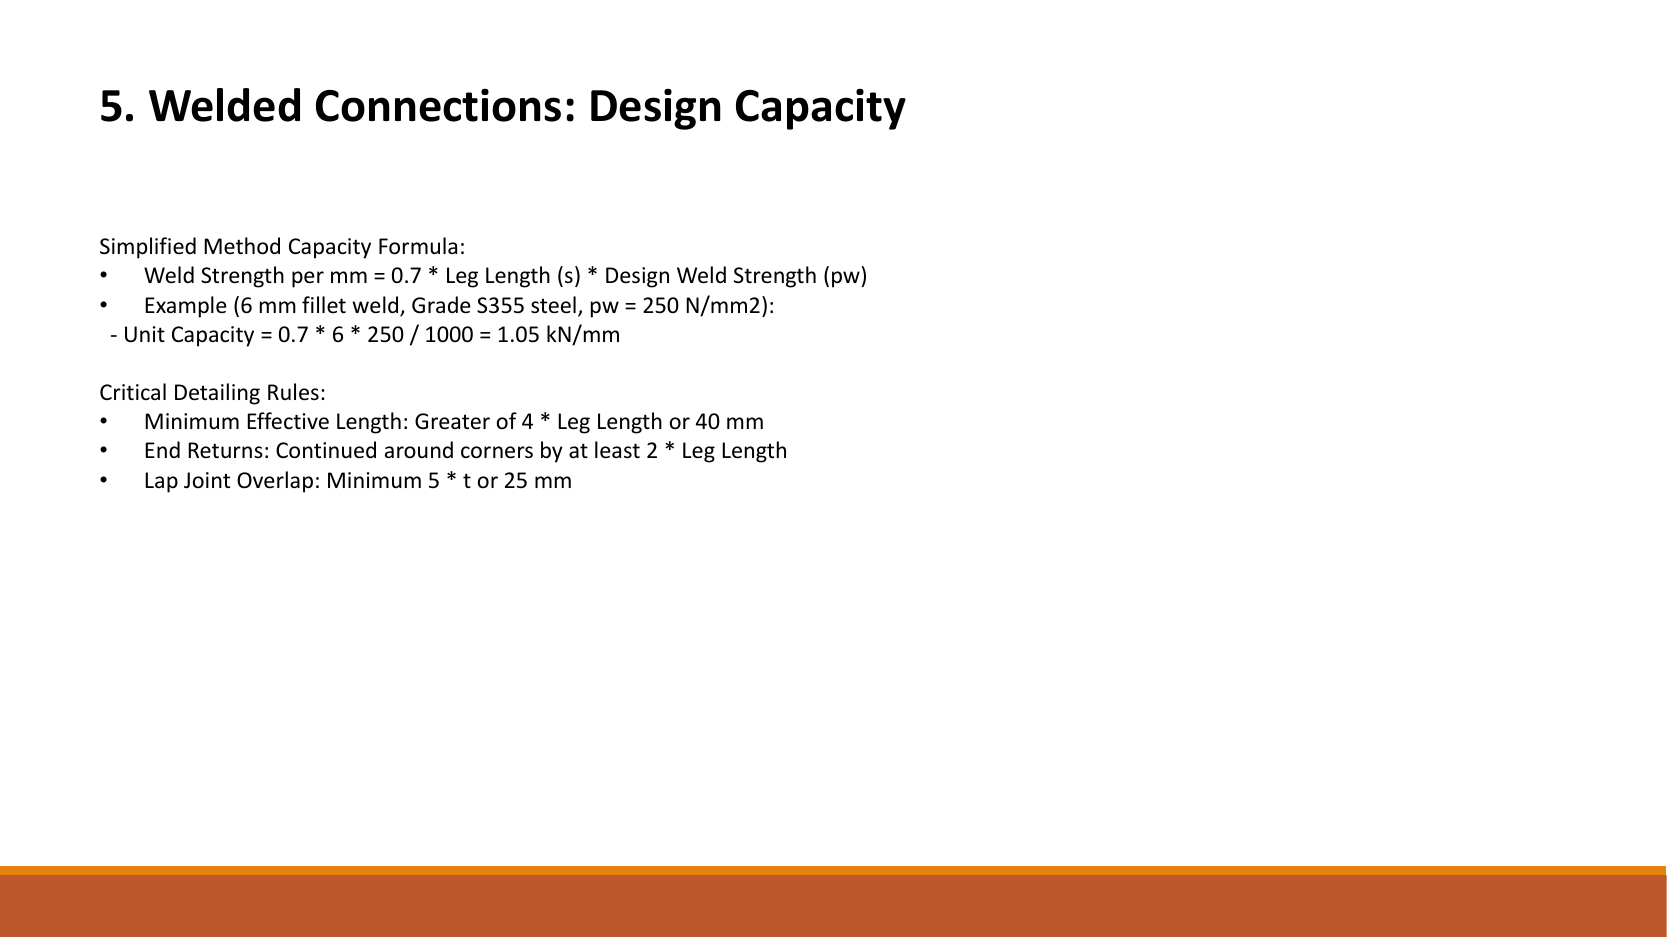
Original slide 6, weld design resistance.
In the simplified method, resistance per millimetre of weld length is .
The original unnumbered example uses a weld leg, S355, , and resistance per unit length .
Detailing rules: minimum effective weld length ; end return at least ; listed lap lengths or , taking the larger under the full course rule.
The extension calculation above is this website's teaching addition, not another load given on the slide.
Do not infer dimensions from slide scale.Open full-size image
Mechanism detailsFrom fillet leg to effective throat
The complete mechanism is explained below.
Read each stage together with its stated conditions; playback and interaction are not required.
- An equal-leg fillet between perpendicular plates has an approximately right-triangular section.
For this geometry, throat .
It is shorter than the leg.
Effective resisting area = .
With here, capacity per length is .
- Use the course end allowances, minimum size and length rules; increasing the geometric length alone does not resolve every detailing check.
PPT/Joint Connections L2.pptx · slide 7: Recognise eccentricity in three dimensions
Add force components at each bolt
An in-plane load acts away from the bolt-group centre. Find the largest resultant bolt force.
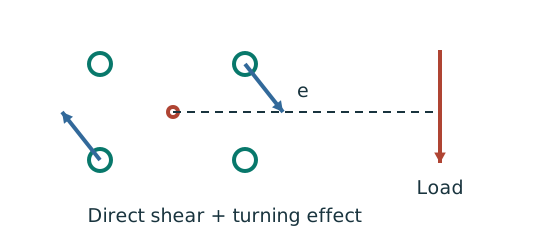
Prediction, then explanation. At fixed force, increasing eccentricity increases the moment component. Its direction differs between bolts.
Locate the bolt-group centre and coordinates. Add horizontal components together and vertical components together before finding each resultant.
e, xi and yi use mm; J uses mm². With M in kN·mm, each moment-force component is in kN.
Scope. These expressions use the stated elastic, equal-bolt in-plane model. Out-of-plane tension and prying require another model.
Check and takeaway. Do not add force magnitudes before resolving directions. Two perpendicular forces of 3 and 4 kN give 5 kN, not 7 kN.
Treat a weld group as lines
An eccentric force creates direct line force and torsional line force in the same weld group.
Prediction, then explanation. Increasing eccentricity increases the torsional contribution. The governing corner depends on vector addition, not distance alone.
Find the line centroid. Integrate squared distance along the effective lines. Add direct and torsional components at every candidate critical point.
J is line polar inertia in mm³. x and y use mm. With M in kN·mm, q is line force in kN/mm.
Scope. A solid rectangle has area inertia in mm⁴ and is not this weld-line model. Missing weld sides change the centroid and integrals.
Check and takeaway. Compare the largest resultant line force with the selected throat resistance. Keep kN/mm distinct from total force in kN.
Use the same mechanism: An eccentric bracket pulls bolts differently. For unchanged geometry, doubling the applied moment doubles the modelled bolt tensions. Changing the pivot changes the distribution.
Apply the reasoning to this section’s data and conditions
An in-plane force rotates the bolt/weld group about its centroid and gives direct plus torsional shear.
An out-of-plane bracket load opens the joint and creates fastener tension.
For bolts, check individual shear and tension and ; .
The interaction limit is , not .
Study the full explanation and applications.
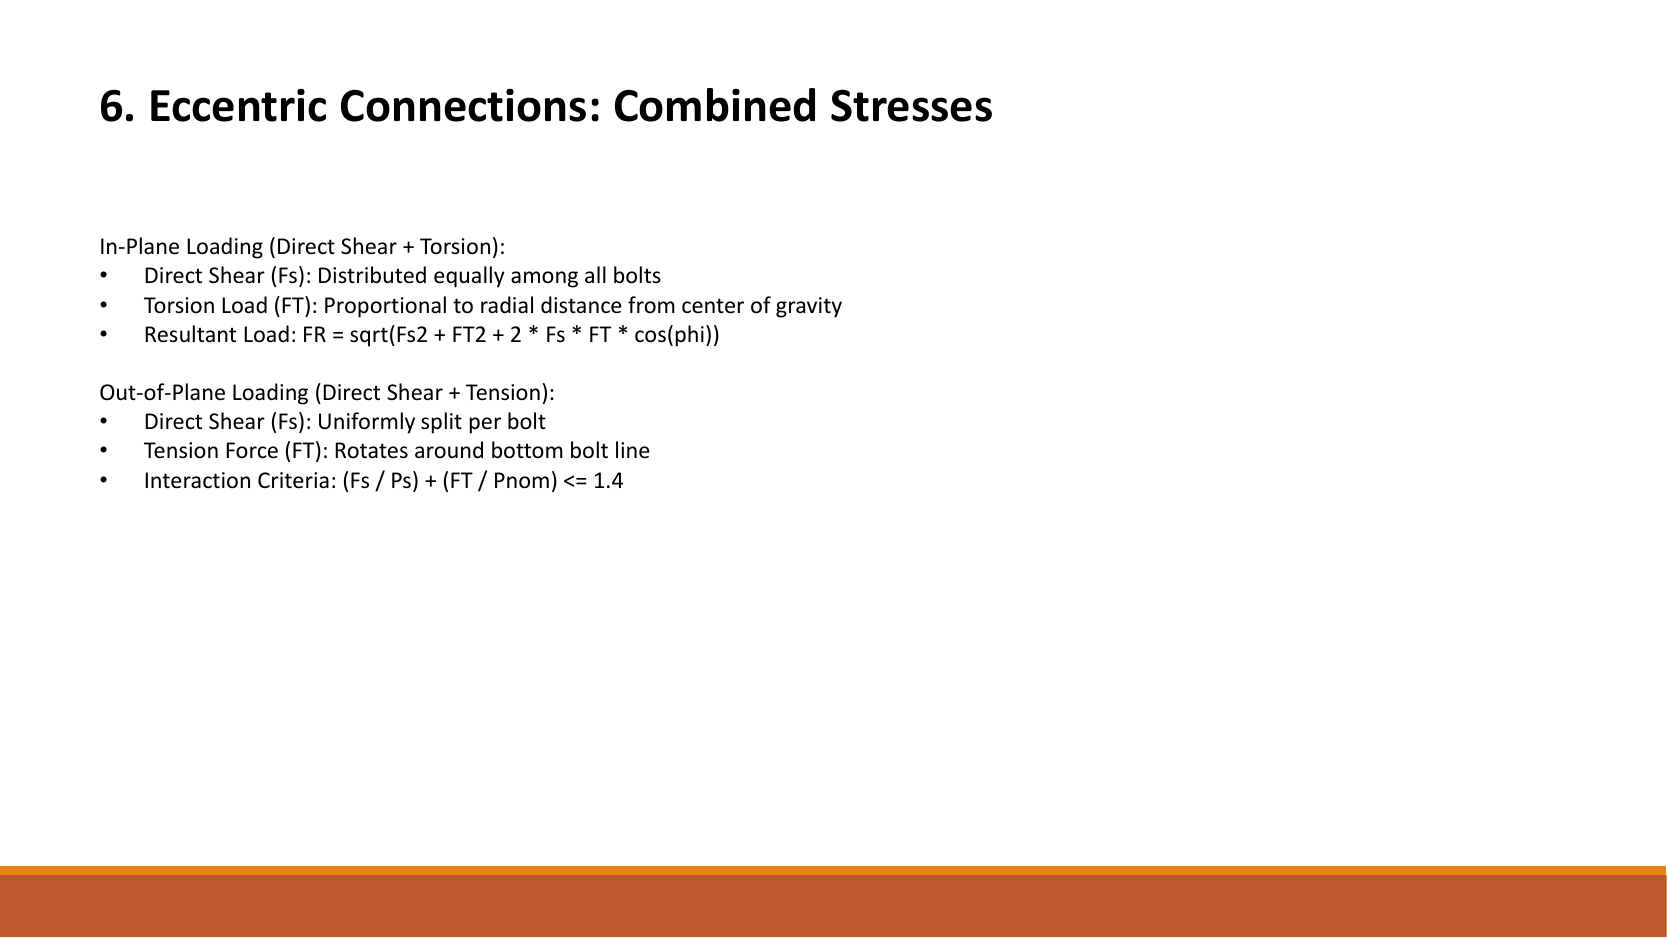
Original slide 7, combined stresses in eccentric connections.
Upper half, in-plane: direct shear is shared equally; torsional force is proportional to radius from the centroid; resultant , is the angle between the two forces, written as “phi” in the source.
Lower half, out-of-plane: direct shear is shared equally; tension uses the rotation model about the lowest bolt row.
The source still uses upper-case for tension and gives the interaction expression .
The two uses of have different physical meanings and cannot be interchanged.
The explanation above writes tension as .
The distinction is made explicit here.
Do not infer dimensions from slide scale.Open full-size image
Mechanism detailsAdd direct and torsional bolt forces
The complete mechanism is explained below.
Read each stage together with its stated conditions; playback and interaction are not required.
- Assign signed coordinates to the bolts relative to the group centroid.
- For the equal-bolt elastic model, the direct force is per bolt.
Moment magnitude is .
Its sign follows the load direction.
For signed M: , , .
Add signed x and y components at each bolt, then take the resultant.
The longest arrow shows the critical bolt in this illustration.
PPT/Joint Connections L2.pptx · slide 8: A reusable connection workflow
Use the same mechanism: Keep load categories separate. Increasing imposed load changes its own term. It does not change the dead-load factor or the steel stiffness.
Use the same mechanism: Count cuts through each loaded bolt. For equal sharing and unchanged bolt area, two active planes provide twice one plane’s shear resistance.
Use the same mechanism: An eccentric bracket pulls bolts differently. For unchanged geometry, doubling the applied moment doubles the modelled bolt tensions. Changing the pivot changes the distribution.
Apply the reasoning to this section’s data and conditions
Resolve factored actions; classify force direction; label geometry.
Calculate individual fastener demand.
Calculate all applicable fastener and plate resistances.
Check layout; state the governing result and assumptions.
The linked worked example explains this sequence.
The corresponding tutorial shows the complete application and answer.
Study the full explanation and applications.
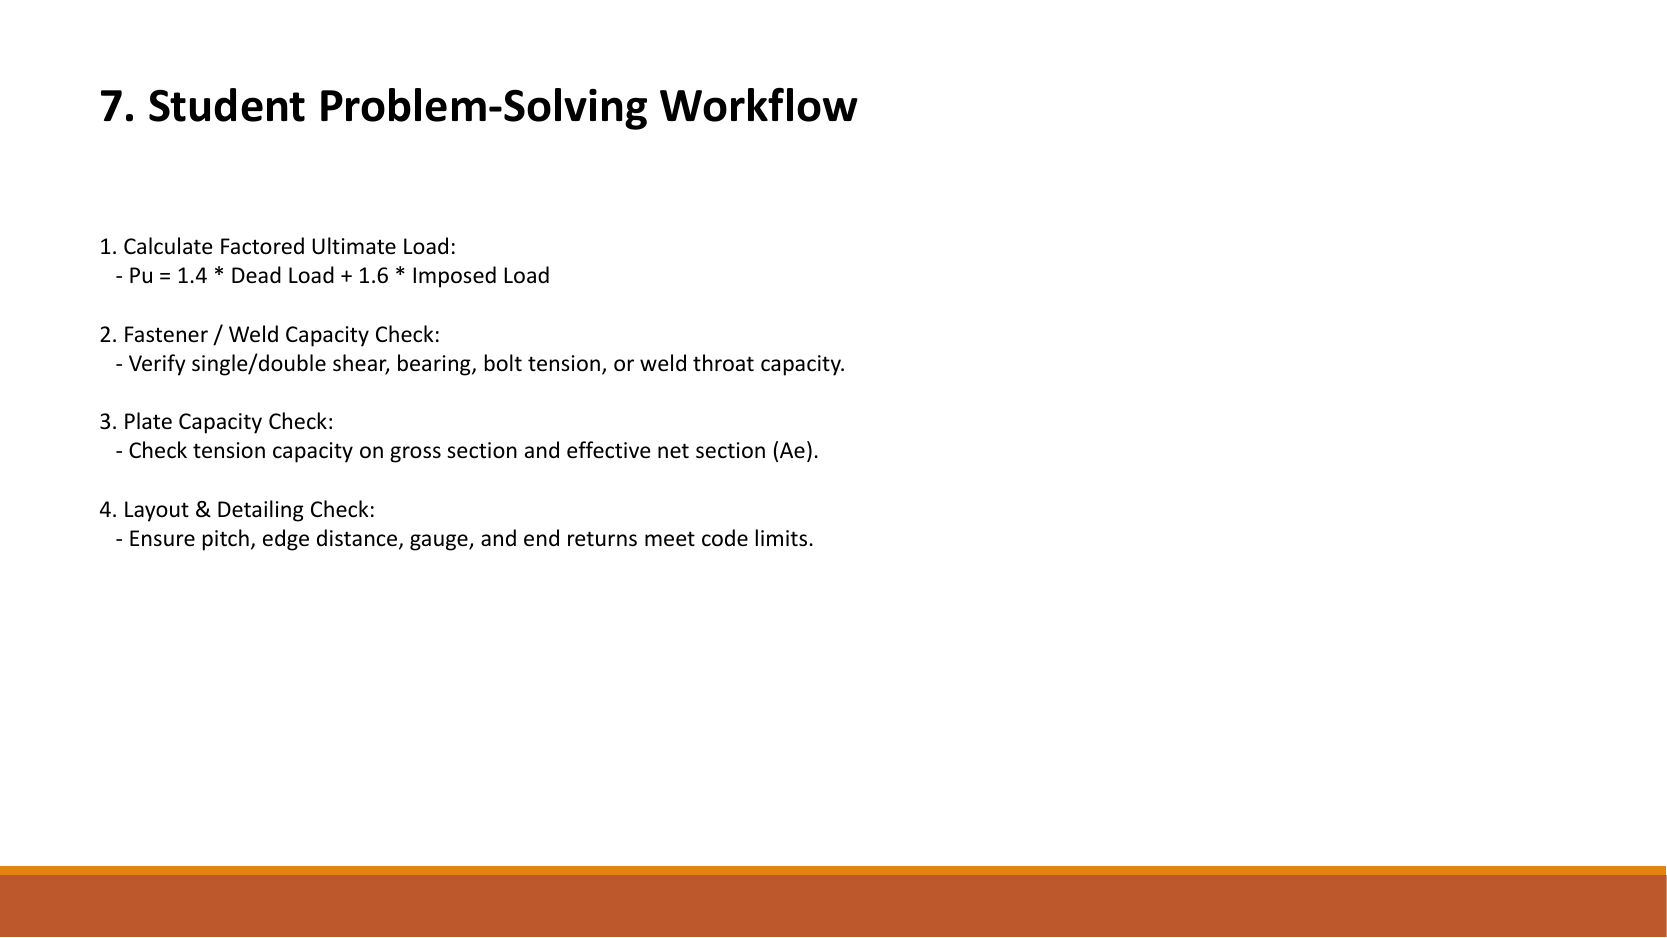
Original slide 8, student solution procedure.
Step 1: calculate .
Step 2: check single/double shear, bearing, bolt tension or weld-throat resistance.
Step 3: check plate tension using gross and effective net areas .
Step 4: check code requirements for pitch, edge distance, transverse spacing and weld end returns.
Do not infer dimensions from slide scale.Open full-size image
Mechanism detailsFollow the calculation sequence
The complete mechanism is explained below.
Read each stage together with its stated conditions; playback and interaction are not required.
- Locate the load, supports, connection geometry and any stated assumptions.
- Keep given values, table lookups and calculated values distinct; reconcile their units.
- The calculation player steps through the existing expressions in their original order.
Compare demand with resistance or the relevant limit.
Keep missing inputs and conditional conclusions explicit.
PPT/Steel Beam Design L3.pptx · slide 1: Beam design
Balance the isolated beam
Find the two vertical reactions before calculating internal shear or moment.
Prediction, then explanation. Move the same load toward B. Reaction B increases because the load has a larger moment arm about A.
Take moments about A. Reaction A has zero lever arm there. Then use vertical force balance to find reaction A.
P, RA and RB are forces in kN. L is support spacing and a is load position, both in m.
Scope. These expressions describe one point load on a simply supported beam. Add other loads through equilibrium; keep their actual positions.
Check and takeaway. Illustration: P = 60 kN, L = 6 m and a = 2 m give RB = 20 kN and RA = 40 kN.
Internal tension and compression resist moment
Find which section resistance applies before comparing it with the moment demand.
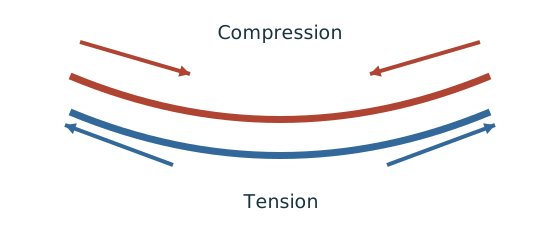
Prediction, then explanation. A larger appropriate section modulus raises resistance at fixed strength. Local plate buckling can restrict the usable modulus.
Classify the section first. At low shear, use the elastic expression for Class 3 or the prescribed capped plastic expression for Classes 1 and 2.
py uses N/mm². S is plastic modulus and Z is elastic modulus, both in mm³. Mc then uses N·mm.
Scope. This is section resistance, not whole-member LTB resistance. High shear and Class 4 require their appropriate treatment.
Check and takeaway. Selecting the larger of the two capped terms defeats the cap. Use their minimum.
The web carries the shear check
Compare the applied shear with the resistance of the prescribed shear area.
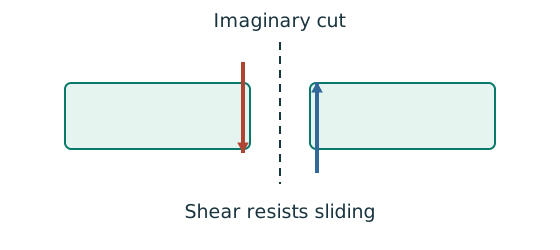
Prediction, then explanation. At fixed design strength and depth, increasing web thickness increases this shear resistance.
Calculate the prescribed shear area. Multiply by the design shear stress from the course rule. Then compare matching force units.
D is overall depth; t is web thickness, in mm. Av uses mm². py uses N/mm², giving Vc in N.
Scope. Apply this area definition to the stated rolled section. Check web slenderness separately. The factor 0.6 is the low-shear threshold, not this resistance coefficient.
Check and takeaway. A shear pass alone does not prove bending, deflection or local support-web adequacy.
Apply the reasoning to this section’s data and conditions
A beam mainly resists transverse load by bending and shear.
Its vertical supports and sideways restraints serve different purposes: a lateral restraint need not be a vertical support.
Study the full explanation and applications.
Original slide 1: Steel Beam Design, Chapter 3.
Do not infer dimensions from slide scale.Open full-size image
Mechanism detailsBalance reactions and moments
The complete mechanism is explained below.
Read each stage together with its stated conditions; playback and interaction are not required.
This demonstrator is a simply supported 6 m beam with a 60 kN point load.
It is not the page’s original loading diagram.
.
Moving the load towards B increases .
.
The two upward reactions must sum to P.
With the load at midspan, .
End couples, UDLs and overhangs require their own equilibrium terms.
PPT/Steel Beam Design L3.pptx · slide 2: Beam learning objectives
Use the same mechanism: Keep load categories separate. Increasing imposed load changes its own term. It does not change the dead-load factor or the steel stiffness.
Use the same mechanism: Balance the isolated beam. Move the same load toward B. Reaction B increases because the load has a larger moment arm about A.
A cut reveals the internal actions
Find where the beam moment is largest. A large load arrow alone does not locate that point.
Prediction, then explanation. Under a uniform downward load, shear falls steadily. Moment reaches a stationary value where shear becomes zero.
Balance the forces on the cut piece to get V. Balance their moments about the cut to get M. Evaluate each load region separately.
x and L use m; w uses kN/m; V uses kN; M uses kN·m. These lines apply before any point load.
Scope. A point load adds a shear jump. A concentrated couple adds a moment jump. Check load points, supports and overhang roots too.
Check and takeaway. A UDL gives a sloping shear line and a curved moment line. A flat moment diagram therefore cannot represent a loaded UDL region.
Apply the reasoning to this section’s data and conditions
A complete beam answer progresses through load analysis, section classification, shear, bending, local web checks where required, LTB where unrestrained, and deflection.
Section selection is iterative because a heavier trial section also changes self-weight.
Study the full explanation and applications.
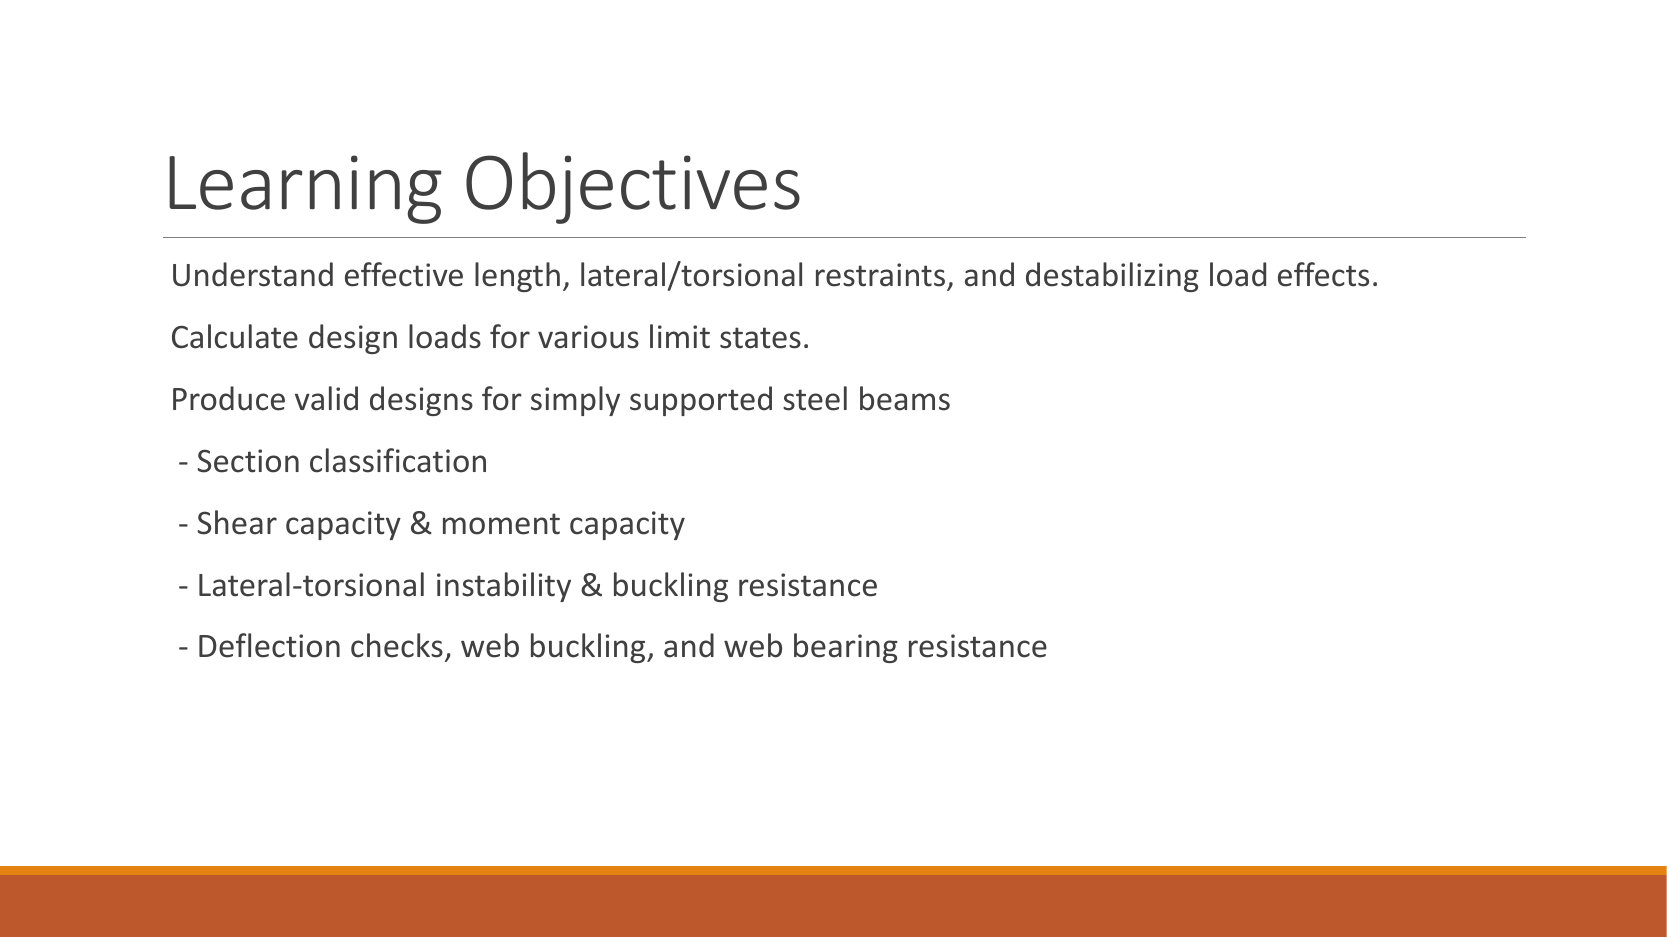
Original slide 2, Learning Objectives: understand effective length, lateral/torsional restraint and destabilizing loads.
Calculate loads; and check simply supported beams under the Hong Kong steel code for classification, shear, bending, LTB, deflection, web bearing and web buckling.
Do not infer dimensions from slide scale.Open full-size image
Mechanism detailsFollow the calculation sequence
The complete mechanism is explained below.
Read each stage together with its stated conditions; playback and interaction are not required.
- Locate the load, supports, connection geometry and any stated assumptions.
- Keep given values, table lookups and calculated values distinct; reconcile their units.
- The calculation player steps through the existing expressions in their original order.
Compare demand with resistance or the relevant limit.
Keep missing inputs and conditional conclusions explicit.
PPT/Steel Beam Design L3.pptx · slide 3: Compression flange restraint
Use the same mechanism: Vertical bending can trigger sideways motion. Adding a valid lateral restraint shortens a stability segment. It need not change the beam’s vertical reaction or moment diagram.
Use the same mechanism: Internal tension and compression resist moment. A larger appropriate section modulus raises resistance at fixed strength. Local plate buckling can restrict the usable modulus.
Apply the reasoning to this section’s data and conditions
The flange in compression can move sideways and twist the beam.
The slide’s restraint-force rule is a strength requirement for the restraint system, not evidence that any slab is automatically an effective restraint.
Confirm which flange is in compression and whether the attachment prevents lateral movement/twist.
Study the full explanation and applications.
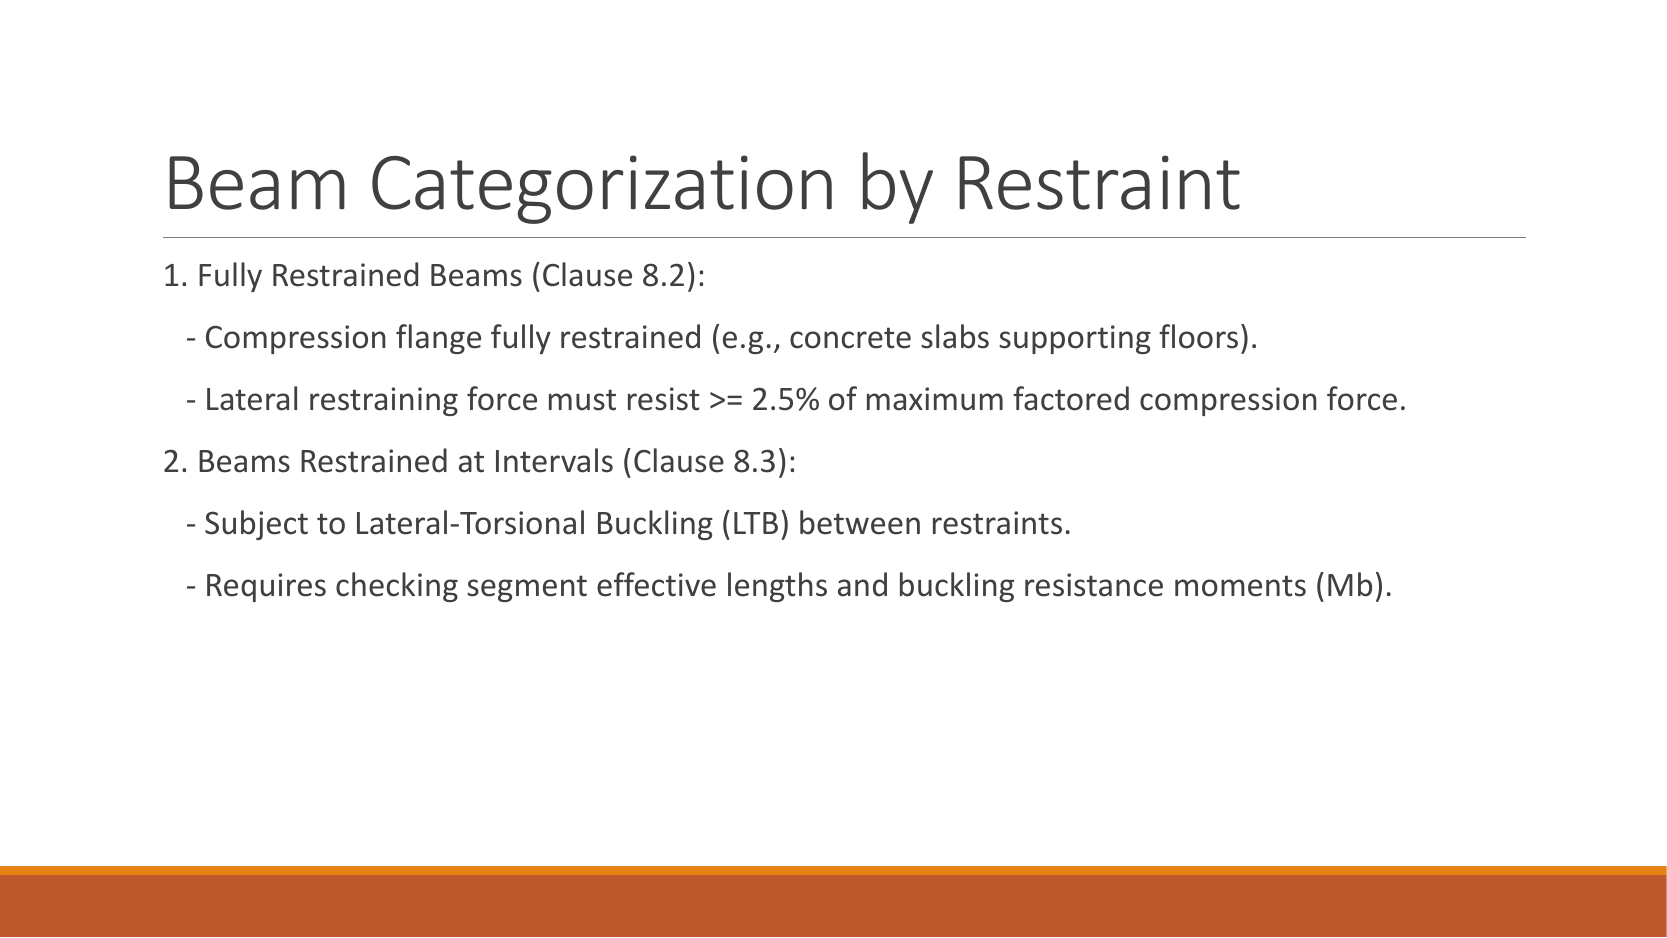
Original slide 3: full lateral restraint follows clause 8.2.
The compression flange is restrained over its entire length, and the restraint system must resist at least the following fraction of the maximum design compressive force: .
Partial restraint provides restraint only at selected positions.
Under clause 8.3, check each segment for LTB, effective length and moment resistance above.
Do not infer dimensions from slide scale.Open full-size image
Mechanism detailsA beam bends sideways and twists
The complete mechanism is explained below.
Read each stage together with its stated conditions; playback and interaction are not required.
- For the illustrated sagging beam the top flange is compressed.
- The unrestrained compression flange can move sideways while the complete cross-section twists.
Only effective restraints divide the member into unbraced segments.
They do not automatically add vertical supports.
Use the segment effective length, section properties and matching moment factor.
This is an exaggerated mode shape, not a calculated displacement.
PPT/Steel Beam Design L3.pptx · slide 4: Classify the beam
Use the same mechanism: Find which plate buckles first. At fixed width, a thinner plate has a larger width-to-thickness ratio. Local buckling then becomes more restrictive.
Apply the reasoning to this section’s data and conditions
Under major-axis bending the flanges and web have different stress distributions.
Use the flange outstand and web from the section table, compare with the correct multiples of , and select the worse class.
Do not substitute overall depth for clear web depth .
Study the full explanation and applications.
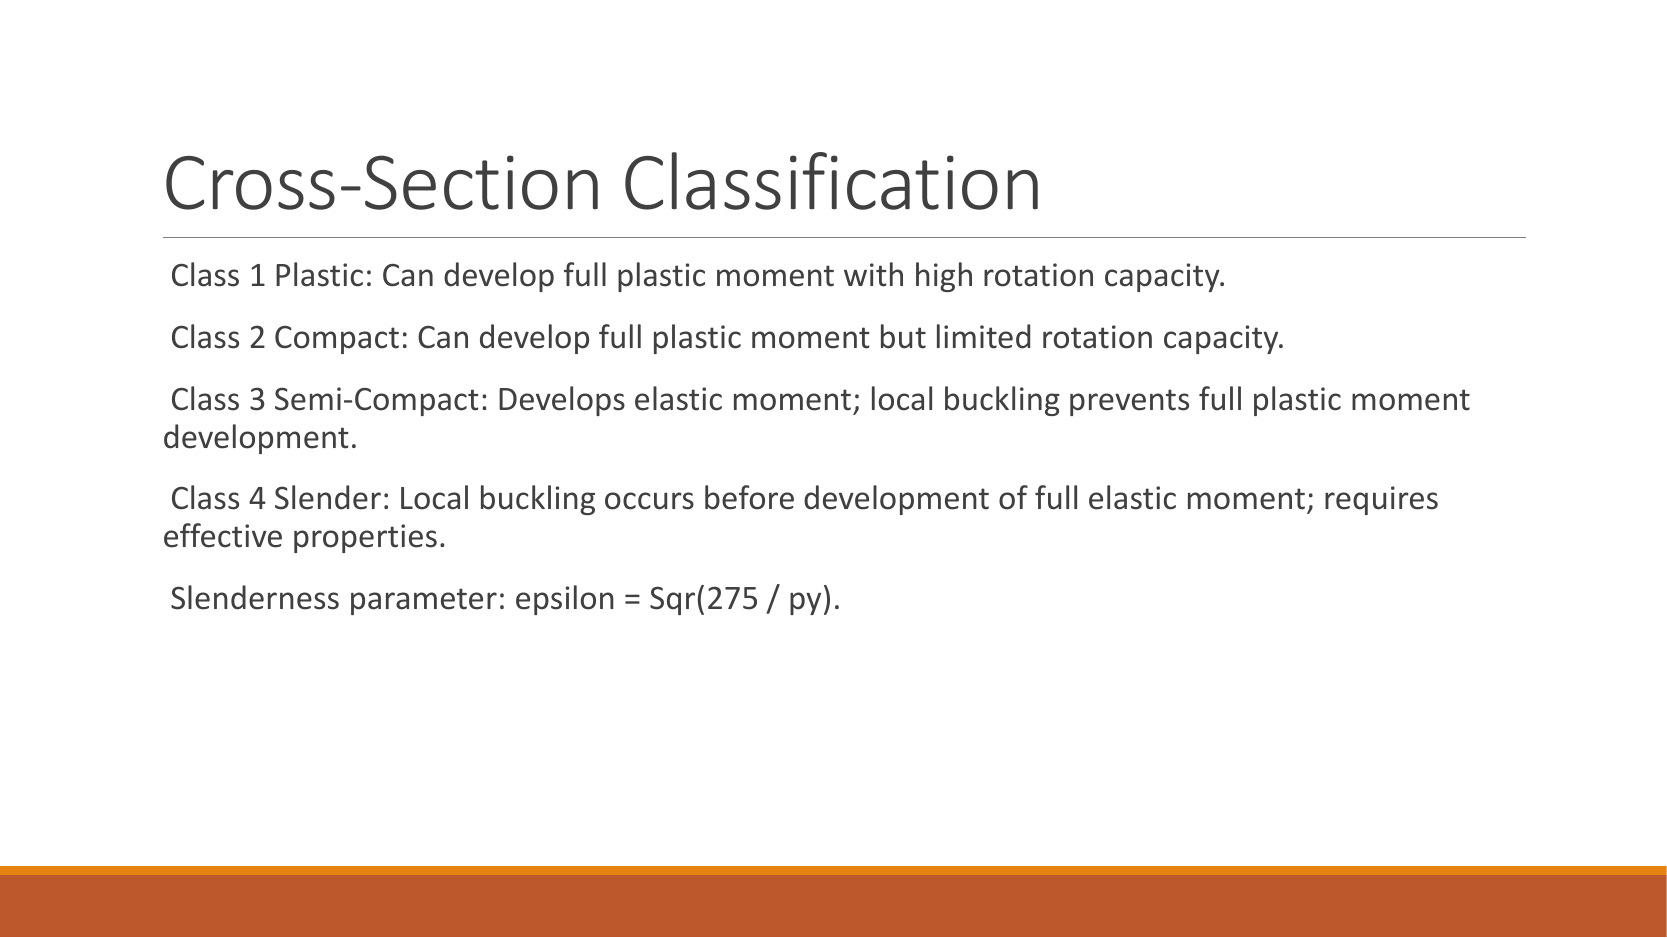
Original slide 4: section classification depends on width/thickness ratios and steel strength.
Class 1, plastic, can form a plastic hinge with adequate rotation.
Class 2, compact, can reach plastic moment resistance with limited rotation.
Class 3, semi-compact, can yield at the extreme fibre, but local buckling prevents full plastic moment resistance.
Class 4, slender, buckles locally before yielding and requires an effective section.
In the source expression , is measured in is substituted.
Do not infer dimensions from slide scale.Open full-size image
Mechanism detailsWhy thin elements buckle locally
The complete mechanism is explained below.
Read each stage together with its stated conditions; playback and interaction are not required.
- The flange outstand and web have different widths, thicknesses and edge support conditions.
- A thinner plate can wrinkle locally before the complete member loses stability.
Class 1 allows plastic rotation.
Class 2 reaches plastic resistance.
Class 3 reaches elastic resistance.
Class 4 requires effective properties.
Check every relevant compression element with the supplied limits and stress distribution.
The deformation shown is qualitative.
PPT/Steel Beam Design L3.pptx · slide 5: Shear resistance
Use the same mechanism: The web carries the shear check. At fixed design strength and depth, increasing web thickness increases this shear resistance.
Shear and bending share the web
Decide whether the unreduced bending resistance remains applicable at the section being checked.
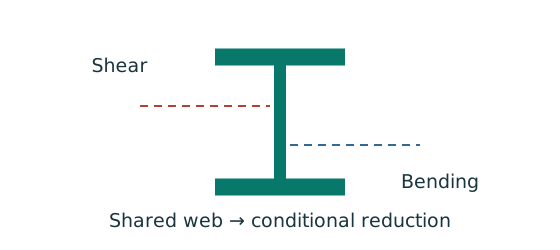
Prediction, then explanation. Raising shear beyond the specified threshold can reduce available bending resistance. A distant maximum shear is not the coexistent shear.
Find the moment-check position. Evaluate the shear there. Compare it with the low-shear threshold before selecting the resistance expression.
V is shear at the checked section; Vc is its shear resistance. Both use the same force unit.
Scope. Above the threshold, use the supplied reduction expression. The threshold itself is not a substitute resistance formula.
Check and takeaway. If the maximum shear anywhere is below the threshold, all sections satisfy that low-shear condition. Otherwise check the actual positions.
Apply the reasoning to this section’s data and conditions
For a rolled I, H or channel under the course major-axis shear model, .
Then .
Convert to only after multiplying stress by area.
If the low-shear bending rule applies; passing alone does not establish low shear.
Study the full explanation and applications.
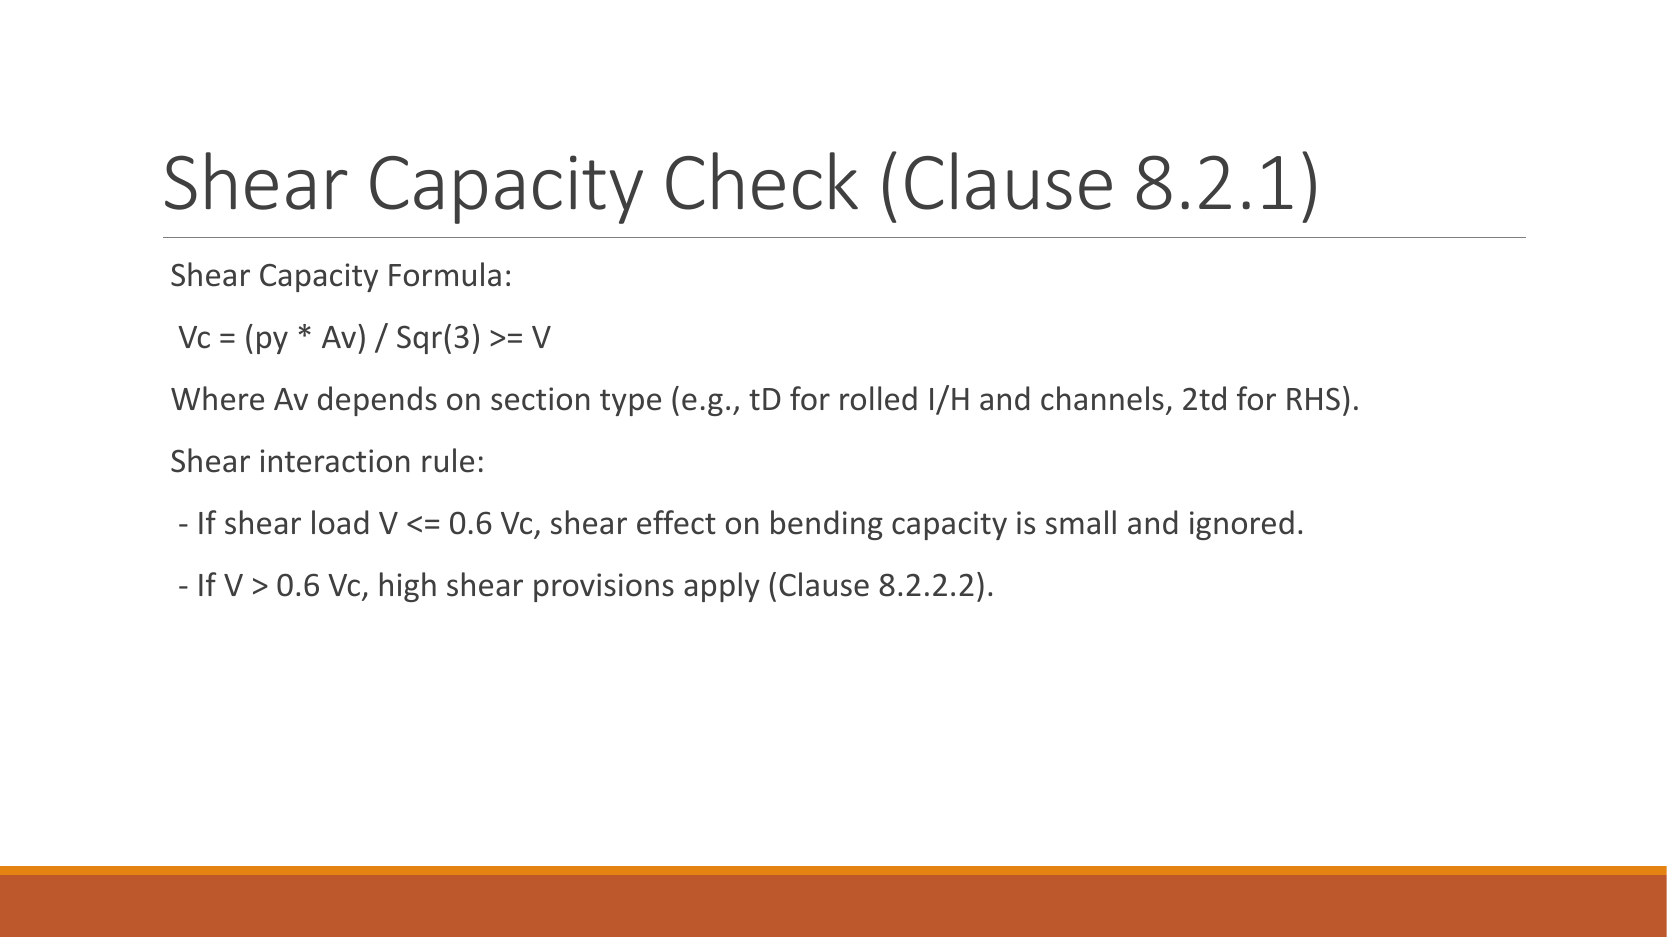
Original slide 5, clause 8.2.1: shear resistance .
Hot-rolled I/H/channel sections use .
The slide gives the following for RHS: .
Low shear means ; high shear means and requires reduced moment resistance under clause 8.2.2.2.
Do not infer dimensions from slide scale.Open full-size image
Mechanism detailsSee shear in the web
The complete mechanism is explained below.
Read each stage together with its stated conditions; playback and interaction are not required.
- Internal shear keeps the two sides of the cut in vertical equilibrium.
For the course’s common I-section case, the web provides the principal shear area.
Use the specified definition.
- A slender web may require a different shear-buckling route before a simple shear-resistance formula is used.
Use where applicable in the course.
Convert N to kN before comparing with design shear.
PPT/Steel Beam Design L3.pptx · slide 6: Low and high shear bending
Use the same mechanism: Internal tension and compression resist moment. A larger appropriate section modulus raises resistance at fixed strength. Local plate buckling can restrict the usable modulus.
Use the same mechanism: Shear and bending share the web. Raising shear beyond the specified threshold can reduce available bending resistance. A distant maximum shear is not the coexistent shear.
Use the same mechanism: Find which plate buckles first. At fixed width, a thinner plate has a larger width-to-thickness ratio. Local buckling then becomes more restrictive.
Apply the reasoning to this section’s data and conditions
For Class 1/2 at low shear, .
Above , reduce bending resistance using the course high-shear formula, with .
At , .
Use the relevant shear-area term from the full formula, not of the entire bending resistance by guesswork.
Study the full explanation and applications.
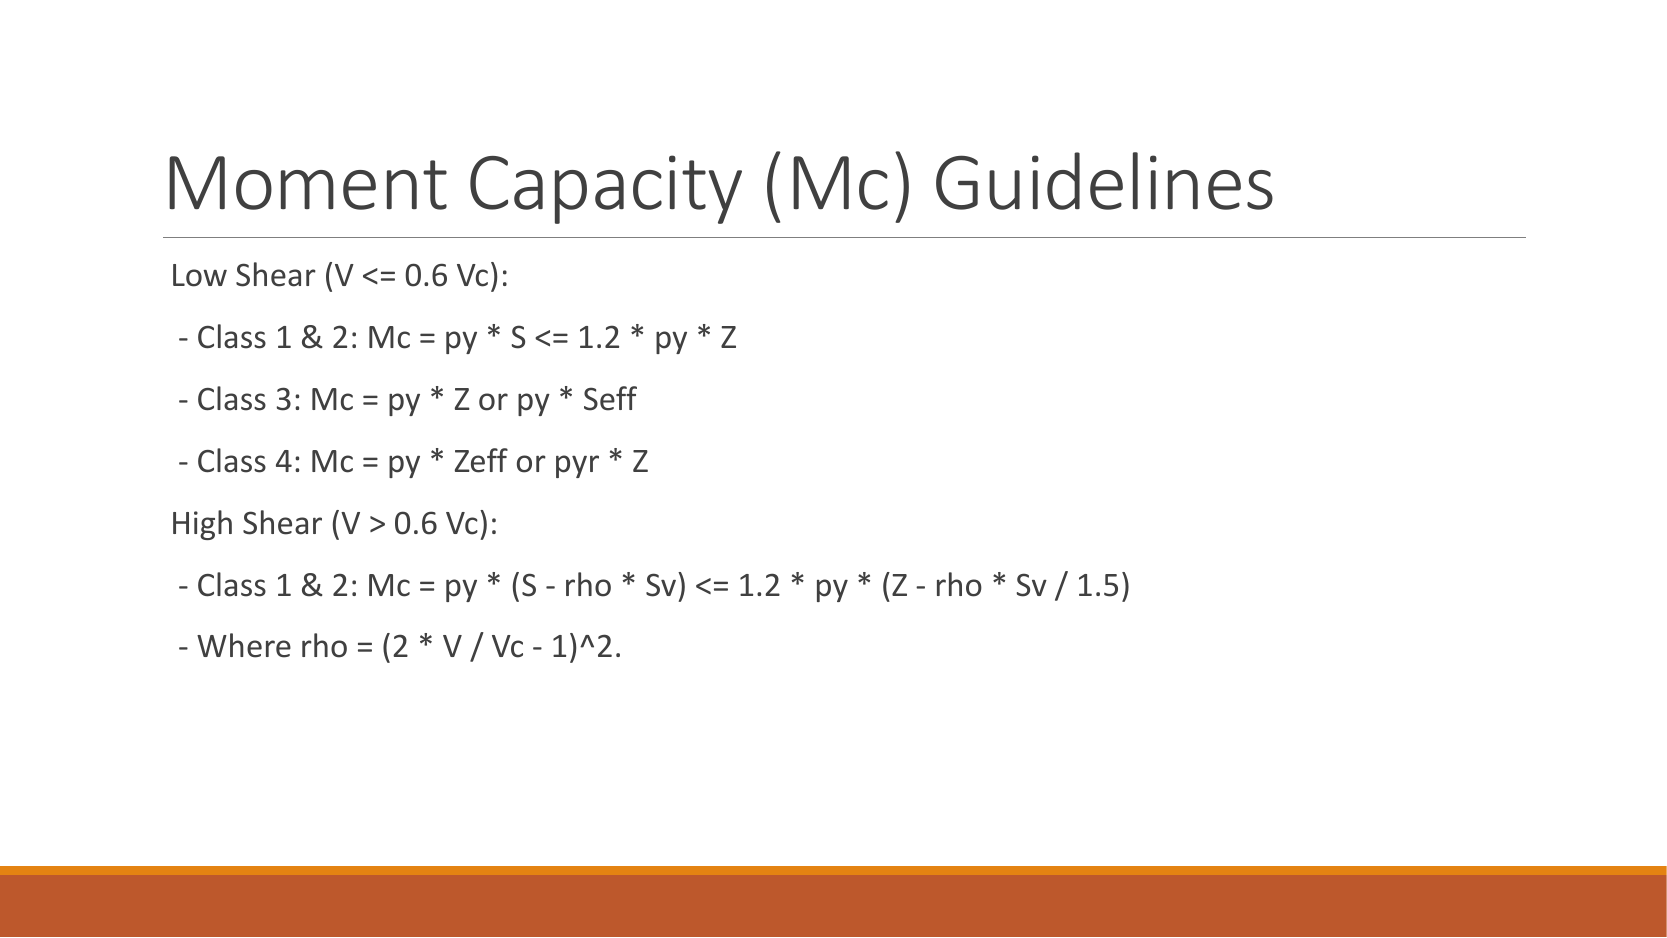
Original slide 6: for low shear .
Class 1/2: .
Class 3: or, under the applicable effective-modulus method, use .
Class 4: or, under the applicable reduced-strength method, use .
These alternatives are distinct code-permitted methods.
Do not simply choose the larger result.
For high shear in Class 1/2 sections: , above.
Do not infer dimensions from slide scale.Open full-size image
Mechanism detailsCompression and tension across a section
The complete mechanism is explained below.
Read each stage together with its stated conditions; playback and interaction are not required.
- For sagging, the top flange is in compression and the bottom in tension; hogging reverses this.
- Elastic bending stress varies with distance from the neutral axis: .
- The section class governs whether elastic, plastic or effective properties may be used.
Use the shear at the section under examination.
The largest shear elsewhere is not automatically coexistent.
PPT/Steel Beam Design L3.pptx · slide 7: Local web bearing and buckling
A concentrated force spreads into the web
Check local web resistance at a support or concentrated load, even if overall beam strength passes.
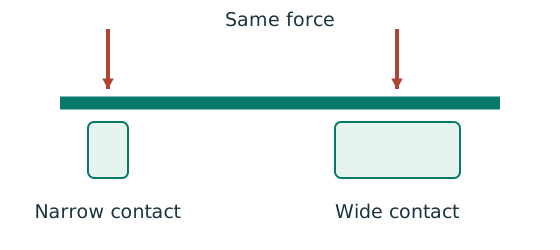
Prediction, then explanation. A longer valid stiff-bearing length can spread the same force over more web. A flexible contact is not automatically stiff bearing.
Match the actual bearing geometry to its source sketch. Use that sketch’s dimensions and permitted spread to calculate the resisting region.
b₁ is stiff-bearing length in mm. Web thickness and applicable design strength enter the prescribed local resistance equation.
Scope. End and interior cases can differ. A lateral-restraint symbol does not provide a bearing length or a load-introduction detail.
Check and takeaway. If bearing geometry is missing, give the applicable symbolic check and state the missing input. Do not borrow another example’s dimensions.
The loaded web can act as a short strut
A concentrated load can buckle the web instead of crushing it. This requires a separate local check.
Prediction, then explanation. Reduced local restraint can increase the relevant effective length and reduce local buckling resistance.
First calculate the source model’s effective strip and base resistance. Then apply the branch required by local restraint and load position.
Local web effective length is not the beam span or the LTB segment length. Use the symbol definition in the selected local formula.
Scope. The short-strut picture explains a mechanism; it is not a derivation of every coefficient in the supplied web rule.
Check and takeaway. A local bearing pass does not establish a local buckling pass. State both conclusions and any unresolved restraint condition.
Apply the reasoning to this section’s data and conditions
A support reaction or concentrated load presses through a finite bearing length into the web.
Bearing and web buckling are separate checks.
Identify the stiff bearing length, load position near an end, and lateral restraint.
This slide only displays the branch.
The full lecture includes the other case.
Missing contact dimensions prevent a definite local capacity.
Study the full explanation and applications.
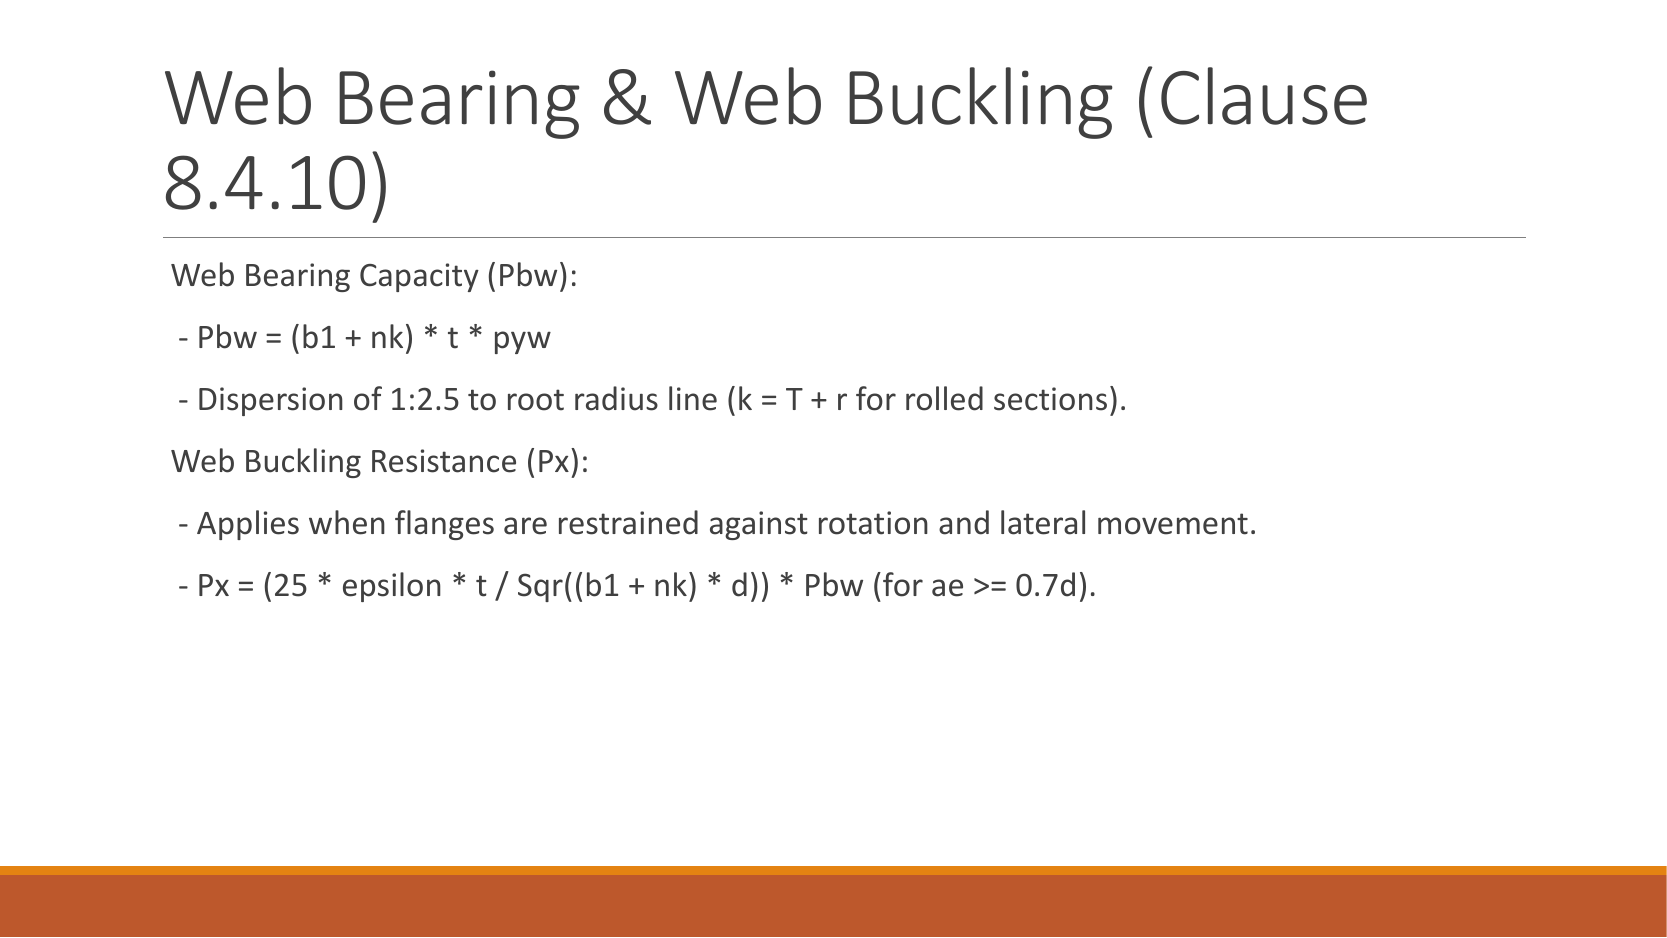
Original slide 7, clause 8.4.10: web bearing ; load spreads at to the root fillet.
For hot-rolled sections, .
The web-buckling resistance expression shown requires rotational and lateral restraint to the flange.
When , .
is bearing length.
is the additional dispersion length selected for the end location.
Dimensions and the applicable branch must still be identified from the actual question.
Do not infer dimensions from slide scale.Open full-size image
Mechanism detailsSpread a concentrated force into the web
The complete mechanism is explained below.
Read each stage together with its stated conditions; playback and interaction are not required.
- A concentrated reaction first enters through the bearing/contact region.
- The flange and root geometry spread the force before it enters the web.
- A wider effective bearing region can reduce local stress for the same force.
End distance, stiff bearing length and restraint conditions must come from the original question.
The illustrated dimensions explain the mechanism.
They do not replace the original question data.
PPT/Steel Beam Design L3.pptx · slide 8: LTB factors and effective length
Use the same mechanism: Vertical bending can trigger sideways motion. Adding a valid lateral restraint shortens a stability segment. It need not change the beam’s vertical reaction or moment diagram.
Use the same mechanism: A table value has conditions. A different flange thickness can select a lower design strength even when the steel grade name remains unchanged.
Apply the reasoning to this section’s data and conditions
Compute , then and , and read .
The slide’s suggestion to multiply destabilizing length by is not a universal rule.
In the full lecture table, select the applicable loading column.
Then select the actual end-restraint row.
Load height and freedom to twist determine applicability.
Study the full explanation and applications.
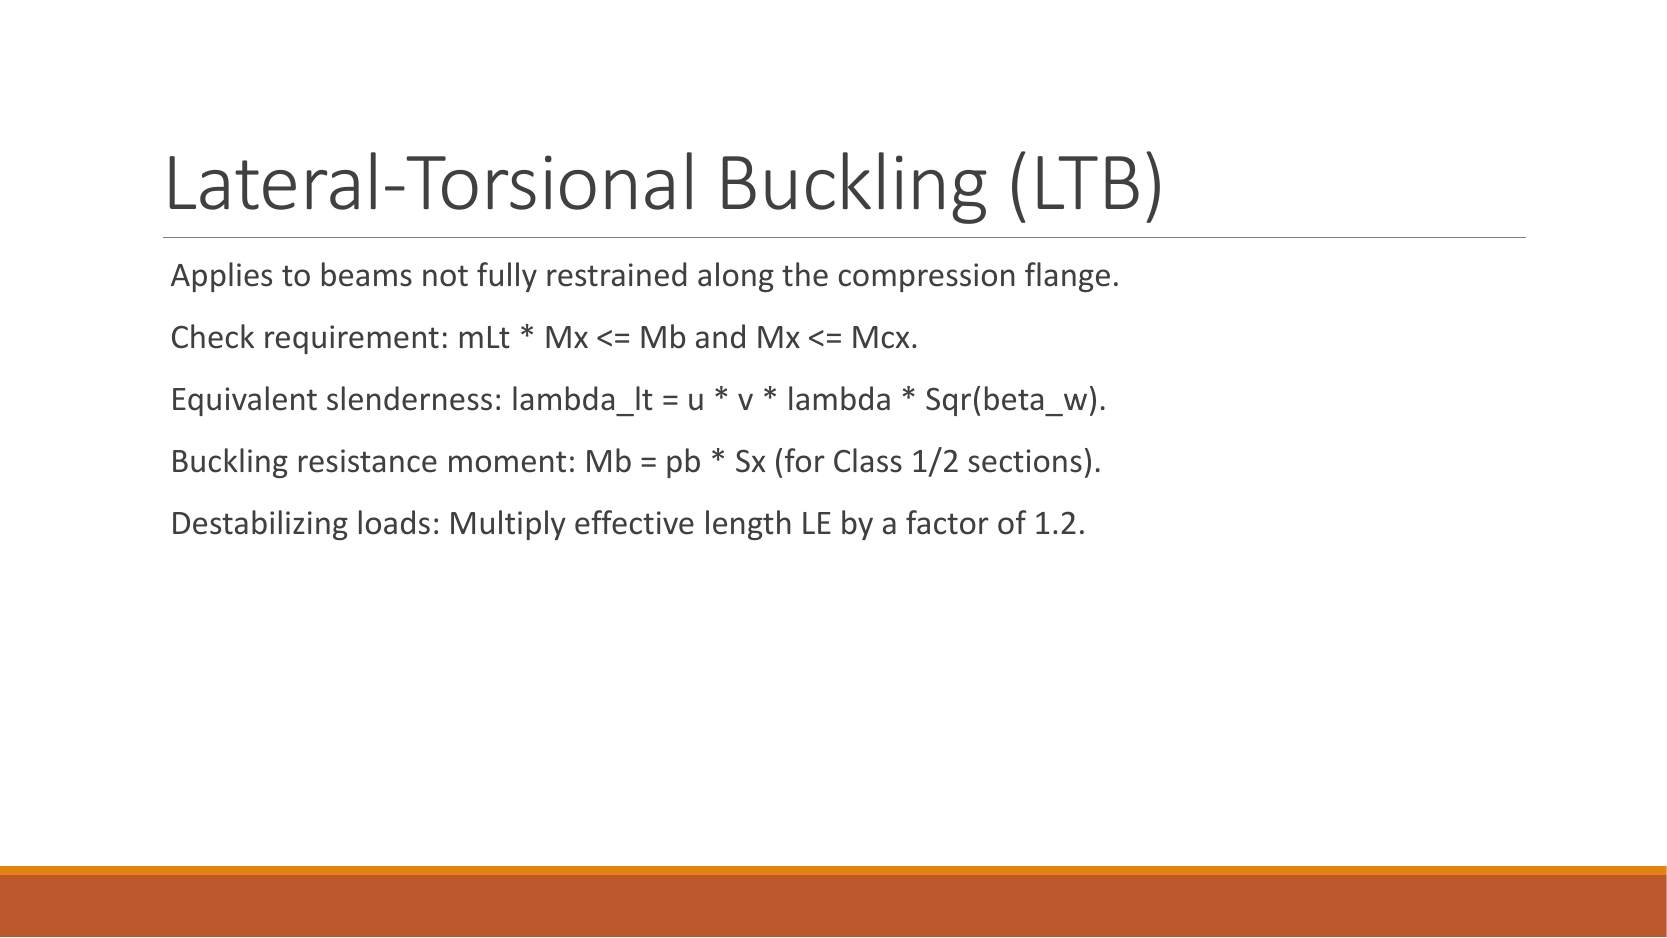
Original slide 8: LTB must be checked when the compression flange is not restrained along its full length.
Original notation is retained as and ; .
For Class 1/2, .
The diagram symbol , , corresponds to this lesson's , , ; source letter case is retained.
The slide says destabilizing loading multiplies by .
Applicability limits and the full lookup method are explained above.
This is not a fixed multiplier for every restraint condition.
Do not infer dimensions from slide scale.Open full-size image
Mechanism detailsA beam bends sideways and twists
The complete mechanism is explained below.
Read each stage together with its stated conditions; playback and interaction are not required.
- For the illustrated sagging beam the top flange is compressed.
- The unrestrained compression flange can move sideways while the complete cross-section twists.
Only effective restraints divide the member into unbraced segments.
They do not automatically add vertical supports.
Use the segment effective length, section properties and matching moment factor.
This is an exaggerated mode shape, not a calculated displacement.
PPT/Steel Beam Design L3.pptx · slide 9: Fully restrained workflow
Use the same mechanism: Keep load categories separate. Increasing imposed load changes its own term. It does not change the dead-load factor or the steel stiffness.
Use the same mechanism: Balance the isolated beam. Move the same load toward B. Reaction B increases because the load has a larger moment arm about A.
Use the same mechanism: A cut reveals the internal actions. Under a uniform downward load, shear falls steadily. Moment reaches a stationary value where shear becomes zero.
Apply the reasoning to this section’s data and conditions
Resolve loads and reactions; draw the critical moment/shear; choose a trial section.
Check its class, and .
Check local web behaviour.
Calculate service deflection.
State the physical reason LTB is restrained rather than silently omitting it.
Study the full explanation and applications.
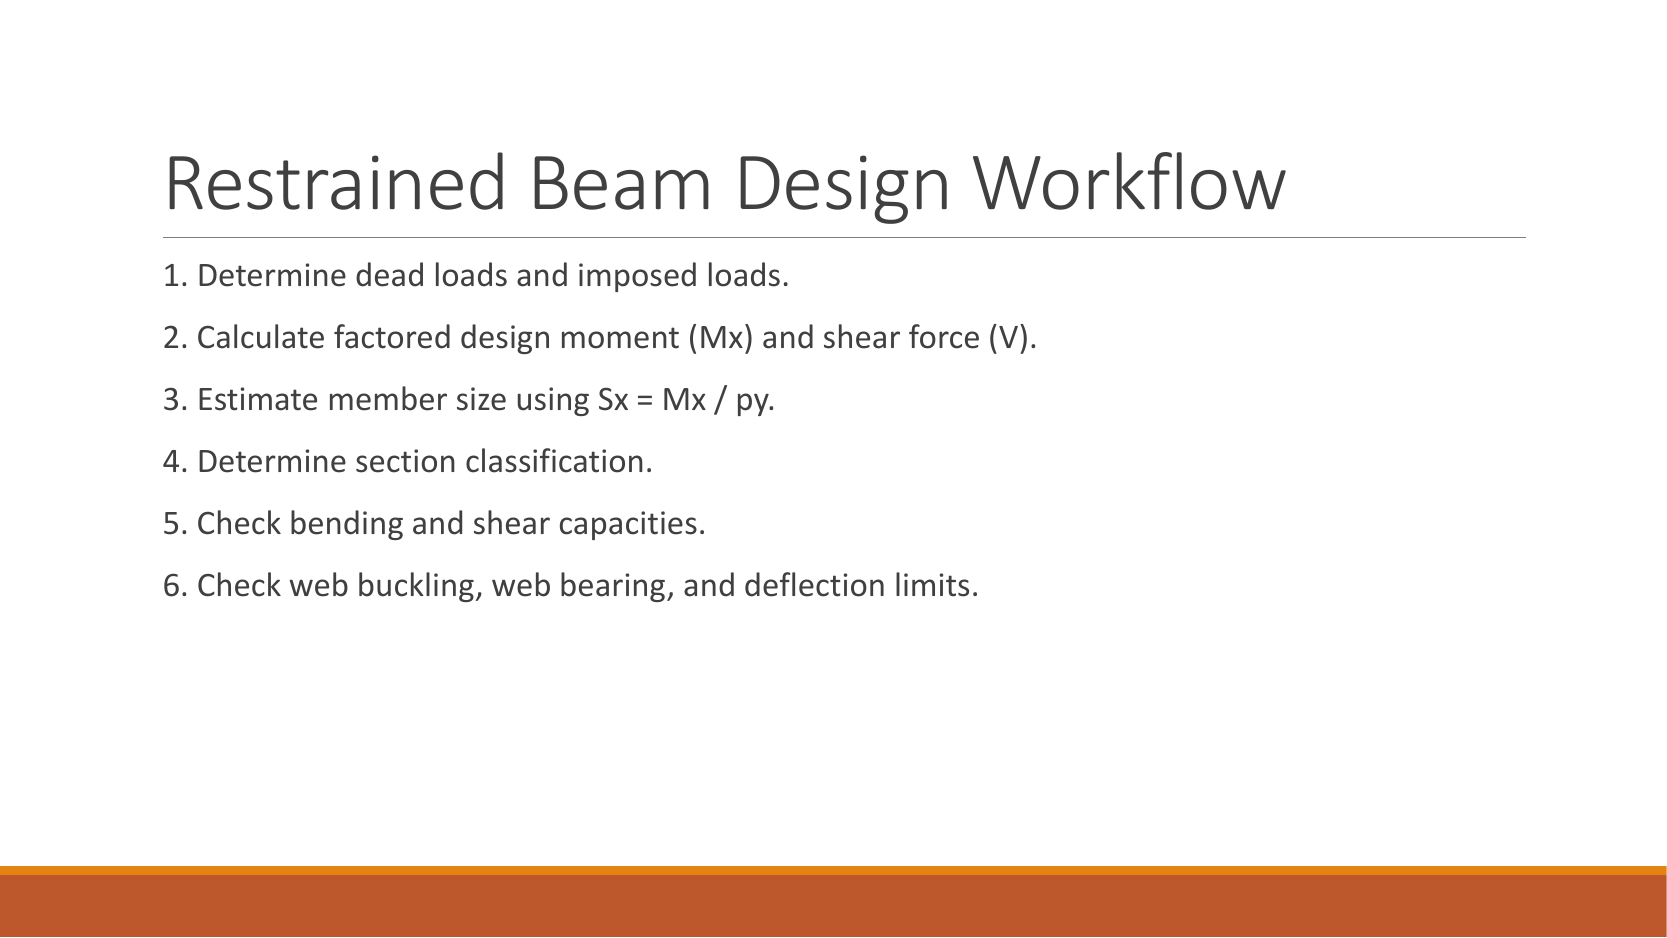
Original slide 9, six steps for a fully restrained steel beam. (1) Determine dead and imposed loads. (2) Calculate design moment and shear . (3) Make a trial section selection using . (4) Classify using width/thickness ratios. (5) Check bending and shear resistances. (6) Check local web bearing/buckling and deflection.
The trial-selection formula does not replace these checks.
Do not infer dimensions from slide scale.Open full-size image
Mechanism detailsFollow the calculation sequence
The complete mechanism is explained below.
Read each stage together with its stated conditions; playback and interaction are not required.
- Locate the load, supports, connection geometry and any stated assumptions.
- Keep given values, table lookups and calculated values distinct; reconcile their units.
- The calculation player steps through the existing expressions in their original order.
Compare demand with resistance or the relevant limit.
Keep missing inputs and conditional conclusions explicit.
PPT/Steel Beam Design L3.pptx · slide 10: Unrestrained workflow
Use the same mechanism: Vertical bending can trigger sideways motion. Adding a valid lateral restraint shortens a stability segment. It need not change the beam’s vertical reaction or moment diagram.
Moment shape matters within one segment
Represent a nonuniform moment distribution in the applicable member-buckling equation.
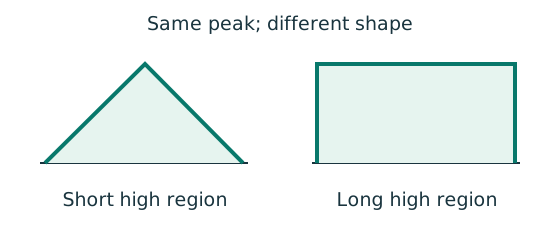
Prediction, then explanation. Two segments can have equal peak moment but different distributions. Their equivalent moment factors can therefore differ.
Evaluate moments from the true whole-beam analysis at the required positions. Apply the exact table’s weights, signs and lower bound.
mLT is an LTB factor. mx and my belong to the specified flexural checks. They are not interchangeable.
Scope. Some rules use magnitudes; others require signed ordinates. A factor does not reduce the actual moment used in a local section check.
Check and takeaway. Measure quarter points from the segment start, not automatically from the beam’s left support.
Use the same mechanism: A table value has conditions. A different flange thickness can select a lower design strength even when the steel grade name remains unchanged.
Apply the reasoning to this section’s data and conditions
Divide the beam at effective lateral restraints.
For each relevant segment find its maximum moment and moment shape, obtain , calculate effective slenderness and , and compare .
The segment with the longest length is not necessarily the governing one.
Study the full explanation and applications.
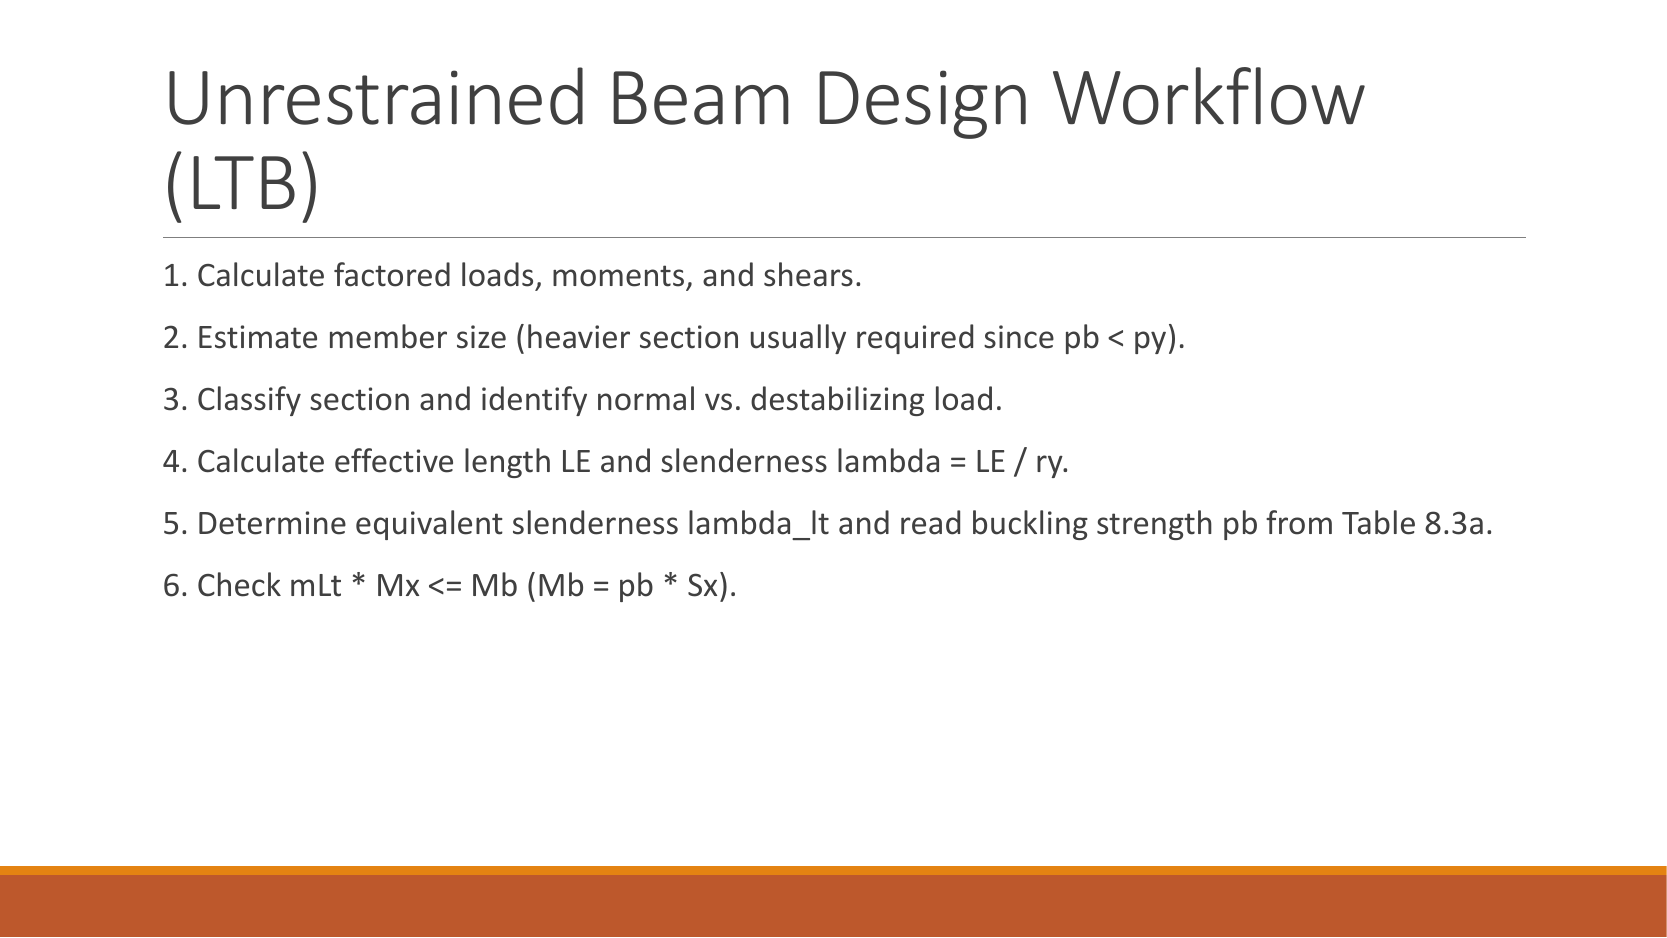
Original slide 10, six steps for a beam without full lateral restraint. (1) Determine design actions. (2) The trial may need to be heavier because . (3) Classify and identify normal/destabilizing loading. (4) Calculate slenderness using . (5) Determine and look up bending strength in Table 8.3a. (6) Check , where .
For the source symbol , and its correspondence to this lesson's upper-case subscript, see slide 8.
Do not infer dimensions from slide scale.Open full-size image
Mechanism detailsA beam bends sideways and twists
The complete mechanism is explained below.
Read each stage together with its stated conditions; playback and interaction are not required.
- For the illustrated sagging beam the top flange is compressed.
- The unrestrained compression flange can move sideways while the complete cross-section twists.
Only effective restraints divide the member into unbraced segments.
They do not automatically add vertical supports.
Use the segment effective length, section properties and matching moment factor.
This is an exaggerated mode shape, not a calculated displacement.
PPT/Steel Beam Design L3.pptx · slide 11: Finish with serviceability and a conclusion
Use the same mechanism: A safe beam can still sag too far. For the same UDL and stiffness, doubling span multiplies deflection by sixteen. Doubling I halves deflection.
Apply the reasoning to this section’s data and conditions
Use the stated service load and unamplified elastic stiffness .
For central , .
For UDL , .
Convert to by ×.
State the largest utilization and any incomplete local checks.
Study the full explanation and applications.
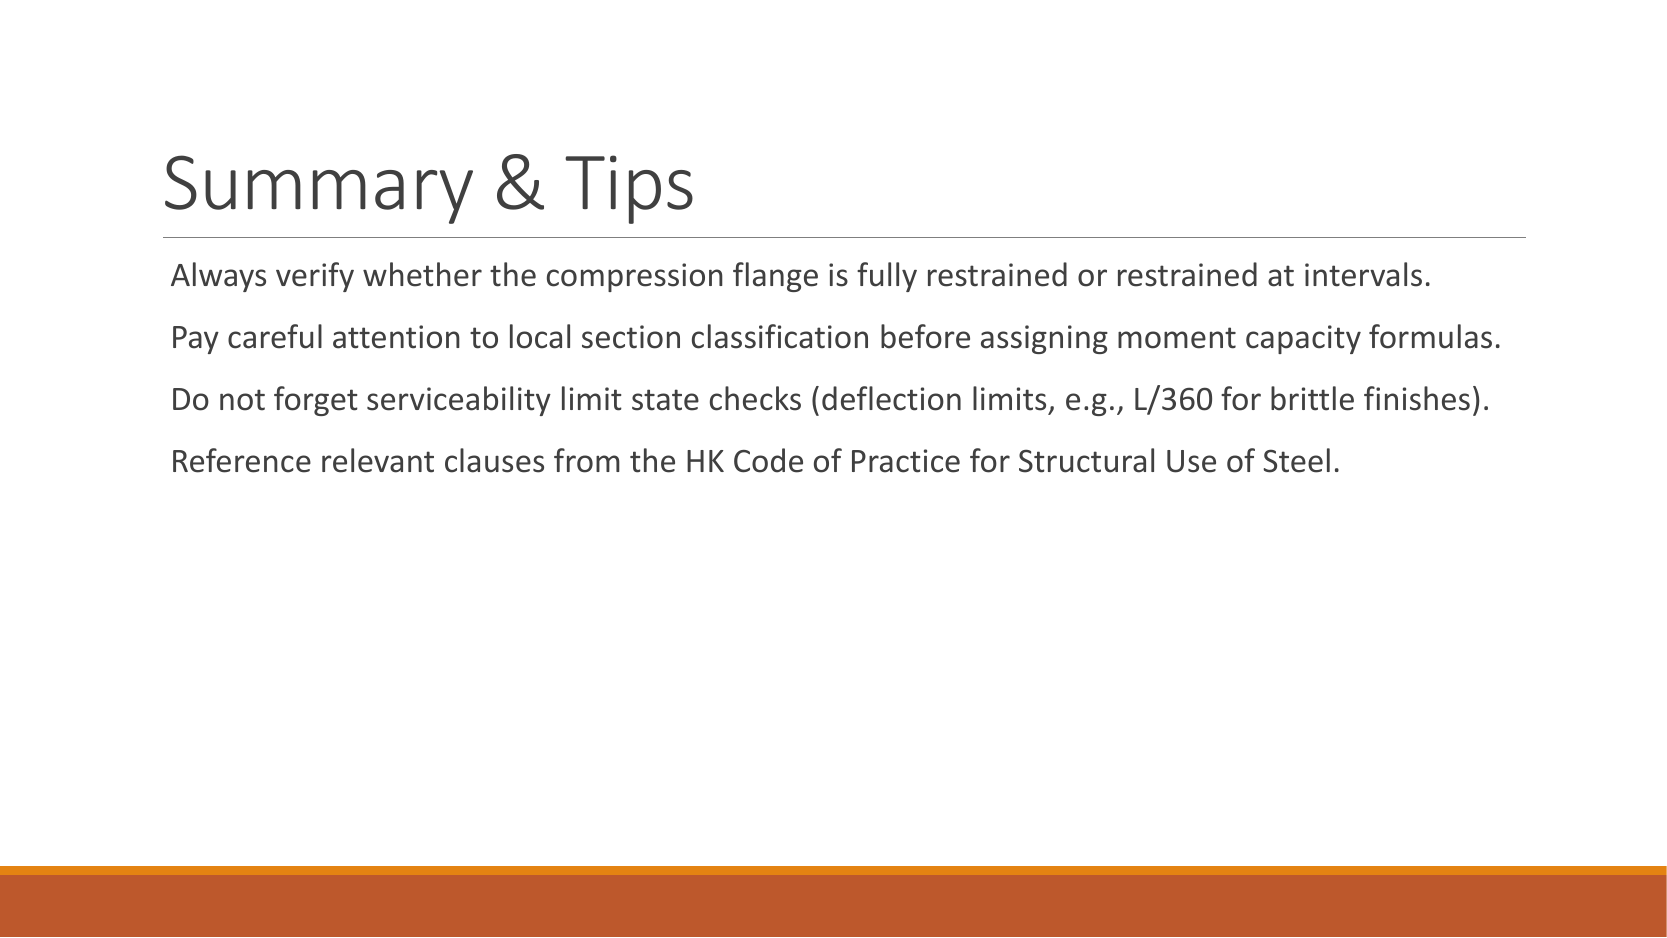
Original slide 11, design and exam tips: establish restraints before selecting the calculation method; include classification.
Keep serviceability deflection separate from strength checks.
The example limit for brittle finishes is .
State the applicable Hong Kong code clauses and the conclusion.
Do not infer dimensions from slide scale.Open full-size image
Mechanism detailsSee stiffness and deflection
The complete mechanism is explained below.
Read each stage together with its stated conditions; playback and interaction are not required.
Use the specified SLS load, span and support arrangement.
The demonstrator has a full-span UDL.
The loaded beam bends.
The deformation is exaggerated so its shape can be seen.
For a simply supported full-span UDL, .
Double L with w, E and I unchanged: δ becomes 16 times as large.
The readout uses , and .
Select the finish/support-specific limit from the original table.
PPT/Steel Column Design L4.pptx · slide 1: Column design
A strong cross-section can belong to an unstable member
A column carries axial compression and bending. Explain why more than one check is required.
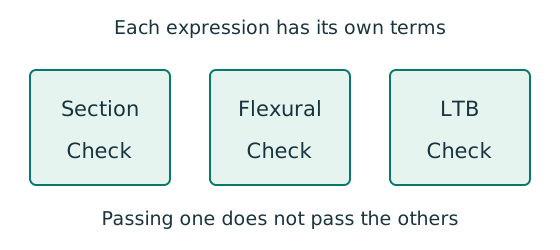
Prediction, then explanation. At fixed moments and resistances, increasing compression increases utilisation. A section pass cannot remove the length-dependent instability checks.
Separate cross-section, flexural-buckling and LTB interaction equations. Use each equation’s own denominators and first-order or amplified moments.
is a section axial resistance. is a member compression resistance. Elastic and prescribed are different bending denominators.
Scope. Preserve the course barred-moment definitions and Eq. 8.81 convention. Do not substitute plastic moduli into an elastic denominator.
Check and takeaway. Report each requested utilisation and the governing check. The largest properly calculated ratio identifies the closest limit.
Use the same mechanism: Check buckling about both axes. At fixed radius, longer effective length raises slenderness. The supplied buckling curve generally gives lower compressive strength.
Apply the reasoning to this section’s data and conditions
A column resists compression, often with bending.
A short section can crush.
A long member can buckle before reaching material strength.
These mechanisms require separate checks.
Study the full explanation and applications.
Original slide 1: Steel Column Design (CON4334), Chapter 4; understanding the content, effective length and member resistance.
Do not infer dimensions from slide scale.Open full-size image
Mechanism detailsA strong slice can belong to an unstable member
The complete mechanism is explained below.
Read each stage together with its stated conditions; playback and interaction are not required.
- Combine axial compression and the two bending demands using the specified section resistances.
- The whole member adds effective-length and buckling-curve effects.
This uses its own moment factor and bending resistance.
It is not a copy of the section check.
Elastic, plastic and buckling resistances are not interchangeable.
Read the three original expressions and their first-order/amplified moments.
PPT/Steel Column Design L4.pptx · slide 2: Column learning objectives
Use the same mechanism: Find which plate buckles first. At fixed width, a thinner plate has a larger width-to-thickness ratio. Local buckling then becomes more restrictive.
Use the same mechanism: A strong cross-section can belong to an unstable member. At fixed moments and resistances, increasing compression increases utilisation. A section pass cannot remove the length-dependent instability checks.
Use the same mechanism: Check buckling about both axes. At fixed radius, longer effective length raises slenderness. The supplied buckling curve generally gives lower compressive strength.
Apply the reasoning to this section’s data and conditions
Learn restraint interpretation, two-axis slenderness, curve selection, compression resistance and combined axial/bending checks.
A single axial capacity is insufficient when the load acts eccentrically.
Study the full explanation and applications.
Original slide 2, Learning Objectives: understand effective length and section classification; correctly design columns carrying axial force alone; evaluate columns under combined axial force and bending in simple and continuous construction.
Do not infer dimensions from slide scale.Open full-size image
Mechanism detailsWhy thin elements buckle locally
The complete mechanism is explained below.
Read each stage together with its stated conditions; playback and interaction are not required.
- The flange outstand and web have different widths, thicknesses and edge support conditions.
- A thinner plate can wrinkle locally before the complete member loses stability.
Class 1 allows plastic rotation.
Class 2 reaches plastic resistance.
Class 3 reaches elastic resistance.
Class 4 requires effective properties.
Check every relevant compression element with the supplied limits and stress distribution.
The deformation shown is qualitative.
PPT/Steel Column Design L4.pptx · slide 3: Effective length and slenderness
Use the same mechanism: Check buckling about both axes. At fixed radius, longer effective length raises slenderness. The supplied buckling curve generally gives lower compressive strength.
Apply the reasoning to this section’s data and conditions
For each axis, and .
The dimensionless factor represents the stated end restraint/sway condition.
Millimetres must be used in both numerator and denominator.
Tying the weak direction reduces only if the tie actually restrains that buckling direction.
Study the full explanation and applications.
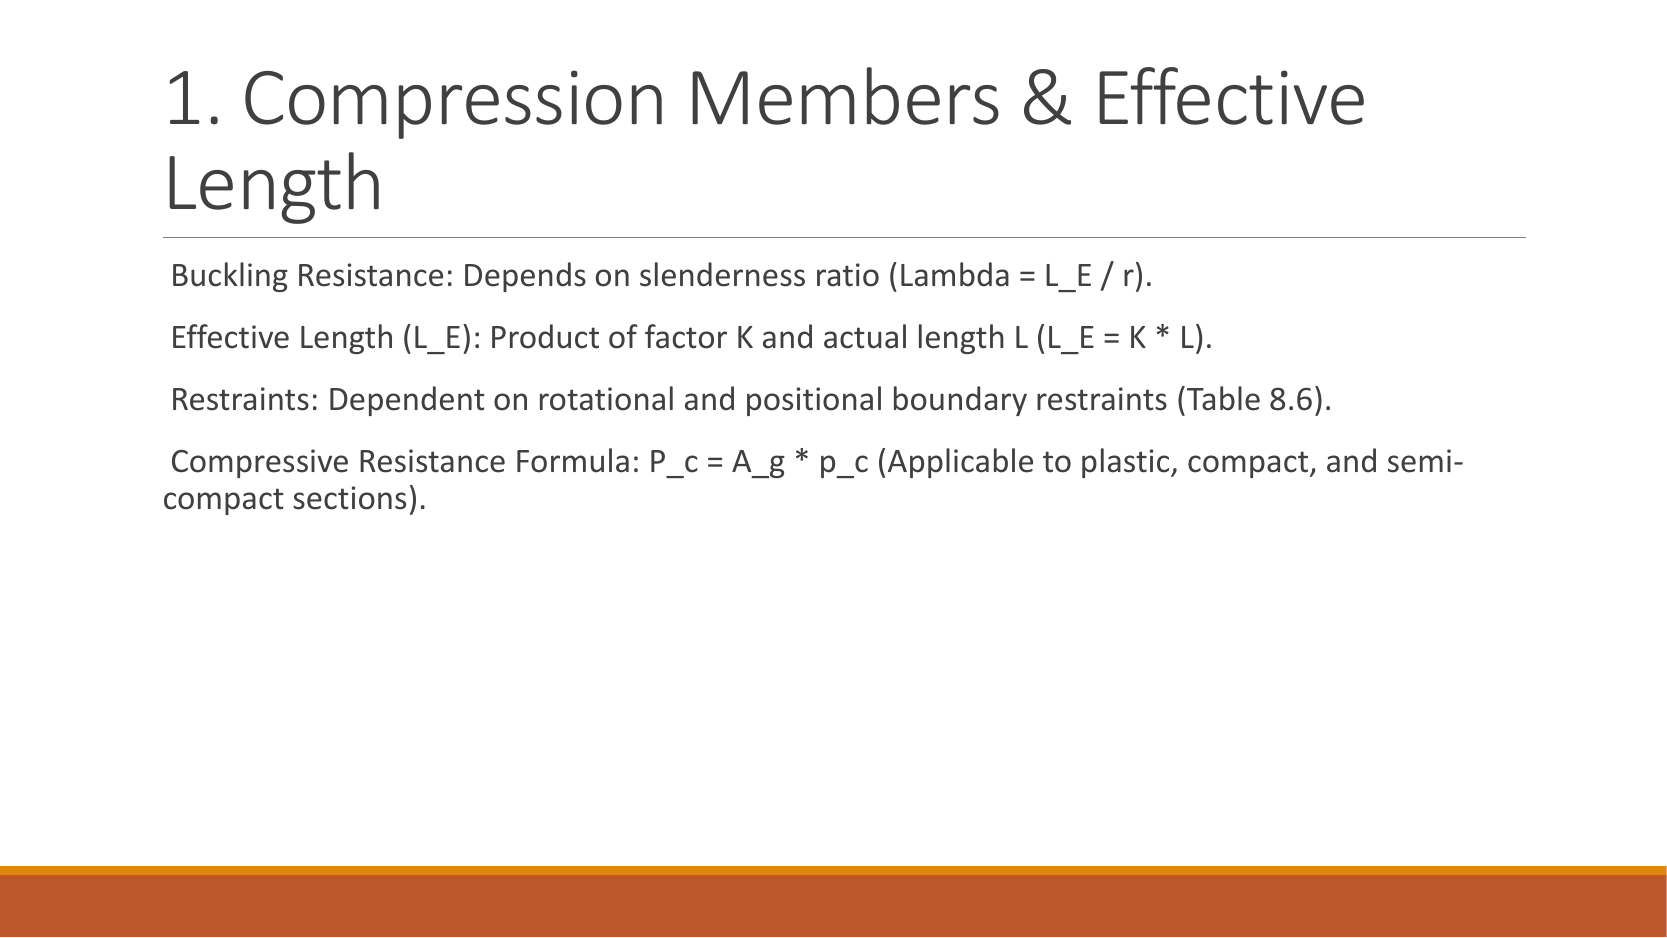
Original slide 3, compression members and effective length.
Buckling resistance depends on slenderness ; effective length is the product of factor and actual length .
Use rotational and positional restraint conditions to select from Table 8.6.
Compression resistance for plastic, compact and semi-compact sections: above.
Do not infer dimensions from slide scale.Open full-size image
Mechanism detailsEffective length and buckling axes
The complete mechanism is explained below.
Read each stage together with its stated conditions; playback and interaction are not required.
- A column can bow sideways before its section reaches the crushing resistance.
- Each axis has its own radius of gyration and restraint spacing.
, with compatible length units.
A tie affects only the directions it actually restrains.
Select each buckling curve and compressive strength before forming Pc.
The governing axis is determined by resistance, not slenderness alone.
PPT/Steel Column Design L4.pptx · slide 4: Select a strut curve before a number
Use the same mechanism: Check buckling about both axes. At fixed radius, longer effective length raises slenderness. The supplied buckling curve generally gives lower compressive strength.
Use the same mechanism: A table value has conditions. A different flange thickness can select a lower design strength even when the steel grade name remains unchanged.
Move between two known values
The required slenderness lies between two table rows. Estimate the strength on the straight segment between those rows.
Prediction, then explanation. If the second strength is lower, moving toward that row must reduce the interpolated strength.
Subtract the lower input to find distance travelled. Divide by the input interval. Multiply that fraction by the output change.
x is the required input. The two known pairs are (x₀, y₀) and (x₁, y₁). f has no unit.
Scope. Use one table, curve and strength column. This interpolation does not permit extrapolation or inventing an intermediate steel section.
Check and takeaway. Illustration: between strengths 200 and 180, a fraction of 0.4 gives 192 N/mm². The result lies between both endpoints.
Apply the reasoning to this section’s data and conditions
Read Table 8.7 by section type, maximum thickness and buckling axis.
A rolled H section with thickness uses curve b about and c about .
Then read Table 8.8 using that curve, and slenderness; interpolate between bounding rows.
Study the full explanation and applications.
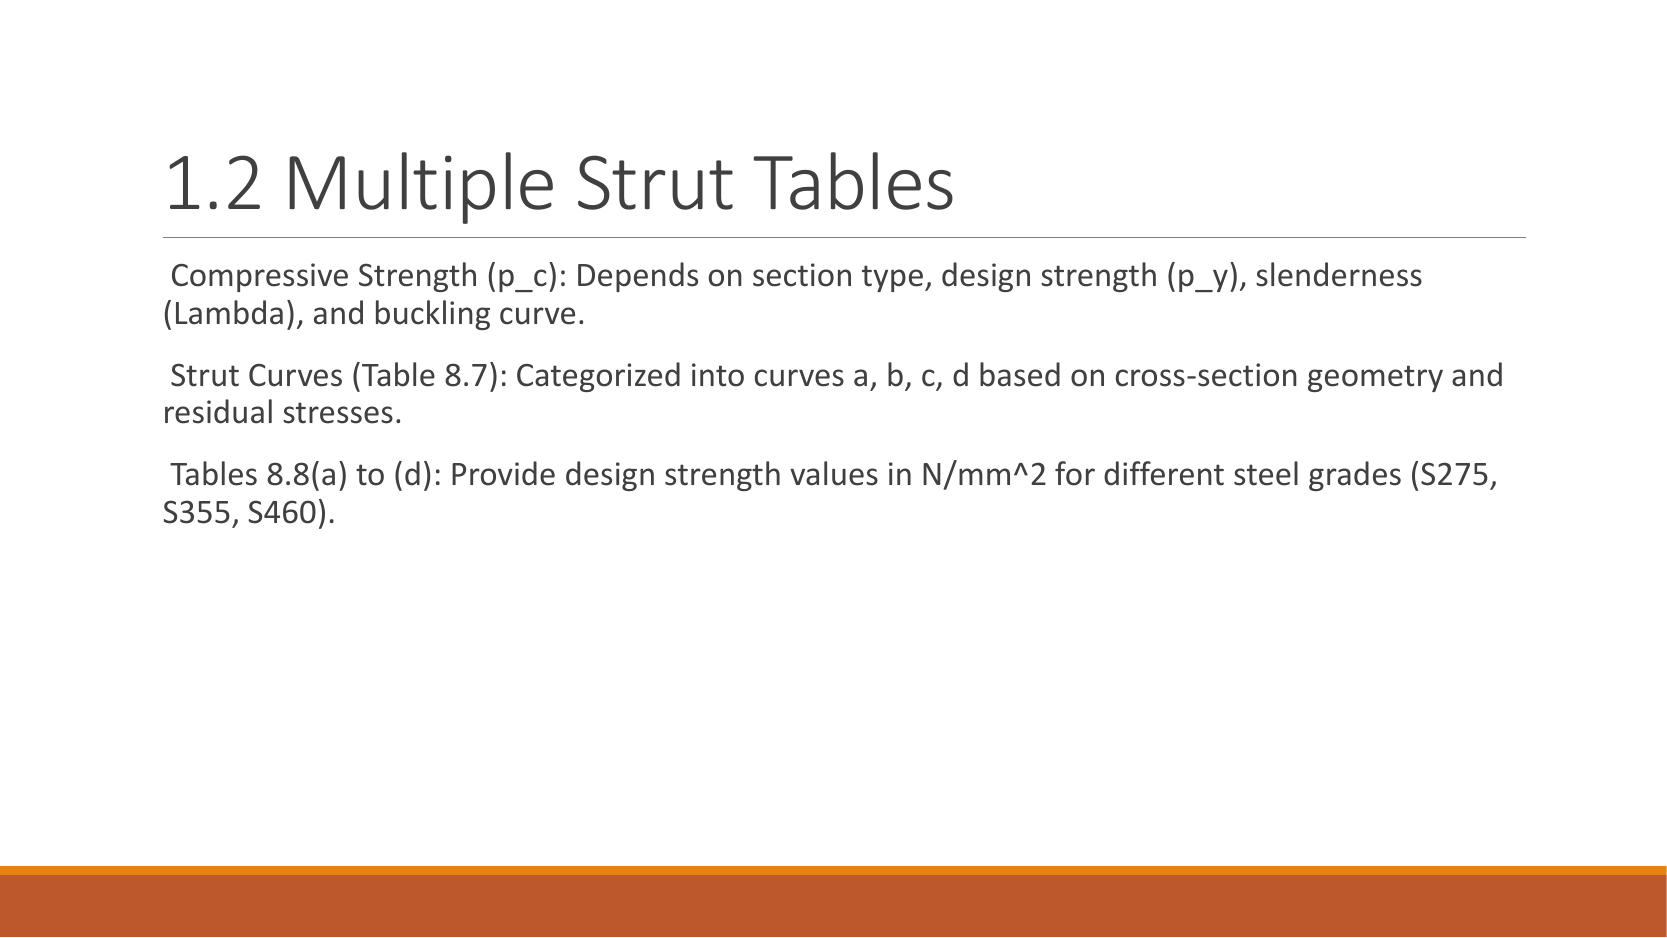
Original slide 4, strut-strength tables.
Compressive strength depends on section type, design strength , slenderness and buckling curve.
Table 8.7 selects curves a, b, c and d using section geometry and residual stress.
Tables 8.8(a) to (d) on the slide give design strength in for steel grades including S275, S355 and S460.
Use the applicable curve and table heading; steel grade alone does not select the table.
Do not infer dimensions from slide scale.Open full-size image
Mechanism detailsEffective length and buckling axes
The complete mechanism is explained below.
Read each stage together with its stated conditions; playback and interaction are not required.
- A column can bow sideways before its section reaches the crushing resistance.
- Each axis has its own radius of gyration and restraint spacing.
, with compatible length units.
A tie affects only the directions it actually restrains.
Select each buckling curve and compressive strength before forming Pc.
The governing axis is determined by resistance, not slenderness alone.
PPT/Steel Column Design L4.pptx · slide 5: Section and member interactions
Use the same mechanism: A strong cross-section can belong to an unstable member. At fixed moments and resistances, increasing compression increases utilisation. A section pass cannot remove the length-dependent instability checks.
Two simultaneous actions use one component
Check a component that carries shear and tension, or compression and bending, at the same time.
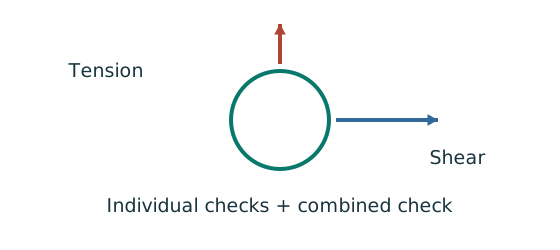
Prediction, then explanation. At fixed resistances, increasing one demand increases its utilisation. The permitted sum is not always one.
First apply the individual checks. Next use the exact combined equation and its definitions. Keep demands from the same load case.
This is the course bolt interaction rule. Fs and Ft are bolt demands; Ps and Pnom are their specified resistance denominators.
Scope. The 1.4 limit and nominal tension denominator do not apply to column equations. Their limits and moment definitions are separate.
Check and takeaway. A sum above one can pass this bolt rule while still needing individual checks. A pass must name the actual equation used.
Apply the reasoning to this section’s data and conditions
Cross-section interaction combines axial utilization and bending utilizations at the same section.
Member equations include reduced compression/LTB resistance and moment factors.
Follow the full lecture’s elastic denominators and overbars: compact slide notation can hide whether a moment is first-order or amplified.
Study the full explanation and applications.
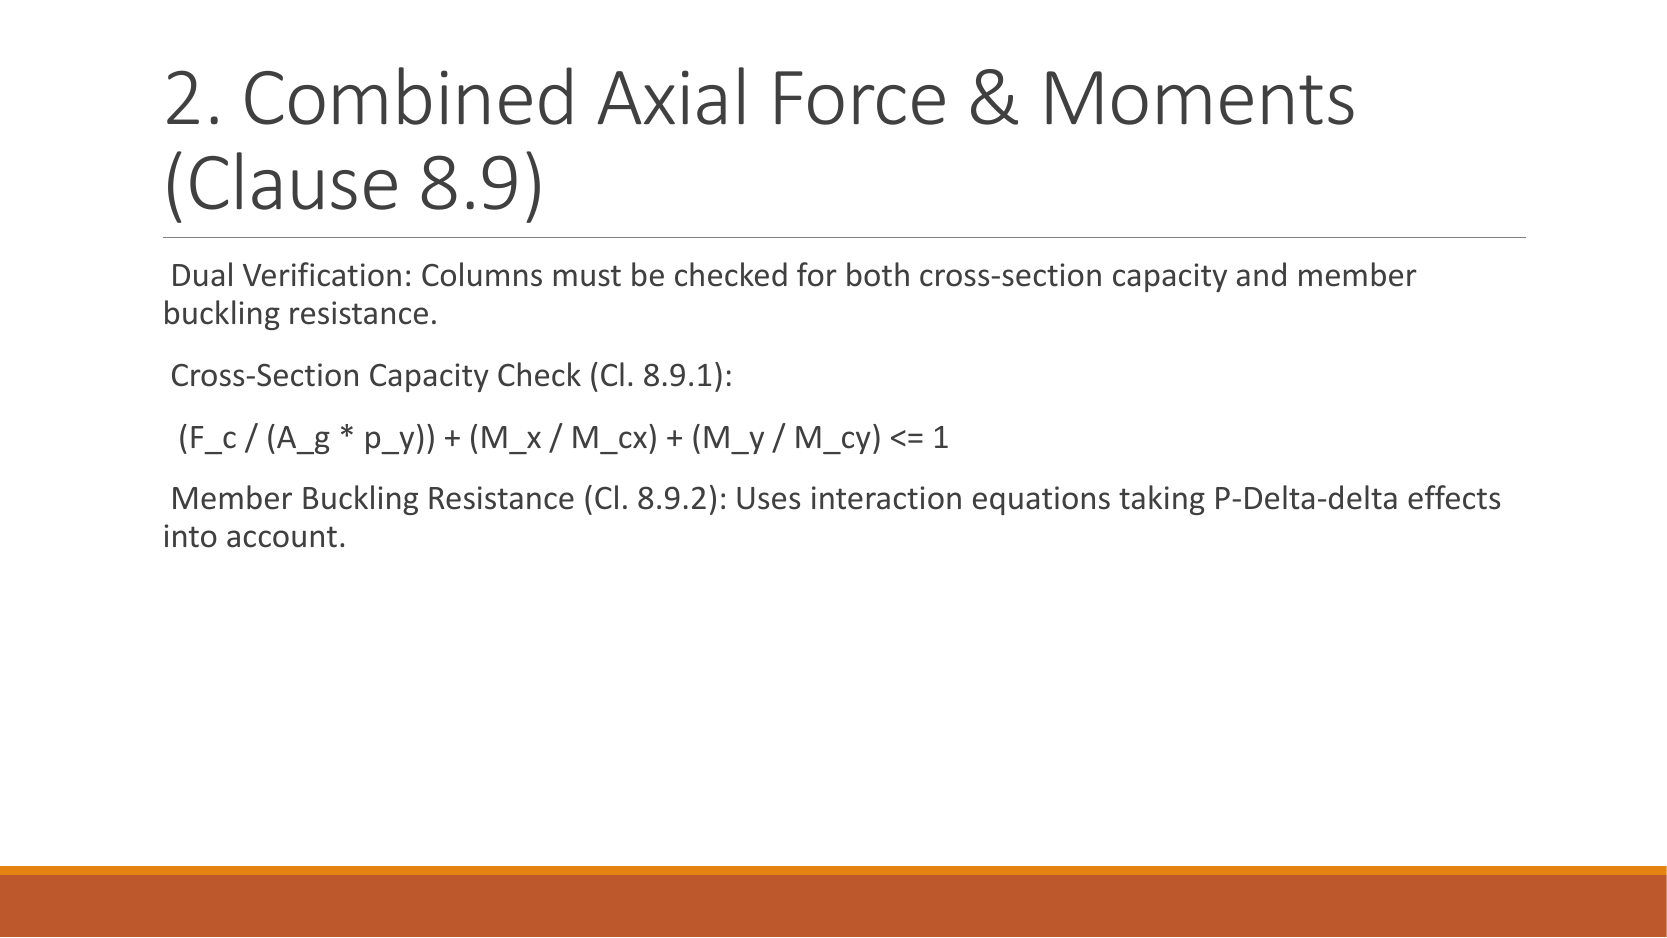
Original slide 5, combined axial force and bending (clause 8.9).
A column must satisfy both section resistance and member buckling resistance.
Clause 8.9.1 gives the section expression .
The member interaction expressions in clause 8.9.2 account for second-order overall sway and member bending ( and ).
Do not infer dimensions from slide scale.Open full-size image
Mechanism detailsA strong slice can belong to an unstable member
The complete mechanism is explained below.
Read each stage together with its stated conditions; playback and interaction are not required.
- Combine axial compression and the two bending demands using the specified section resistances.
- The whole member adds effective-length and buckling-curve effects.
This uses its own moment factor and bending resistance.
It is not a copy of the section check.
Elastic, plastic and buckling resistances are not interchangeable.
Read the three original expressions and their first-order/amplified moments.
PPT/Steel Column Design L4.pptx · slide 6: Frame classification and amplification
Use the same mechanism: Restraints define the analysis model. A joint that permits beam rotation does not automatically remove all column moment. Eccentric reactions may still bend the column.
Use the same mechanism: Compression acts on the displaced shape. At fixed axial force, a larger offset creates a larger additional moment. This can further increase the displacement.
Apply the reasoning to this section’s data and conditions
Elastic critical load factor measures proximity to global instability.
Use the lecture’s non-sway/sway/ultra-sensitive boundaries and applicable amplification method.
If the problem already supplies amplification factors, apply them once to the specified first-order moments.
An already amplified must not be amplified again.
Study the full explanation and applications.
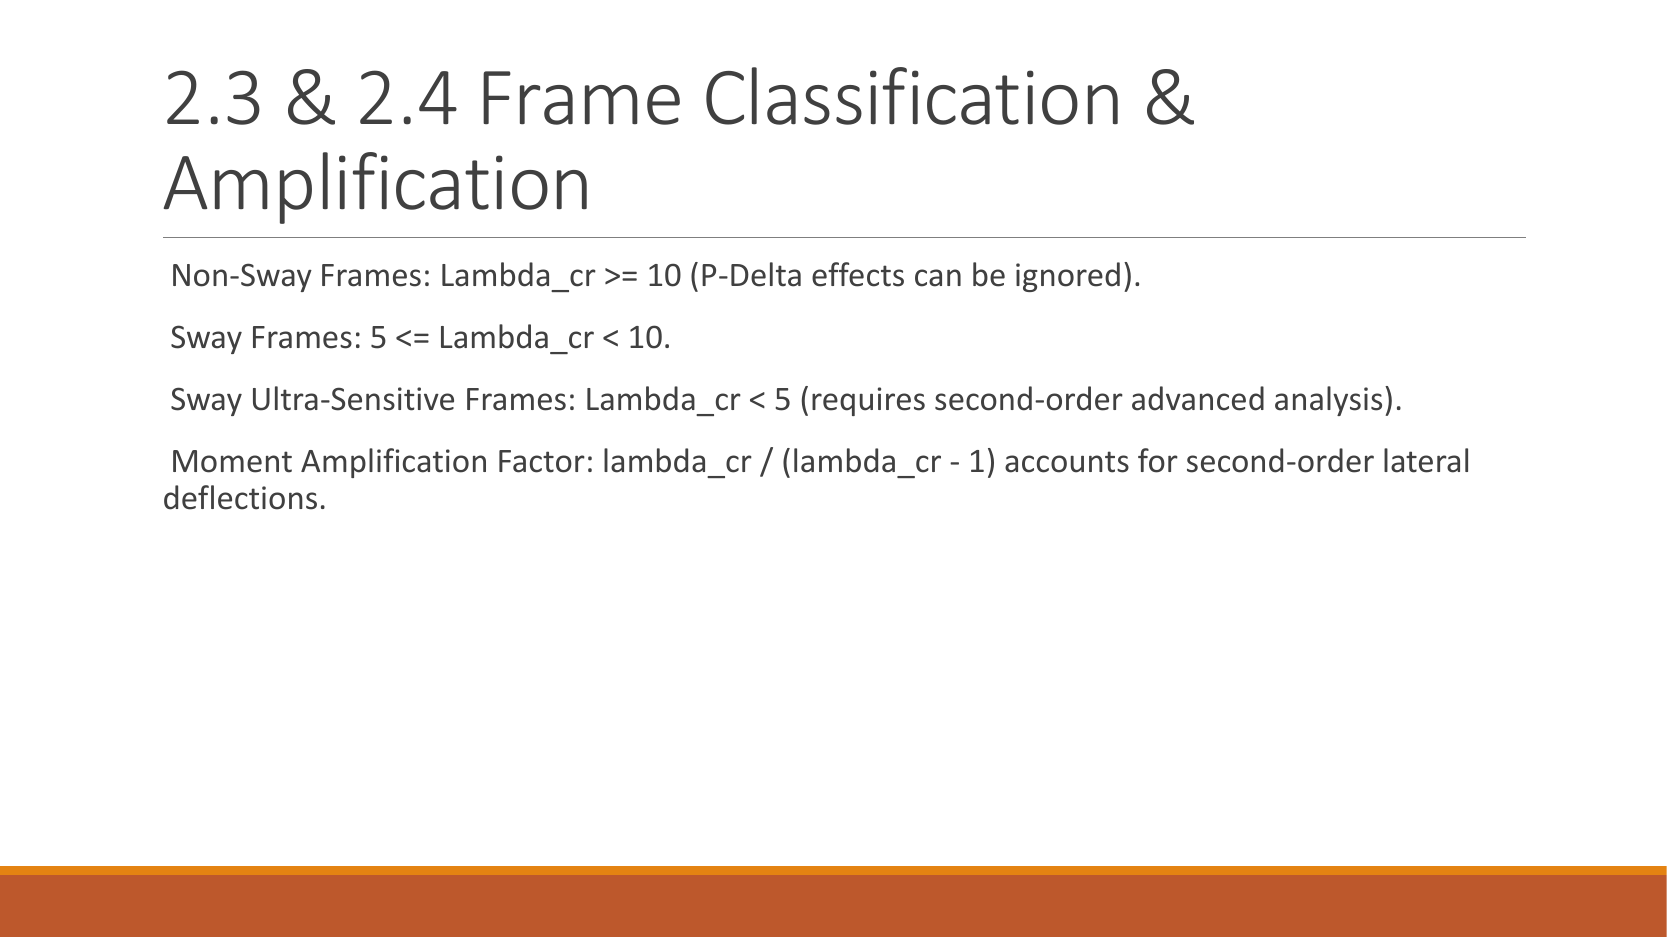
Original slide 6, sections 2.3 and 2.4: frame classification and amplification.
Non-sway frames: , allowing overall effects to be ignored.
Sway frames: ; highly sway-sensitive frames: , requiring a higher-order second-order analysis.
The slide gives moment amplification factor to account for second-order sway, subject to the applicability conditions of the course method.
Do not infer dimensions from slide scale.Open full-size image
Mechanism detailsRestraints, sway and imperfections
The complete mechanism is explained below.
Read each stage together with its stated conditions; playback and interaction are not required.
- A frame needs a defined path for horizontal force as well as gravity.
- Pinned joints alone do not provide frame moment resistance; sway restraint needs a real structural system.
Diagonal bracing carries horizontal action through axial forces.
This sketch does not assign a numerical frame classification.
Use the specified imperfection/notional-force model and critical-load criteria.
Avoid counting alternative imperfection models twice.
PPT/Steel Column Design L4.pptx · slide 7: Simple construction
An eccentric beam reaction bends the column
A simple beam joint delivers a vertical reaction away from the column centre. Find the resulting column moments.
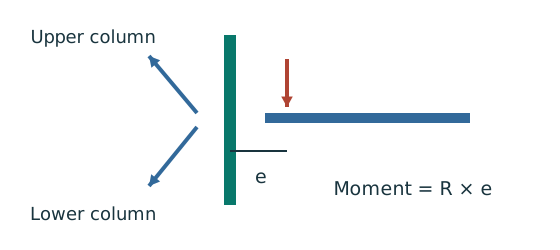
Prediction, then explanation. Equal opposite-face reactions can cancel a joint moment. Their downward forces still add to column compression.
Sum axial forces first. Calculate the signed eccentric moments. Share the net joint moment between upper and lower columns using the stated stiffness model.
R is reaction; e is perpendicular eccentricity. K denotes the stiffness measure prescribed for moment sharing.
Scope. Equal sharing requires equal stated stiffness. Use actual storey length where the special simple-construction LTB rule requires it.
Check and takeaway. A pin-like beam connection can still cause an eccentric reaction moment in the column. Joint rotation and reaction location are separate facts.
Use the same mechanism: Check buckling about both axes. At fixed radius, longer effective length raises slenderness. The supplied buckling curve generally gives lower compressive strength.
Use the same mechanism: Vertical bending can trigger sideways motion. Adding a valid lateral restraint shortens a stability segment. It need not change the beam’s vertical reaction or moment diagram.
Apply the reasoning to this section’s data and conditions
Nominally pinned beams can still deliver eccentric reactions to a column.
Calculate reaction×eccentricity and share joint moment according to the prescribed column stiffnesses.
For the course simple-construction LTB shortcut, uses actual column length , not the flexural effective length .
Study the full explanation and applications.
Original slide 7, columns in simple construction.
Beams are assumed fully loaded and simply supported, with all equivalent-moment factors .
Equivalent slenderness for lateral-torsional buckling , is storey height, not .
Under multi-storey clause 8.7.8, pattern loading need not be considered.
Nominal moments come from reaction eccentricity, taking the larger eccentricity from a load line from the column face or at the centre of stiff bearing.
Do not infer dimensions from slide scale.Open full-size image
Mechanism detailsEccentric reactions and stiffness sharing
The complete mechanism is explained below.
Read each stage together with its stated conditions; playback and interaction are not required.
- A beam reaction can act away from the column centre even at a nominally pinned beam connection.
.
Opposing reactions can cancel part of the signed moment, while both still add compression.
- The course simple model distributes the joint moment in proportion to of the columns above and below.
Equal relevant stiffness gives half each.
A roof joint with no upper column is a different case.
PPT/Steel Column Design L4.pptx · slide 8: Write both buckling checks accurately
Use the same mechanism: A strong cross-section can belong to an unstable member. At fixed moments and resistances, increasing compression increases utilisation. A section pass cannot remove the length-dependent instability checks.
Apply the reasoning to this section’s data and conditions
Keep flexural-buckling and LTB interaction equations separate.
The full lecture Eq. 8.80 uses amplified bending moments; Eq. 8.81 uses the specified amplified and first-order minor-axis .
The slide is a memory aid.
Use the full derivation to restore subscripts, bars and elastic moment denominators.
Study the full explanation and applications.
Original slide 8, summary of column checks.
The source section expression is , the same for simple and continuous construction.
The source member expression for simple construction is ,; continuous construction selects specific values from Tables 8.9 and 8.4.
This reproduces the source diagram without silently replacing its with the elastic denominator in the full lecture.
Actual solutions must use the complete formulas and amplified-moment definitions linked above.
This summary, which omits overbars, cannot replace them.Open full-size image
Mechanism detailsA strong slice can belong to an unstable member
The complete mechanism is explained below.
Read each stage together with its stated conditions; playback and interaction are not required.
- Combine axial compression and the two bending demands using the specified section resistances.
- The whole member adds effective-length and buckling-curve effects.
This uses its own moment factor and bending resistance.
It is not a copy of the section check.
Elastic, plastic and buckling resistances are not interchangeable.
Read the three original expressions and their first-order/amplified moments.
PPT/Steel Column Design L4.pptx · slide 9: The worked-example sequence
Use the same mechanism: Check buckling about both axes. At fixed radius, longer effective length raises slenderness. The supplied buckling curve generally gives lower compressive strength.
Use the same mechanism: A strong cross-section can belong to an unstable member. At fixed moments and resistances, increasing compression increases utilisation. A section pass cannot remove the length-dependent instability checks.
Use the same mechanism: An eccentric beam reaction bends the column. Equal opposite-face reactions can cancel a joint moment. Their downward forces still add to column compression.
Apply the reasoning to this section’s data and conditions
Example 1 begins with axial compression.
Example 2 shows how a weak-axis tie changes stability.
Example 3 transfers eccentric beam reactions into column forces and moments.
Example 4 builds floor loads and applies the stated imposed-load reduction.
The full notes also contain Example 5 for combined end moments, which remains required even though this summary omits it.
Study the full explanation and applications.
Original slide 9, design examples and learning resources.
Example 1: pin-ended column under axial force.
Example 2: pin-ended column tied against minor-axis buckling.
Example 3: column under axial force and bending in simple construction.
Example 4: axially loaded column using tributary area and load reduction.
Do not infer dimensions from slide scale.Open full-size image
Mechanism detailsEffective length and buckling axes
The complete mechanism is explained below.
Read each stage together with its stated conditions; playback and interaction are not required.
- A column can bow sideways before its section reaches the crushing resistance.
- Each axis has its own radius of gyration and restraint spacing.
, with compatible length units.
A tie affects only the directions it actually restrains.
Select each buckling curve and compressive strength before forming Pc.
The governing axis is determined by resistance, not slenderness alone.
PPT/Steel Column Design L4.pptx · slide 10: References and further study
Use the same mechanism: A table value has conditions. A different flange thickness can select a lower design strength even when the steel grade name remains unchanged.
Apply the reasoning to this section’s data and conditions
The slide names references and suggests external video searches.
This offline course contains the needed teaching locally.
When reading outside material, compare code edition, axis labels, yield strength rules and partial factors before using any equation.
Do not combine Eurocode and supplied HK design expressions.
Study the full explanation and applications.
Original slide 10, References & Useful Links: Hong Kong Code of Practice for the Structural Use of Steel 2011; and Steelwork Design Guide to BS 5950 / HK Code (CON4334 course notes).
The original suggested YouTube search strings are retained for recognition: Steel Column Design EC3 / BS5950 Workflow (column design workflow) and Effective Length Buckling Civil Engineering (effective length and buckling).
These are source suggestions for further study.
This site does not depend on external videos or combine different codes.
Do not infer dimensions from slide scale.Open full-size image
Mechanism detailsRead a table without losing the keys
The complete mechanism is explained below.
Read each stage together with its stated conditions; playback and interaction are not required.
- Name the required property: material strength, section property, buckling strength or a moment factor.
- Keep section size, steel grade, thickness band, curve and axis as separate lookup keys.
, and require different conversion powers.
Do not use adjacent columns interchangeably.
Use bracketing rows within the same valid column.
The original page remains the source of all table values.
NOTE.docx · rendered page 1: material and capacities
Use the same mechanism: Separate stiffness, strength and ductility. Raising the yield level alone need not change the initial slope. The same elastic load can therefore give similar deformation.
Use the same mechanism: Find which plate buckles first. At fixed width, a thinner plate has a larger width-to-thickness ratio. Local buckling then becomes more restrictive.
Use the same mechanism: Internal tension and compression resist moment. A larger appropriate section modulus raises resistance at fixed strength. Local plate buckling can restrict the usable modulus.
Apply the reasoning to this section’s data and conditions
is elastic stiffness.
scales classification limits.
Read from thickness before calculating .
The note lists .
However, this is the Class 1/2 low-shear rule, not the Class 3/4 rule.
uses for the specified rolled sections and shear direction.
needs net-area/shear-lag adjustments for connected angles.
needs separate curve and slenderness lookups about both axes.
Despite the heading “Member Checks”, and alone are cross-section resistances; instability needs additional member checks.
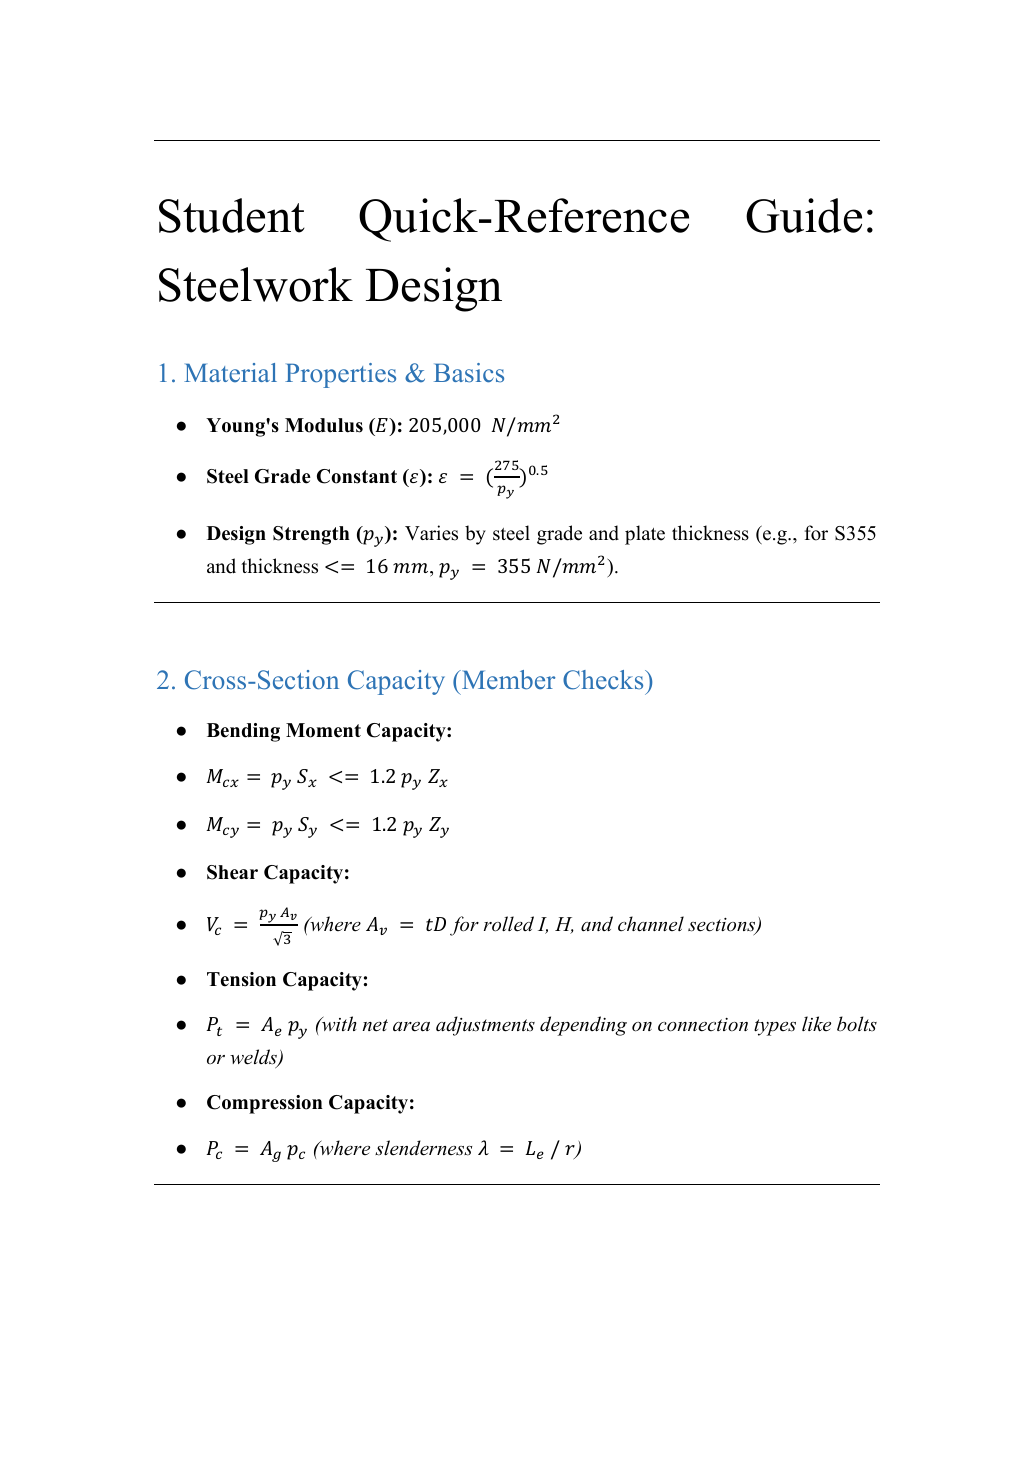
Original Word document p.1, Student Quick-Reference Guide: Steelwork Design.
Equations are embedded objects inspected as images. (1) Materials: Young's modulus ; steel-grade factor ; design strength varies with grade and plate thickness, for example S355 at thickness ,. (2) Bending: ,, subject to the classification and low-shear conditions above.
Shear: .
For hot-rolled I, H and channel sections, use .
Tension: , adjusting net area for the bolted/welded connection type.
Compression: , with slenderness ; lower-case subscript is retained from the source.Open full-size image
Prediction and explained answer.
Why can be less than ?
Answer and reasoning
accounts for member buckling and is normally below ; only describes the material/section strength.
Mechanism detailsElasticity, yielding and ductility
The complete mechanism is explained below.
Read each stage together with its stated conditions; playback and interaction are not required.
Stress is force divided by area.
Strain measures change in length relative to original length.
Before yielding, stress is approximately .
E controls the elastic slope.
Further strain includes permanent deformation.
Higher yield strength does not by itself increase E.
Strength, stiffness and ductility answer different questions.
This schematic is not a measured stress–strain curve.
NOTE.docx · rendered page 2: deflection and fasteners
Use the same mechanism: A safe beam can still sag too far. For the same UDL and stiffness, doubling span multiplies deflection by sixteen. Doubling I halves deflection.
Use the same mechanism: Count cuts through each loaded bolt. For equal sharing and unchanged bolt area, two active planes provide twice one plane’s shear resistance.
Use the same mechanism: An eccentric bracket pulls bolts differently. For unchanged geometry, doubling the applied moment doubles the modelled bolt tensions. Changing the pivot changes the distribution.
Apply the reasoning to this section’s data and conditions
For a simply supported prismatic beam with constant , central-point-load deflection is , and full-span UDL deflection is .
The Word note correctly shows for the point load.
The separate Data File has a conflicting exponent.
Select the service load and limit row, then use consistent and .
Bolt is per shear plane; choose shank or thread area from where the plane crosses.
is individual tension resistance.
is the nominal value used in the specified interaction expression.
Therefore, the “or” does not permit arbitrary selection.
Bolt bearing still requires separate connected-part bearing checks.
Weld is strength per millimetre of effective length, not total force.
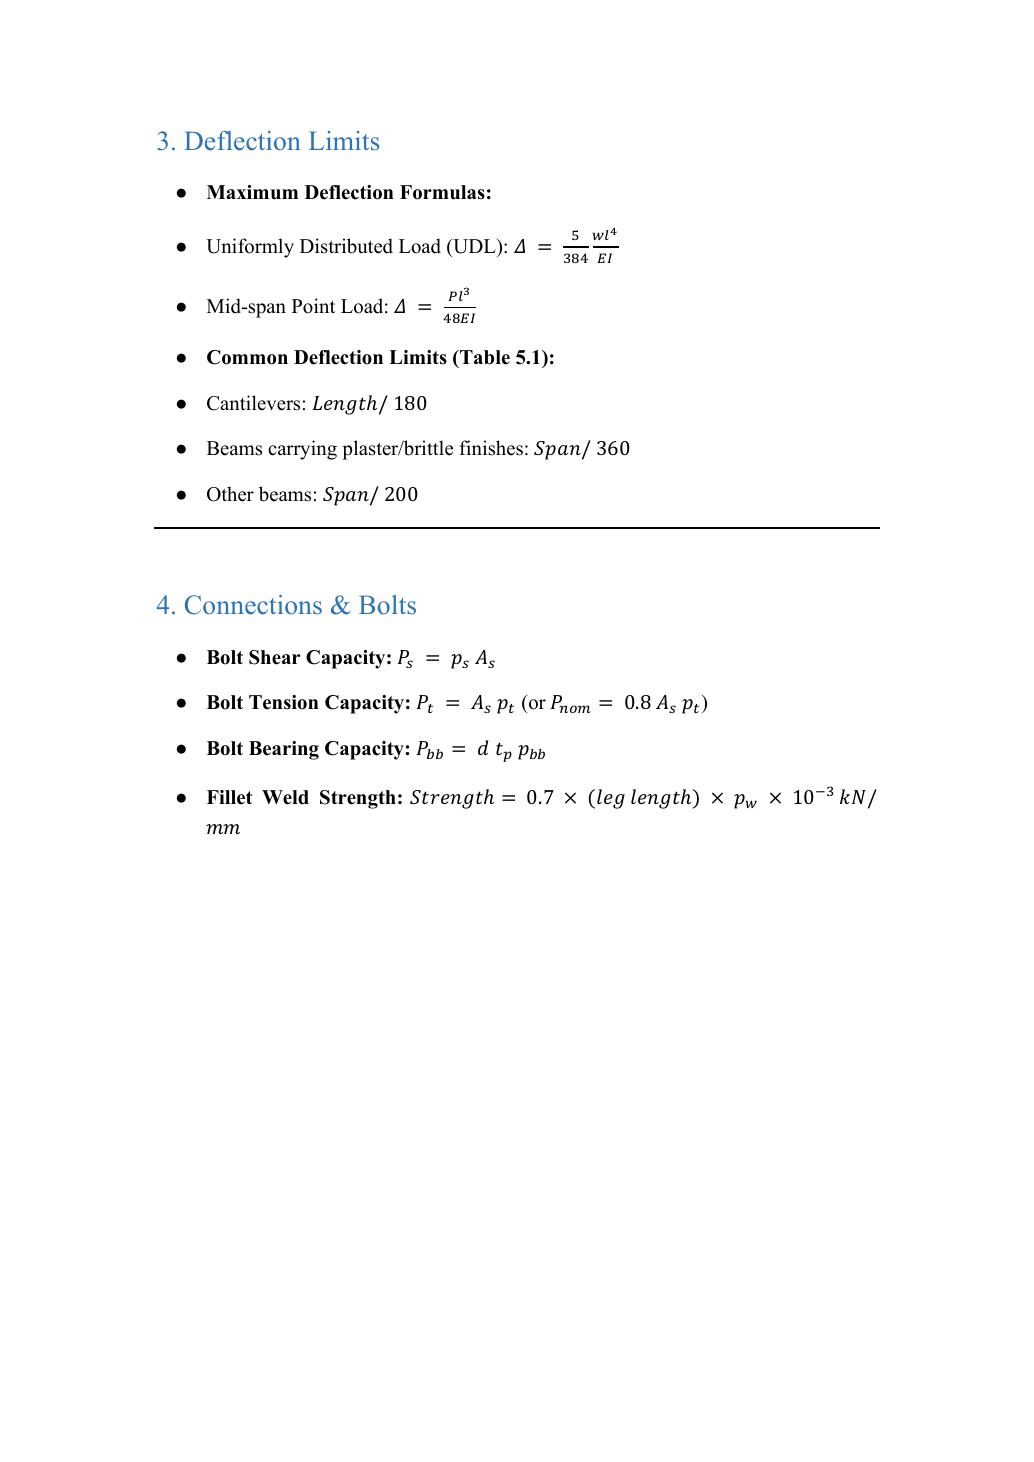
Original Word document p.2: deflection limits, connections and bolts.
The source uses lower-case span and upper-case deflection : full-span UDL ; midspan point load .
The cubic power in the point-load formula is correct.
This lesson writes it as .
Common Table 5.1 limits: cantilevers ; beams carrying plaster/brittle finishes ; other beams .
Bolt shear resistance ; tension resistance , or use the following in the specified interaction expression: ; bolt bearing .
Original fillet-weld expression ; Strength means resistance per millimetre of effective length, leg length is the weld leg entered in millimetres, and is measured in is substituted.Open full-size image
Prediction and explained answer.
A S355/Class 42 fillet has effective length.
What direct force can it carry?
Answer and reasoning
; resistance, subject to detailing and parent-metal checks.
Mechanism detailsFrom fillet leg to effective throat
The complete mechanism is explained below.
Read each stage together with its stated conditions; playback and interaction are not required.
- An equal-leg fillet between perpendicular plates has an approximately right-triangular section.
For this geometry, throat .
It is shorter than the leg.
Effective resisting area = .
With here, capacity per length is .
- Use the course end allowances, minimum size and length rules; increasing the geometric length alone does not resolve every detailing check.
Mechanism detailsSee stiffness and deflection
The complete mechanism is explained below.
Read each stage together with its stated conditions; playback and interaction are not required.
Use the specified SLS load, span and support arrangement.
The demonstrator has a full-span UDL.
The loaded beam bends.
The deformation is exaggerated so its shape can be seen.
For a simply supported full-span UDL, .
Double L with w, E and I unchanged: δ becomes 16 times as large.
The readout uses , and .
Select the finish/support-specific limit from the original table.