Tutorial 3 Q4: an end couple reverses the bending diagram
Check UB S355 against LTB for a design end moment and design point load. Supports A and C are apart; point B is from A and from C. A, B and C have lateral restraints. Normal loads; effective lengths equal actual segment lengths.
Original source: LectureNotes/Ch 3_Beam.pdf — p. 35, p. 36.
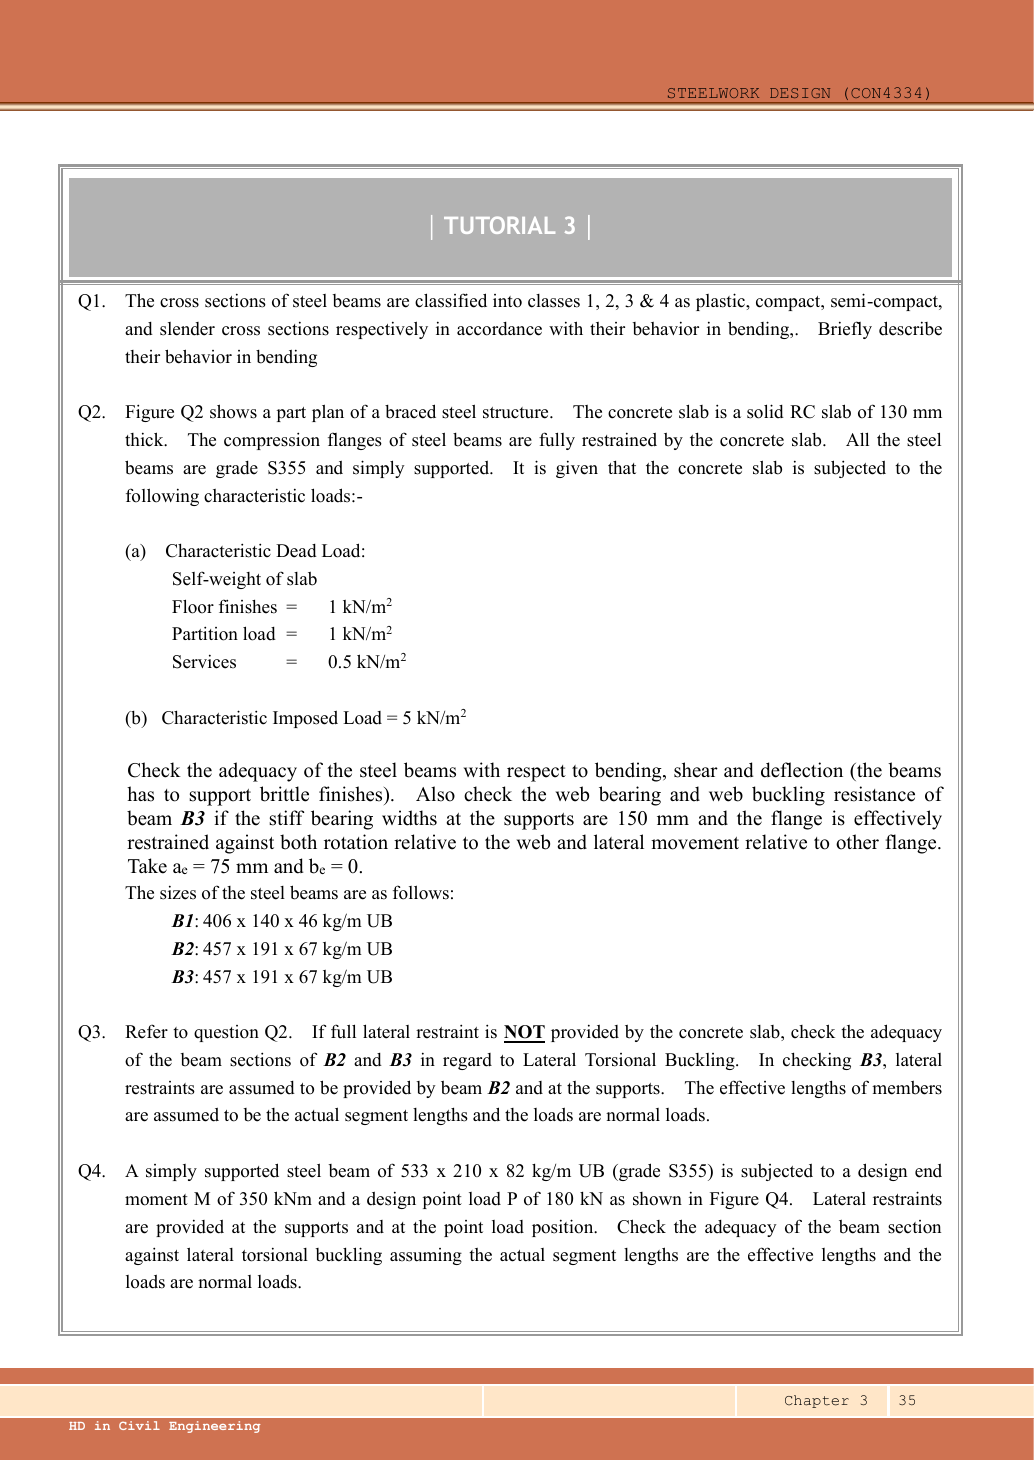
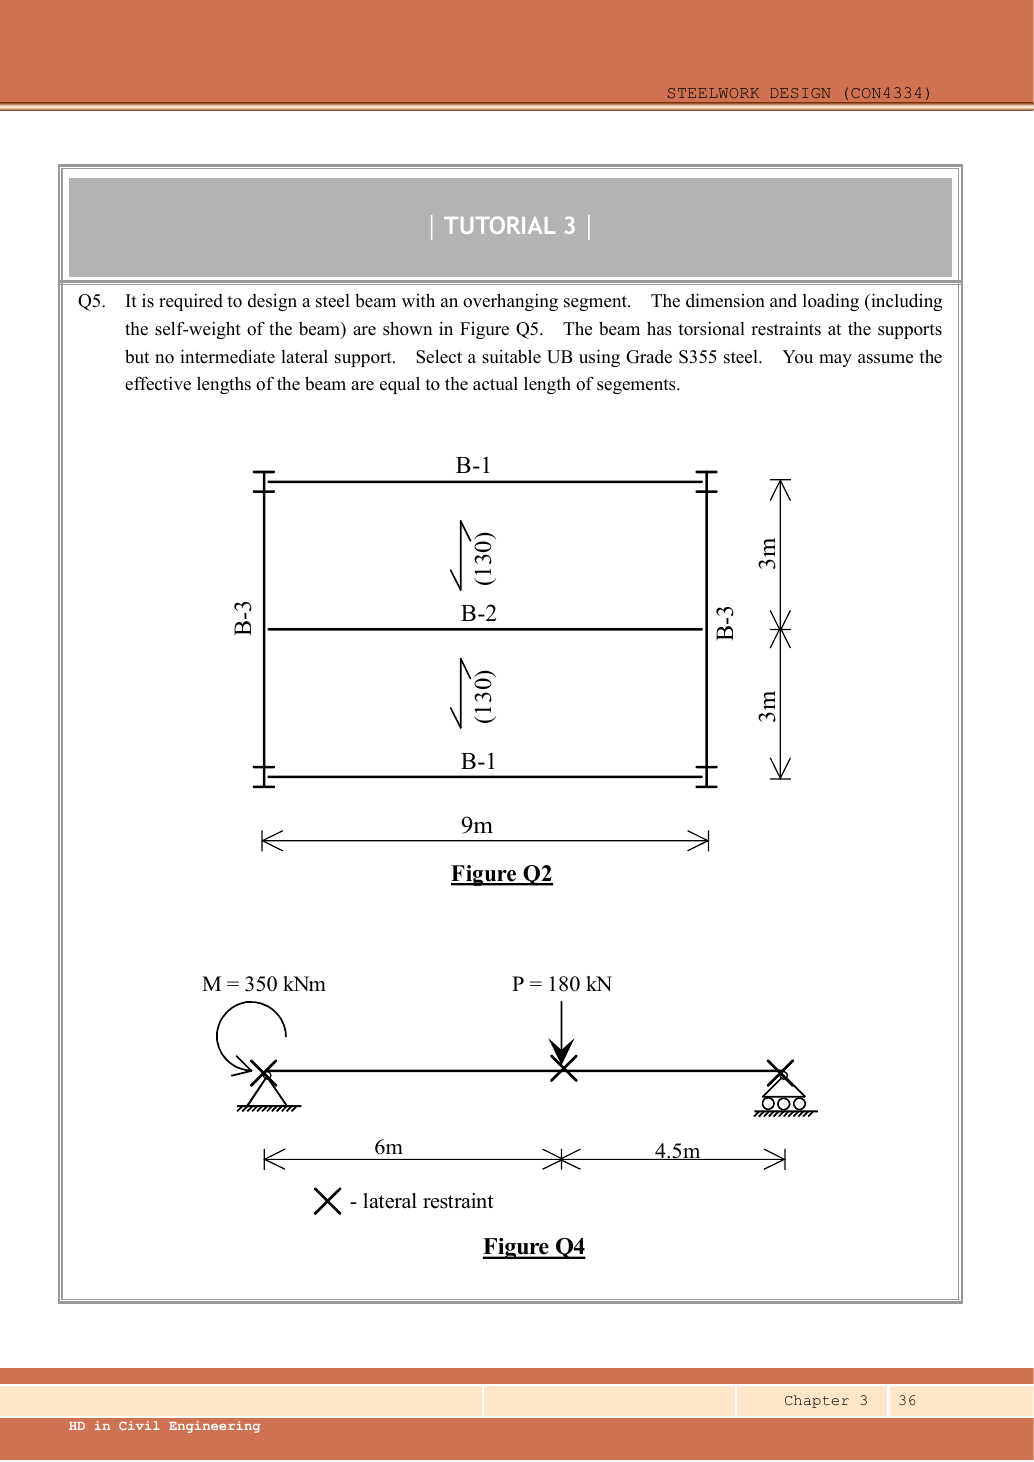
A given value comes from the question or diagram.
A lookup value comes from the named table.
A calculated value follows from the working.
Each assumption is stated where the calculation needs it.
Known information, diagram labels and unknowns
Vertical bending can trigger sideways motion
A beam has enough local bending resistance. Check whether its compression flange can move sideways and twist.
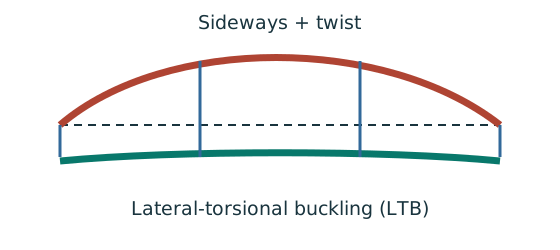
Prediction, then explanation. Adding a valid lateral restraint shortens a stability segment. It need not change the beam’s vertical reaction or moment diagram.
Identify the compressed flange and effective restraints. Calculate the specified slenderness, read buckling strength and compare resistance with the segment demand.
LE and ry use the same length unit. pb uses N/mm²; Sx uses mm³; Mb uses N·mm. mLT is dimensionless.
Scope. Use the specified section class, effective-length branch and loading condition. Load height alone does not prove a destabilizing case.
Check and takeaway. Removing a lateral restraint requires a new segment stability check. The old shorter-segment result cannot establish the longer segment’s adequacy.
Balance the isolated beam
Find the two vertical reactions before calculating internal shear or moment.
Prediction, then explanation. Move the same load toward B. Reaction B increases because the load has a larger moment arm about A.
Take moments about A. Reaction A has zero lever arm there. Then use vertical force balance to find reaction A.
P, RA and RB are forces in kN. L is support spacing and a is load position, both in m.
Scope. These expressions describe one point load on a simply supported beam. Add other loads through equilibrium; keep their actual positions.
Check and takeaway. Illustration: P = 60 kN, L = 6 m and a = 2 m give RB = 20 kN and RA = 40 kN.
Change the ruler, keep the quantity
A section table uses centimetres, but the strength calculation uses millimetres. The numbers must describe the same section.
Prediction, then explanation. Would every property increase by ten? No. The exponent determines how many factors of ten are needed.
First identify the physical quantity. Next convert each length factor. Keep force and length conversions separate when converting a moment.
Here n is the length exponent: 2 for area, 3 for section modulus and 4 for second moment of area.
Scope. Changing units changes neither the load nor the section. A conversion factor cannot repair a formula for the wrong physical quantity.
Check and takeaway. Illustration: . The fourth power belongs to the unit, not the number 2.
Apply the reasoning to this section’s data and conditions
| Input | Given/lookup |
|---|---|
| Loads | Already design values M350 kNm and P180 kN; no / refactoring. |
| Spans | Dimension chain ; B is a load/restraint point, not a support. |
| LTB lengths | AB6,000 mm; BC4,500 mm under the explicit effective-length assumption. |
Lookup: Data File pp.9–10, exact UB row.
Dimensions on p.9; properties on p.10.
is overall depth.
is the clear web depth between root fillets, not the nominal designation.
| Property | Lookup value / conversion |
|---|---|
| Dimensions | D528.3, web t 9.6, flange T13.2, root r 12.7, clear d 476.5, all |
| Local ratios | ;。 |
| Major-axis properties | ; ; . |
| LTB properties | ; ; torsional index . |
Why this method applies
Use the same mechanism: Vertical bending can trigger sideways motion. Adding a valid lateral restraint shortens a stability segment. It need not change the beam’s vertical reaction or moment diagram.
A cut reveals the internal actions
Find where the beam moment is largest. A large load arrow alone does not locate that point.
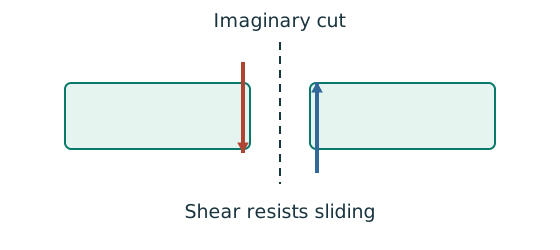
Prediction, then explanation. Under a uniform downward load, shear falls steadily. Moment reaches a stationary value where shear becomes zero.
Balance the forces on the cut piece to get V. Balance their moments about the cut to get M. Evaluate each load region separately.
x and L use m; w uses kN/m; V uses kN; M uses kN·m. These lines apply before any point load.
Scope. A point load adds a shear jump. A concentrated couple adds a moment jump. Check load points, supports and overhang roots too.
Check and takeaway. A UDL gives a sloping shear line and a curved moment line. A flat moment diagram therefore cannot represent a loaded UDL region.
Use the same mechanism: Balance the isolated beam. Move the same load toward B. Reaction B increases because the load has a larger moment arm about A.
Apply the reasoning to this section’s data and conditions
An applied couple contributes to moment equilibrium but does not add vertical force.
It produces a jump in the bending diagram at the end.
Find the signed internal end moments for each segment, then use the end-moment LTB factor.
The bending diagram is linear between the discrete loads.
1. Find support reactions with the end couple included
Use the same mechanism: Balance the isolated beam. Move the same load toward B. Reaction B increases because the load has a larger moment arm about A.
Apply the reasoning to this section’s data and conditions
Physical interpretation: Why reactions balance the loads
Think of a seesaw that must neither fall nor turn.
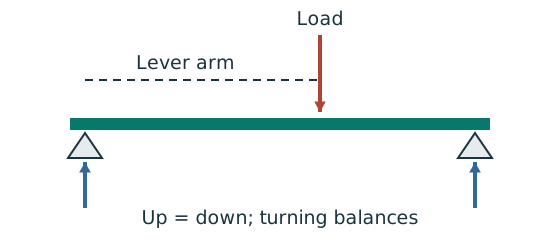
Sketch, not to scale; use the original dimensions.
- Upward and downward forces must balance.
- Take moments about a support to eliminate its reaction.
- Use perpendicular distance from the point to the force line.
Remember: A lateral restraint is not automatically a vertical support.
Treating B as a vertical support would create a different statically indeterminate problem.
Its× symbol only restrains lateral movement for the stated LTB model.
Mechanism detailsBalance reactions and moments
The complete mechanism is explained below.
Read each stage together with its stated conditions; playback and interaction are not required.
This demonstrator is a simply supported 6 m beam with a 60 kN point load.
It is not the page’s original loading diagram.
.
Moving the load towards B increases .
.
The two upward reactions must sum to P.
With the load at midspan, .
End couples, UDLs and overhangs require their own equilibrium terms.
2. Construct signed shear and bending ordinates
Use the same mechanism: A cut reveals the internal actions. Under a uniform downward load, shear falls steadily. Moment reaches a stationary value where shear becomes zero.
Apply the reasoning to this section’s data and conditions
| Location | Shear immediately right | Bending moment |
|---|---|---|
| (end-couple jump) | ||
Draw horizontal SFD segments at the listed levels, a downward jump at B, and upward at C.
Draw straight BMD lines joining at A to at B to at C.
The zero crossing at is not a physical lateral restraint.
Mechanism detailsBuild the shear and moment diagrams
The complete mechanism is explained below.
Read each stage together with its stated conditions; playback and interaction are not required.
- For the illustrative 60 kN point load on a 6 m simply supported beam, balance the reactions before making a cut.
and before the point load.
Moment grows linearly.
Shear jumps down by P.
To its right, and .
For this case, moment is continuous and returns to zero at B.
A concentrated applied couple instead creates a moment jump.
3. Check the AB segment
Use the same mechanism: Vertical bending can trigger sideways motion. Adding a valid lateral restraint shortens a stability segment. It need not change the beam’s vertical reaction or moment diagram.
Moment shape matters within one segment
Represent a nonuniform moment distribution in the applicable member-buckling equation.
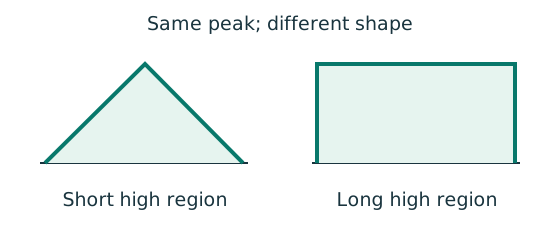
Prediction, then explanation. Two segments can have equal peak moment but different distributions. Their equivalent moment factors can therefore differ.
Evaluate moments from the true whole-beam analysis at the required positions. Apply the exact table’s weights, signs and lower bound.
mLT is an LTB factor. mx and my belong to the specified flexural checks. They are not interchangeable.
Scope. Some rules use magnitudes; others require signed ordinates. A factor does not reduce the actual moment used in a local section check.
Check and takeaway. Measure quarter points from the segment start, not automatically from the beam’s left support.
Find which plate buckles first
Before using plastic bending resistance, check whether the flange and web can sustain the required stress distribution.
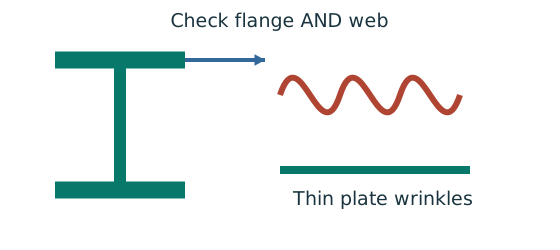
Prediction, then explanation. At fixed width, a thinner plate has a larger width-to-thickness ratio. Local buckling then becomes more restrictive.
Calculate the flange and web ratios separately. Compare each with the limits for its stress condition. The worse class governs.
py is the design yield strength in N/mm². ε is a dimensionless scale used in the supplied classification limits.
Scope. Pure bending and uniform compression use different web limits. Class 2 allows plastic resistance but not the Class 1 rotation capability.
Check and takeaway. A Class 1 web and Class 2 flange give a Class 2 section. Do not average the class numbers.
Apply the reasoning to this section’s data and conditions
Physical interpretation: A beam can escape sideways
The compressed flange can move sideways while the section twists.
Sketch, not to scale; use the original dimensions.
- Divide the beam at effective lateral restraints.
- Use each segment’s effective length to obtain its buckling resistance.
- Compare that resistance with the segment’s equivalent moment demand.
Remember: A section bending check alone does not check lateral-torsional buckling.
AB has reversing moment: maximum magnitude occurs at A.
The smaller signed end ordinate is opposite to.
Therefore, the ratio is negative.
Normal-load effective length is the given segment length.
All quantities in and λᴸᵀ are dimensionless.
This Class 1 section has .
Table 8.3a, Data File p.5, pᵧ355 column:
Mechanism detailsA beam bends sideways and twists
The complete mechanism is explained below.
Read each stage together with its stated conditions; playback and interaction are not required.
- For the illustrated sagging beam the top flange is compressed.
- The unrestrained compression flange can move sideways while the complete cross-section twists.
Only effective restraints divide the member into unbraced segments.
They do not automatically add vertical supports.
Use the segment effective length, section properties and matching moment factor.
This is an exaggerated mode shape, not a calculated displacement.
4. Check the BC segment and conclude
Use the same mechanism: Vertical bending can trigger sideways motion. Adding a valid lateral restraint shortens a stability segment. It need not change the beam’s vertical reaction or moment diagram.
Use the same mechanism: Moment shape matters within one segment. Two segments can have equal peak moment but different distributions. Their equivalent moment factors can therefore differ.
Move between two known values
The required slenderness lies between two table rows. Estimate the strength on the straight segment between those rows.
Prediction, then explanation. If the second strength is lower, moving toward that row must reduce the interpolated strength.
Subtract the lower input to find distance travelled. Divide by the input interval. Multiply that fraction by the output change.
x is the required input. The two known pairs are (x₀, y₀) and (x₁, y₁). f has no unit.
Scope. Use one table, curve and strength column. This interpolation does not permit extrapolation or inventing an intermediate steel section.
Check and takeaway. Illustration: between strengths 200 and 180, a fraction of 0.4 gives 192 N/mm². The result lies between both endpoints.
Apply the reasoning to this section’s data and conditions
Physical interpretation: Which length belongs in the calculation?
A sideways tie can shorten the buckling region without shortening the beam’s vertical span.
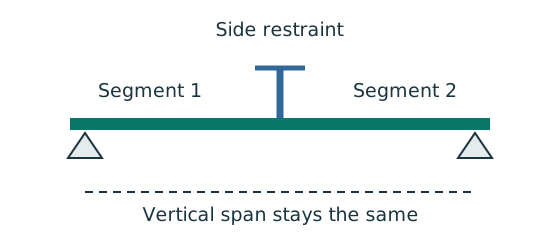
Sketch, not to scale; use the original dimensions.
- Separate vertical-support spacing from lateral-restraint spacing.
- Apply the course rule for the actual end restraint and loading.
- Keep the original vertical load analysis unless its supports change.
Remember: Restraints in one direction may not restrain the other direction.
Normal-load effective length is the given segment length.
All quantities in and λᴸᵀ are dimensionless.
This Class 1 section has .
Table 8.3a, Data File p.5, pᵧ355 column:
Both required segment LTB checks pass.
As a scope check, the peak shear and largest moment magnitude also satisfy the local section checks:
A numerical support bearing check or imposed-load deflection cannot be derived from this source because bearing dimensions and characteristic load components are not supplied.
They are not part of Q4’s stated LTB-only request.
Mechanism detailsA beam bends sideways and twists
The complete mechanism is explained below.
Read each stage together with its stated conditions; playback and interaction are not required.
- For the illustrated sagging beam the top flange is compressed.
- The unrestrained compression flange can move sideways while the complete cross-section twists.
Only effective restraints divide the member into unbraced segments.
They do not automatically add vertical supports.
Use the segment effective length, section properties and matching moment factor.
This is an exaggerated mode shape, not a calculated displacement.
Lecturer's answer
| Item | Lecturer's value |
|---|---|
| Self-weight (factored) | |
| Support shear / moments | , , |
| Section resistance | , |
| Segment AB (6 m) | , ; , |
| Segment BC (4.5 m) | , ; , |
Conclusion: Both segments pass the LTB check (kN·m).
Source: Lecturer's tutorial solution, Ch 3, pp. 9–12.
Result and concise exam wording
Use the same mechanism: Vertical bending can trigger sideways motion. Adding a valid lateral restraint shortens a stability segment. It need not change the beam’s vertical reaction or moment diagram.
Apply the reasoning to this section’s data and conditions
, .
, , .
AB: , , ; demand .
BC: , , ; demand .
S355 UB passes LTB in both segments.
Lecturer's method (self-weight 1.2 kN/m included): , ; segment BC demand . Same conclusion.
Misconceptions and checks
Use the same mechanism: A cut reveals the internal actions. Under a uniform downward load, shear falls steadily. Moment reaches a stationary value where shear becomes zero.
Use the same mechanism: Balance the isolated beam. Move the same load toward B. Reaction B increases because the load has a larger moment arm about A.
Apply the reasoning to this section’s data and conditions
- Do not factor already-design loads again.
- Do not omit the couple in support equilibrium.
- Do not use absolute-value end moments to form a same-side when the BMD reverses.
- Do not insert a restraint at the moment-zero point.
How the method transfers to a new variant
Use the same mechanism: Find which plate buckles first. At fixed width, a thinner plate has a larger width-to-thickness ratio. Local buckling then becomes more restrictive.
Use the same mechanism: Moment shape matters within one segment. Two segments can have equal peak moment but different distributions. Their equivalent moment factors can therefore differ.
A safe beam can still sag too far
Check whether the beam displacement exceeds the permitted service limit.
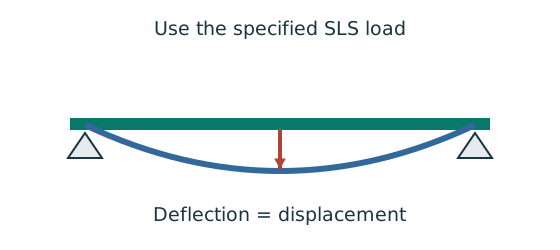
Prediction, then explanation. For the same UDL and stiffness, doubling span multiplies deflection by sixteen. Doubling I halves deflection.
Load bends each beam segment. The curvature accumulates along the span. Material stiffness E and geometric stiffness I resist that deformation.
Use w in N/mm, L in mm, E in N/mm² and I in mm⁴. The resulting midspan deflection is in mm.
Scope. The formula assumes a prismatic, simply supported, linear-elastic beam with full-span UDL. Use the stated service load and deflection limit.
Check and takeaway. A higher yield grade does not automatically increase E. Passing a strength check therefore does not prove acceptable deflection.
Apply the reasoning to this section’s data and conditions
- Name supports and load positions using the source dimension chains.
- Choose a sign convention; include applied couples in moment equilibrium.
- Find reactions, then piecewise shear and bending moment.
- Locate extrema where shear is zero and at load/support discontinuities.
- Divide only at actual effective lateral restraints; classify and read the exact section row.
- Calculate segment moment factors and LTB resistance, retaining UDL curvature where present.
- Check shear, local bending and serviceability; state any missing bearing/detail inputs.
Prediction with explained answer
Use the same mechanism: Moment shape matters within one segment. Two segments can have equal peak moment but different distributions. Their equivalent moment factors can therefore differ.
Use the same mechanism: Vertical bending can trigger sideways motion. Adding a valid lateral restraint shortens a stability segment. It need not change the beam’s vertical reaction or moment diagram.
Use the same mechanism: A cut reveals the internal actions. Under a uniform downward load, shear falls steadily. Moment reaches a stationary value where shear becomes zero.
Apply the reasoning to this section’s data and conditions
Prediction and explained answer.
Invented variant: remove the lateral restraint at B but keep the same vertical loads.
Can the two segment pass results still be used?
Answer and reasoning
No. The unrestrained length becomes .
Recalculate the whole-span quarter-point BMD factor and with .
The vertical reactions and BMD are unchanged.
The stability resistance changes because B is no longer a restraint.