Tutorial 2 Q1: a bolted splice with a layout problem
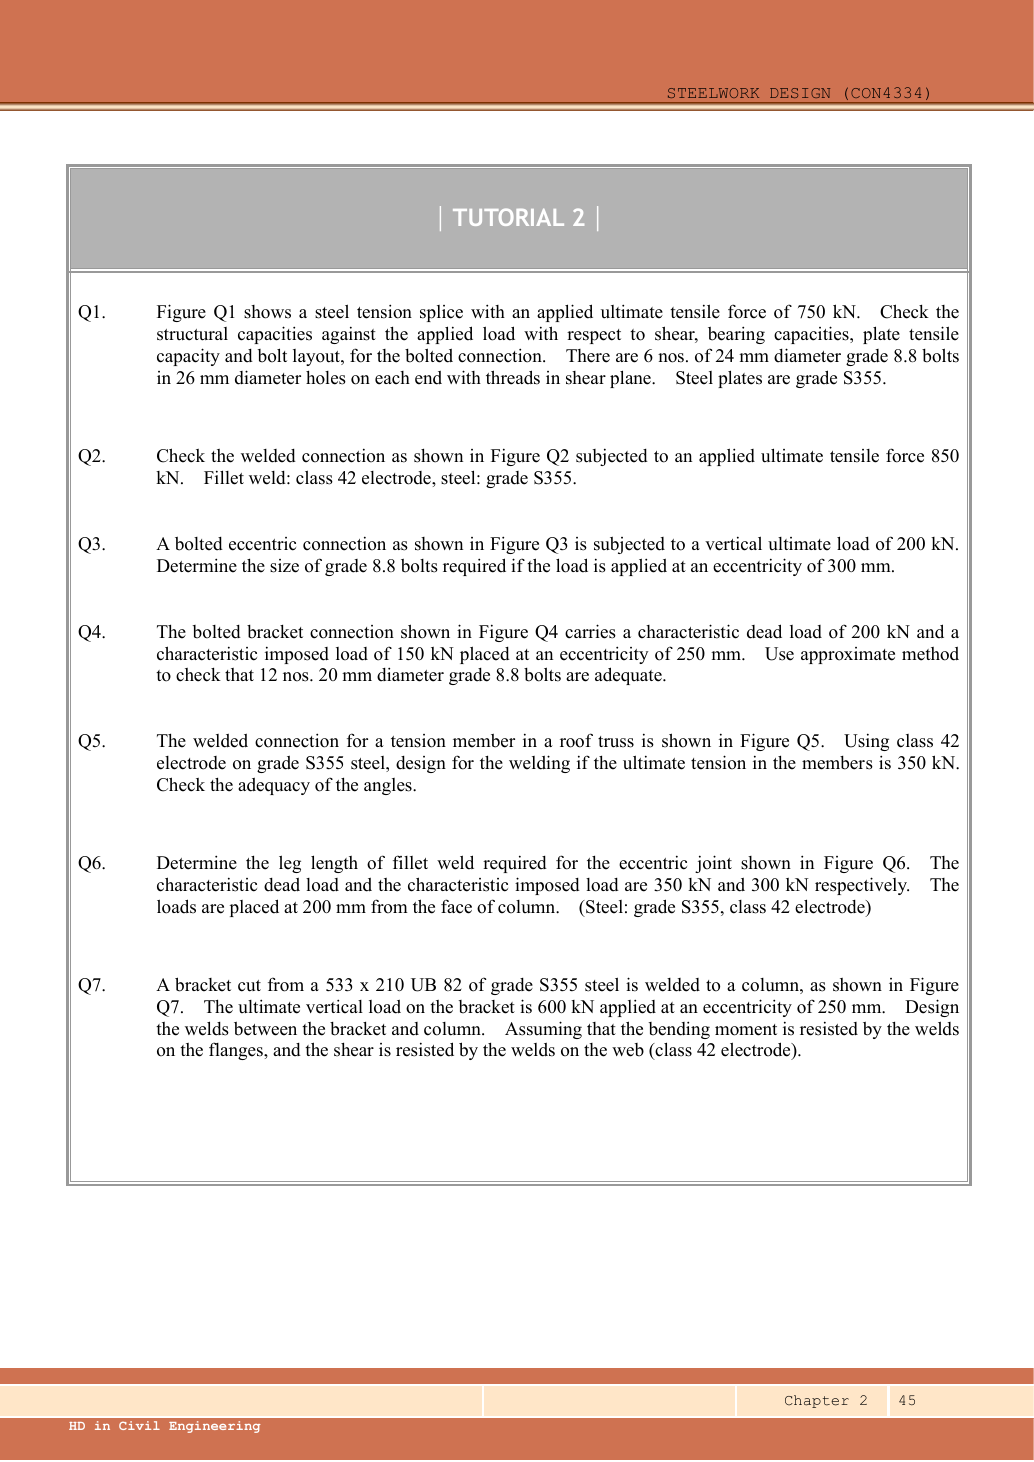
Check the ultimate tension splice for bolt shear, bolt/plate bearing, plate tension and bolt layout. On each side of the splice are six Grade 8.8 M24 bolts in holes, with threads in the shear planes. Plates are S355.
Original source: LectureNotes/Ch 2_Connection.pdf — p. 45, p. 46.
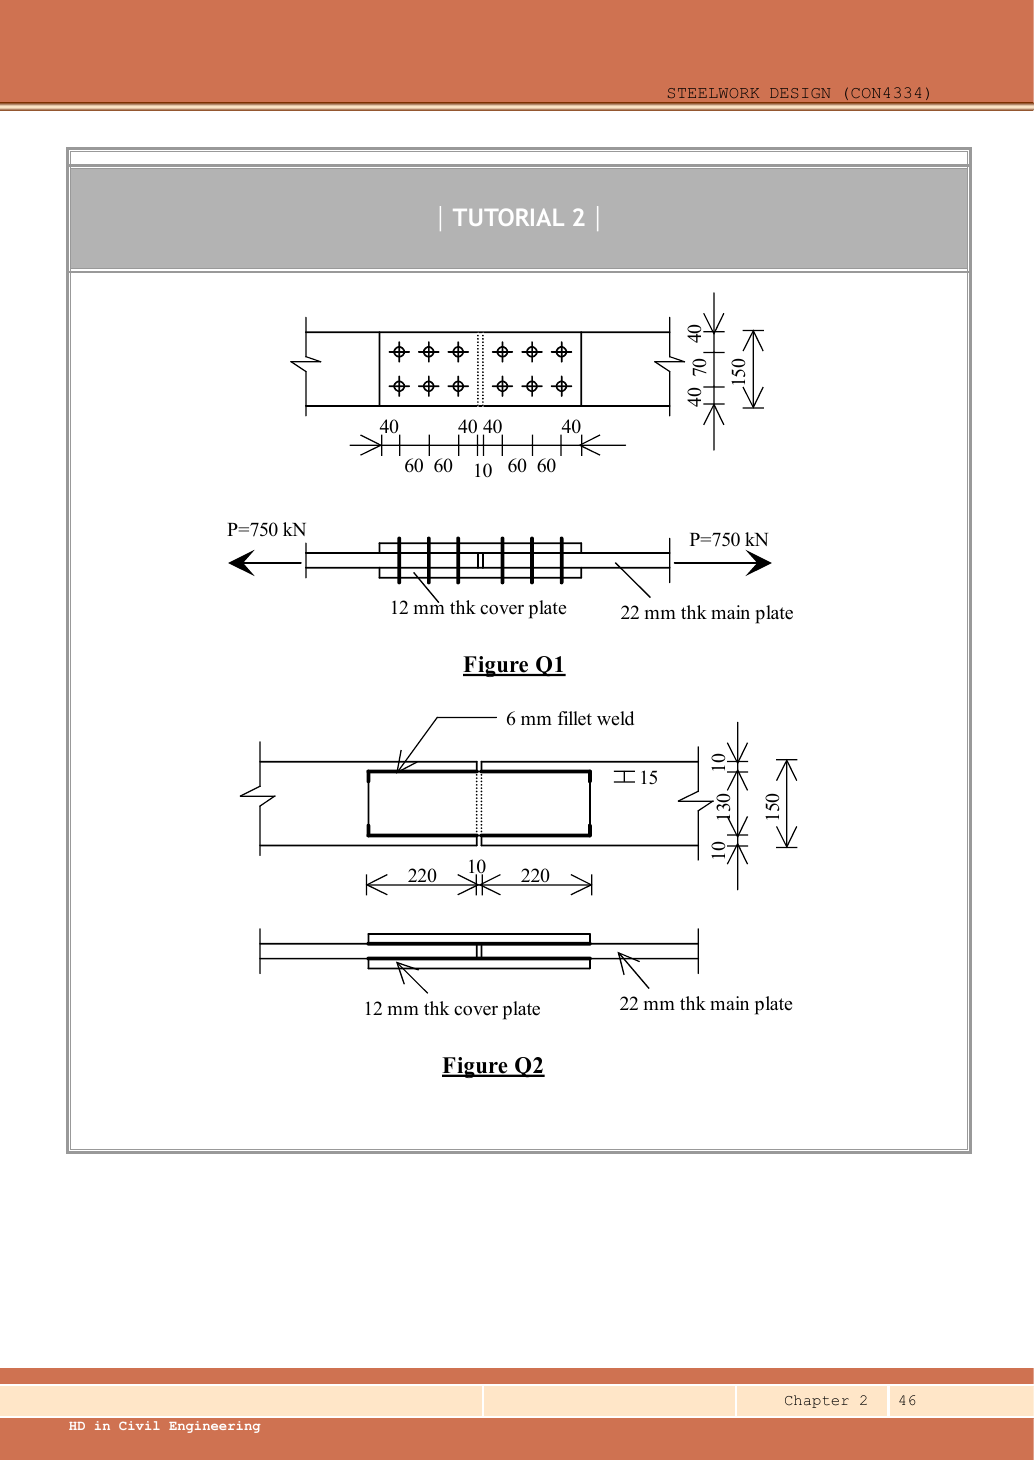
A given value comes from the question or diagram.
A lookup value comes from the named table.
A calculated value follows from the working.
Each assumption is stated where the calculation needs it.
Known information, diagram labels and unknowns
Count cuts through each loaded bolt
Find how many shear planes transfer the force through one side of the connection.
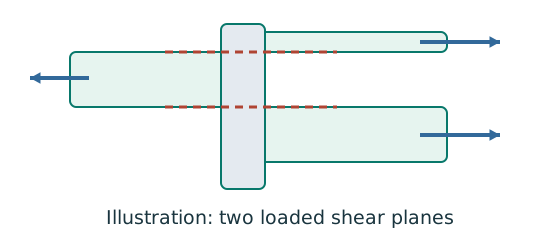
Prediction, then explanation. For equal sharing and unchanged bolt area, two active planes provide twice one plane’s shear resistance.
Select the area at the actual shear plane. Multiply by bolt shear strength. Count only the bolts and planes in the same transfer stage.
ps is bolt shear strength in N/mm²; As is the appropriate area in mm². nb counts bolts; ns counts equally loaded shear planes.
Scope. Use the thread area when threads cross the plane as required. Check bearing, plate failure and detailing separately.
Check and takeaway. Both halves of a butt splice carry the full transmitted force in sequence. Counting both halves together would double the apparent resistance.
Test every possible fracture cut
Find the remaining steel area across a candidate tension-failure path.
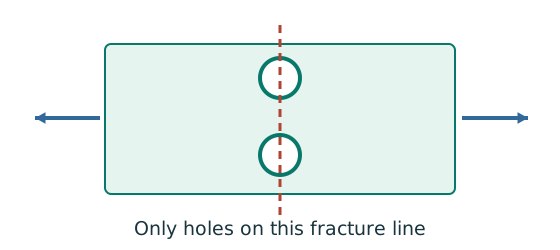
Prediction, then explanation. At fixed plate size, larger holes reduce the straight-path net area. A diagonal path needs its own stagger correction.
Subtract the hole widths crossed by the path, then multiply by thickness. Compare all plausible paths using the applicable course rule.
An is net area in mm²; b is plate width; d₀ is hole diameter; t is thickness, all in mm. n counts holes on this straight path.
Scope. This expression is for a straight cut. Effective area can require further shear-lag rules. Gross, net and effective areas must remain distinct.
Check and takeaway. Use the hole diameter, not the bolt diameter, when removing missing steel. The plate contains a hole, not solid steel around the bolt shank.
A table value has conditions
Find a design property without mixing a row, column or standard from a different case.
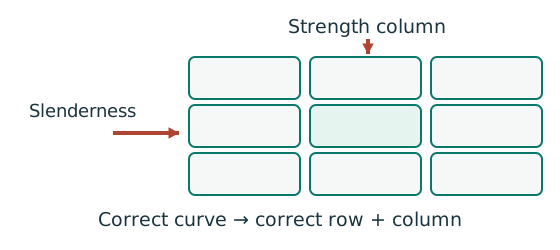
Prediction, then explanation. A different flange thickness can select a lower design strength even when the steel grade name remains unchanged.
Match the complete section designation. Read the relevant axis and unit. For strength tables, select material, thickness and curve before interpolating.
Given values come from the question. Lookup values come from a named table. Assumed values require an explicit condition.
Scope. A missing row or omitted restraint cannot be recovered from a schematic’s scale. Keep the result conditional when required data are absent.
Check and takeaway. Record the table, row, column and unit beside the substitution. That makes a later check possible.
Apply the reasoning to this section’s data and conditions
| Input | Origin and role |
|---|---|
| Force | Given ultimate. Each half-splice transfers all . |
| Bolts | Given per half, M24, hole 26, Grade 8.8, threads in shear planes. |
| Plates | Main . Each cover . Two covers share the tension in parallel. |
| Geometry closure | Across the plate width, ; between the three bolt columns in each half are two longitudinal spacings of . |
| Lookups | M24: ; , , , , ; , . Main plate ; cover plate . |
Why this method applies
Use the same mechanism: Count cuts through each loaded bolt. For equal sharing and unchanged bolt area, two active planes provide twice one plane’s shear resistance.
Apply the reasoning to this section’s data and conditions
The two splice halves are in series, so do not add twelve bolts’ capacities against one force.
Within a half, six bolts share the concentric force equally.
The two covers create two shear interfaces.
Check resistance first, then check the actual spacing/edge rules: adequate strength does not waive an invalid layout.
1. Bolt shear
Use the same mechanism: Count cuts through each loaded bolt. For equal sharing and unchanged bolt area, two active planes provide twice one plane’s shear resistance.
Apply the reasoning to this section’s data and conditions
Physical interpretation: Count where the bolt can be sheared
The plate interfaces are the places trying to cut across the bolt.
Sketch, not to scale; use the original dimensions.
- Count actual loaded shear planes, not merely visible plates.
- Choose shank or threaded area for the plane concerned.
- Compare group resistance with the force that group transfers.
Remember: Bolts on opposite sides of a splice do not all act in parallel.
Use , not , because the question explicitly places threads in the shear planes.
Mechanism detailsCount the bolt shear planes
The complete mechanism is explained below.
Read each stage together with its stated conditions; playback and interaction are not required.
- Load must cross an interface between the connected plates.
- A lap joint gives one shear plane through a bolt.
A symmetric double-cover joint may provide two shear planes.
Count load-transfer interfaces, not just visible plates.
Use the source’s area and shear strength.
Then check bearing, plate resistance and detailing separately.
2. Bolt bearing
Follow contact pressure into the plate
The bolt may survive shear while the connected plate deforms or tears near the hole.
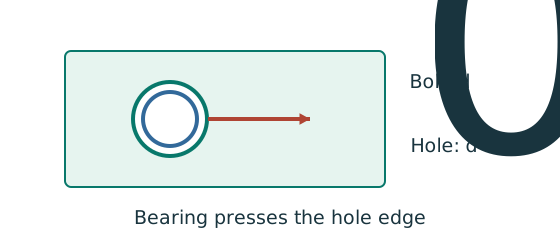
Prediction, then explanation. At fixed geometry and strength, a thicker plate raises plate resistance. Moving a hole too near the end can still govern.
Calculate every bound required by the supplied rule. The smallest applicable bound limits the connection at that layer.
pbs is the applicable bearing strength in N/mm²; d is nominal bolt diameter in mm; t is plate thickness in mm.
Scope. This diameter term alone is not the complete check. End-distance and clear-ligament limits, bolt bearing and each connected layer also matter.
Check and takeaway. Two covers and one main plate do not necessarily have the same thickness or strength. Compare the actual force share in each layer.
Apply the reasoning to this section’s data and conditions
Alternatively each cover takes per bolt and has resistance.
The main plate takes per bolt.
It governs the combined comparison.
Mechanism detailsBearing and the remaining ligament
The complete mechanism is explained below.
Read each stage together with its stated conditions; playback and interaction are not required.
- Force transfers through contact between bolt and connected plate.
The plate around the hole carries bearing stress.
Bolt bearing and plate bearing are separate checks.
A short ligament can tear out towards the end.
The direction of force determines the relevant edge.
- Evaluate every specified bearing and ligament bound for each layer and retain the smallest applicable resistance.
3. Connected-plate bearing and ligament bounds
Use the same mechanism: Follow contact pressure into the plate. At fixed geometry and strength, a thicker plate raises plate resistance. Moving a hole too near the end can still govern.
Apply the reasoning to this section’s data and conditions
Physical interpretation: The bolt can crush or tear the plate
A strong bolt can still push through a weak hole edge.
Sketch, not to scale; use the original dimensions.
- Check the bolt and each connected plate’s bearing bounds.
- Use nominal bolt diameter for bearing; hole size for removed material.
- The smallest applicable resistance controls.
Remember: A short end distance may govern even when bolt shear passes.
Using the minimum end distance for the group is conservative for inner columns.
For each cover the corresponding minimum is against ; two covers give per bolt, still above the main plate’s 242.
Mechanism detailsBearing and the remaining ligament
The complete mechanism is explained below.
Read each stage together with its stated conditions; playback and interaction are not required.
- Force transfers through contact between bolt and connected plate.
The plate around the hole carries bearing stress.
Bolt bearing and plate bearing are separate checks.
A short ligament can tear out towards the end.
The direction of force determines the relevant edge.
- Evaluate every specified bearing and ligament bound for each layer and retain the smallest applicable resistance.
4. Main and cover net tension sections
Use the same mechanism: Test every possible fracture cut. At fixed plate size, larger holes reduce the straight-path net area. A diagonal path needs its own stagger correction.
Apply the reasoning to this section’s data and conditions
Physical interpretation: Why holes reduce tension resistance
The pull must squeeze through the steel left beside the holes.
Sketch, not to scale; use the original dimensions.
- Choose a possible fracture line across the member.
- Subtract the holes crossed by that line using hole diameter.
- Apply the course effective-area rule and its gross-area limit.
Remember: Do not subtract every hole anywhere in the connection.
A straight section across the width crosses two holes, not six: the other bolt columns lie further along the load direction.
For plate tension use , for the supplied S355 method.
The main net-section tension resistance is the lowest of these requested strength checks.
Mechanism detailsSubtract holes on the failure path
The complete mechanism is explained below.
Read each stage together with its stated conditions; playback and interaction are not required.
- Gross area counts the complete plate width and thickness.
- The highlighted transverse path passes through the bolt holes.
For the straight illustrative path, .
Staggered paths require their specified correction.
Net area is not always effective area.
Include the course’s strength ratio or shear-lag rule when applicable.
5. Layout: a strength pass is not a complete pass
A bolt diameter is not a hole diameter
Check that bolts fit and leave enough material between holes and plate boundaries.
Prediction, then explanation. At fixed pitch, a larger hole leaves a shorter clear ligament. Increasing bolt diameter may also increase minimum edge-distance requirements.
Measure pitch along the bolt line and gauge across lines. Distinguish end distance along the load from edge distance across it.
lc is clear ligament between holes; p is centre-to-centre pitch; d₀ is hole diameter. All use mm.
Scope. Apply the supplied edge-preparation and minimum/maximum spacing rules. Passing a bearing calculation does not prove the layout passes.
Check and takeaway. For pitch 60 mm and hole diameter 22 mm, the ligament is 38 mm. Using a 20 mm bolt diameter here gives the wrong ligament.
Use the same mechanism: A table value has conditions. A different flange thickness can select a lower design strength even when the steel grade name remains unchanged.
Apply the reasoning to this section’s data and conditions
Table 9.3, M24 row gives minimum end/edge for sheared/hand-flame-cut edges and for rolled/gas-cut edges.
The dimensions pass the latter but fail the former.
Edge preparation is not specified.
Therefore, that conclusion is conditional.
The gauge is below the normal rule regardless of this edge choice.
The source says “normally”.
No justified exception is supplied, so do not approve it as meeting the ordinary course detailing requirement.
A clearly labelled redesign would use at least gauge and compatible edges.
To keep sheared edges on both sides requires width.
Alternatively, a width with gauge leaves edges and therefore requires a permitted edge type with minimum.
Recheck changed geometry; these are proposed modifications, not dimensions of the original.
Mechanism detailsBolt centres, holes and edges
The complete mechanism is explained below.
Read each stage together with its stated conditions; playback and interaction are not required.
Hole diameter d₀ differs from nominal bolt diameter d.
Net-section deductions use the specified hole.
- Pitch runs along the load direction; gauge measures spacing across rows.
End and edge distances start at the hole centre.
The remaining ligament starts at the hole boundary.
- Minimum spacing, edge distances, grip and plate thickness come from the specified rules, not this scaled illustration.
Lecturer's answer
| Item | Lecturer's value |
|---|---|
| Bolt shear, double, on threads | |
| Bolt bearing | |
| Plate bearing (end distance governs) | |
| Bolts needed | → use 6 M24 bolts |
| Main plate tension | , |
Conclusion: The joint is adequate: plate bearing governs each bolt (242 kN) and the main plate carries 818 kN.
Source: Lecturer's tutorial solution, Ch 2, pp. 1–2.
Result and concise exam wording
Use the same mechanism: Count cuts through each loaded bolt. For equal sharing and unchanged bolt area, two active planes provide twice one plane’s shear resistance.
Use the same mechanism: Follow contact pressure into the plate. At fixed geometry and strength, a thicker plate raises plate resistance. Moving a hole too near the end can still govern.
Use the same mechanism: Test every possible fracture cut. At fixed plate size, larger holes reduce the straight-path net area. A diagonal path needs its own stagger correction.
Apply the reasoning to this section’s data and conditions
per half-splice.
Six M24 bolts in double shear: shear ; bolt bearing ; plate bearing .
Main effective tension ; cover pair .
All requested strength checks pass.
Layout: pitch passes, but gauge .
End/side passes M24 rolled/gas-cut minimum 30 but fails sheared minimum 42.
Given detail is not established as fully compliant; revise/justify layout.
Misconceptions and checks
Use the same mechanism: Test every possible fracture cut. At fixed plate size, larger holes reduce the straight-path net area. A diagonal path needs its own stagger correction.
Apply the reasoning to this section’s data and conditions
- Do not count the two halves as parallel resistance.
- Do not remove six holes from one transverse net section.
- Do not use for the main plate.
- Do not round down to 70 for a minimum spacing.
How the method transfers to a new variant
Add force components at each bolt
An in-plane load acts away from the bolt-group centre. Find the largest resultant bolt force.
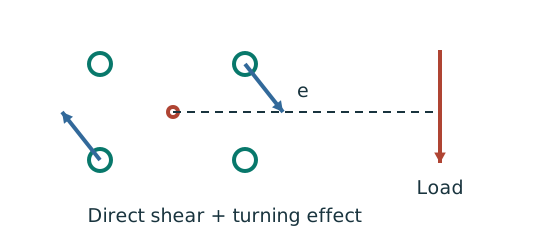
Prediction, then explanation. At fixed force, increasing eccentricity increases the moment component. Its direction differs between bolts.
Locate the bolt-group centre and coordinates. Add horizontal components together and vertical components together before finding each resultant.
e, xi and yi use mm; J uses mm². With M in kN·mm, each moment-force component is in kN.
Scope. These expressions use the stated elastic, equal-bolt in-plane model. Out-of-plane tension and prying require another model.
Check and takeaway. Do not add force magnitudes before resolving directions. Two perpendicular forces of 3 and 4 kN give 5 kN, not 7 kN.
An eccentric bracket pulls bolts differently
An out-of-plane moment rotates the bracket about the stated pivot. Determine the bolt tension pattern.
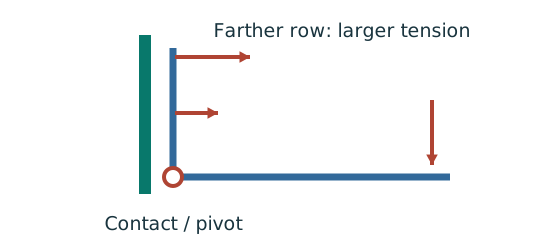
Prediction, then explanation. For unchanged geometry, doubling the applied moment doubles the modelled bolt tensions. Changing the pivot changes the distribution.
Use compatibility to relate tension to distance. Moment equilibrium then determines the proportionality factor.
M is moment in kN·mm. yi is distance from the stated pivot in mm. Ft,i is tension in kN.
Scope. Apply only to the stated active bolt set and pivot model. Flexible plates can create prying; use the supplied assumptions and resistance definitions.
Check and takeaway. A bolt’s lever arm is measured from the pivot used in the equation. It is not automatically its distance from the group centroid.
The weld resists through its throat
Convert a visible fillet leg into resistance per effective length.
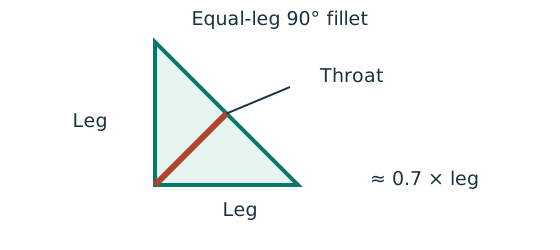
Prediction, then explanation. At fixed weld strength, doubling the leg doubles throat and line resistance in this model. Detailing limits can prevent that choice.
For the course right-angle equal-leg fillet, take throat as 0.7 times leg. Multiply throat area per unit length by weld strength.
s and a are leg and throat in mm. pw is weld strength in N/mm². qcap is resistance in kN/mm.
Scope. Use effective length, the correct steel/electrode strength and permitted leg limits. Full-penetration butt welds use a different model.
Check and takeaway. Illustration: a 6 mm leg at 250 N/mm² gives .
Apply the reasoning to this section’s data and conditions
- Identify the force path and whether the joint is concentric, in-plane eccentric or out-of-plane eccentric.
Read all dimensions from the relevant view.
Do not measure drawing scale.
- Distinguish characteristic from ultimate loads and factor only when needed.
- Calculate demand per fastener/weld with the appropriate equilibrium model.
- Check all requested resistances and detailing conditions separately.
- State whether the given detail passes, fails, or remains conditional on missing data.
Prediction with explained answer
Use the same mechanism: Follow contact pressure into the plate. At fixed geometry and strength, a thicker plate raises plate resistance. Moving a hole too near the end can still govern.
Use the same mechanism: Test every possible fracture cut. At fixed plate size, larger holes reduce the straight-path net area. A diagonal path needs its own stagger correction.
Keep load categories separate
A floor carries permanent material and changing occupancy loads. Find the design load for the stated check.
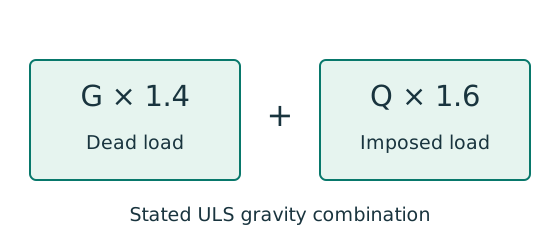
Prediction, then explanation. Increasing imposed load changes its own term. It does not change the dead-load factor or the steel stiffness.
First convert mass to weight where required. Next collect G and Q in compatible units. Apply the combination specified by the course problem.
G is characteristic dead load; Q is characteristic imposed load. Wu is the design load for this course gravity combination.
Scope. This combination is not universal. Use the specified service load for deflection and the stated factors for other standards or cases.
Check and takeaway. Illustration: G = 10 kN and Q = 5 kN give 22 kN. Factoring their sum by one guessed factor loses the distinction.
Apply the reasoning to this section’s data and conditions
Prediction and explained answer.
Invented variant: ultimate load increases to with the same geometry.
Which of the calculated strength checks fails first?
Answer and reasoning
Main-plate effective tension is , so it fails at .
The cover pair 918.456 and bolt/bearing group resistances still exceed 825.
The original layout concerns also remain.