Connection example 6: balance two weld lengths about the load line
← Read this lecture example beside its chapter concepts
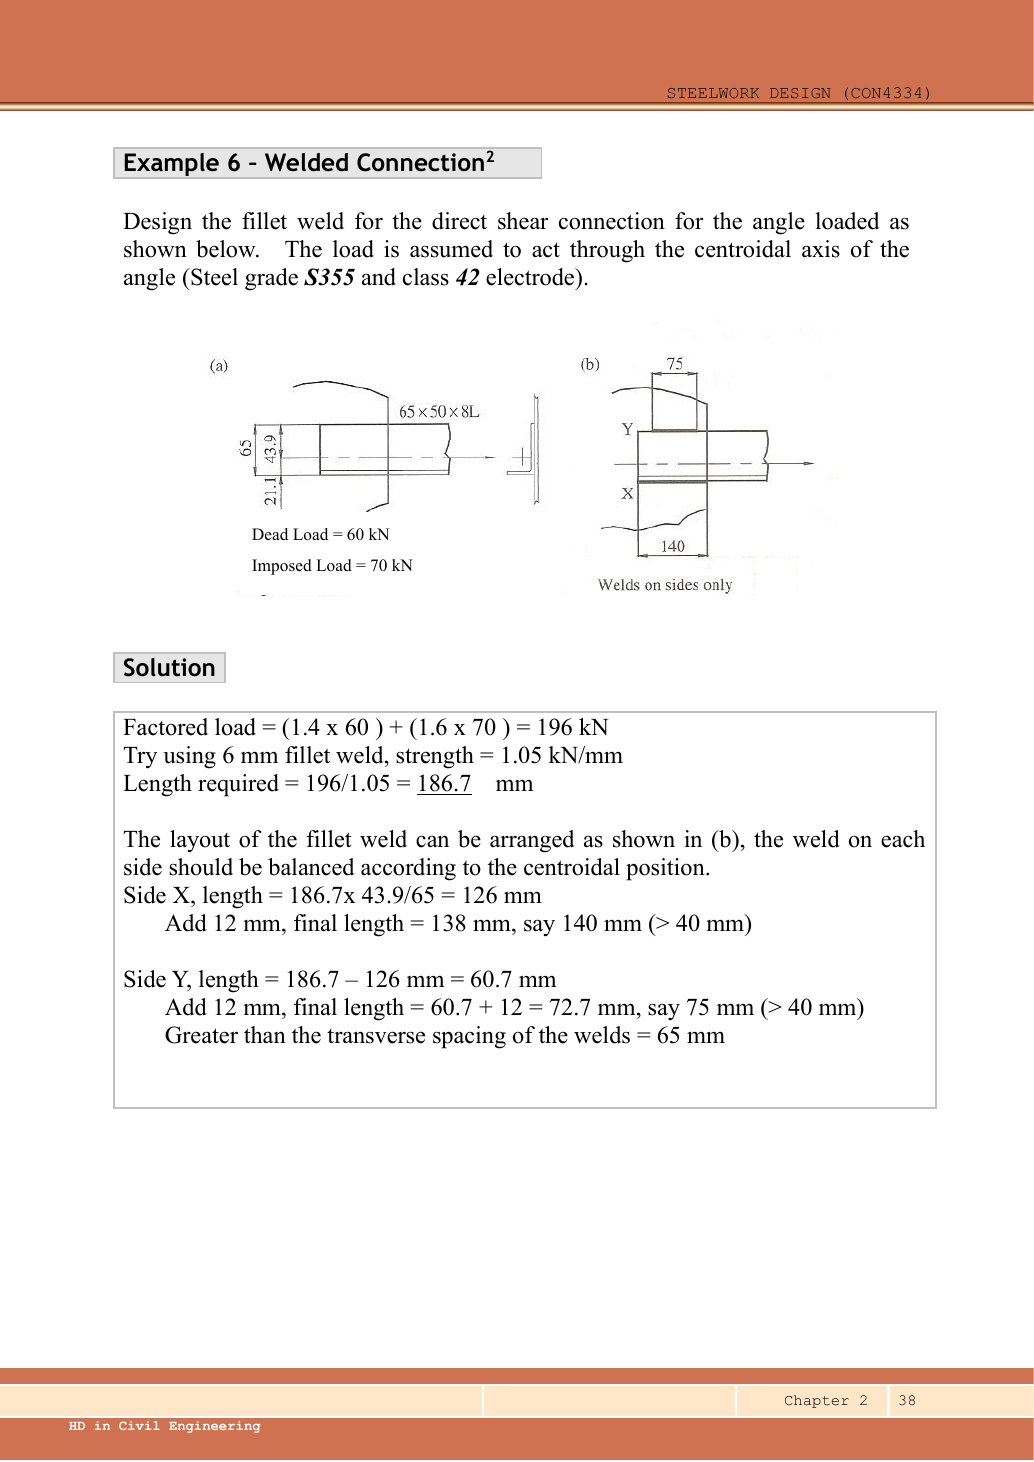
Design the side fillet welds for a angle carrying characteristic dead tension and characteristic imposed tension through its centroid. Use S355 steel and Class 42 electrode.
Original source: LectureNotes/Ch 2_Connection.pdf — p. 38.
A given value comes from the question or diagram.
A lookup value comes from the named table.
A calculated value follows from the working.
Each assumption is stated where the calculation needs it.
Known information, diagram labels and unknowns
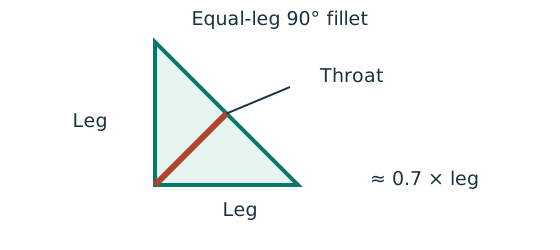
The weld resists through its throat
Convert a visible fillet leg into resistance per effective length.
Prediction, then explanation. At fixed weld strength, doubling the leg doubles throat and line resistance in this model. Detailing limits can prevent that choice.
For the course right-angle equal-leg fillet, take throat as 0.7 times leg. Multiply throat area per unit length by weld strength.
s and a are leg and throat in mm. pw is weld strength in N/mm². qcap is resistance in kN/mm.
Scope. Use effective length, the correct steel/electrode strength and permitted leg limits. Full-penetration butt welds use a different model.
Check and takeaway. Illustration: a 6 mm leg at 250 N/mm² gives .
A table value has conditions
Find a design property without mixing a row, column or standard from a different case.
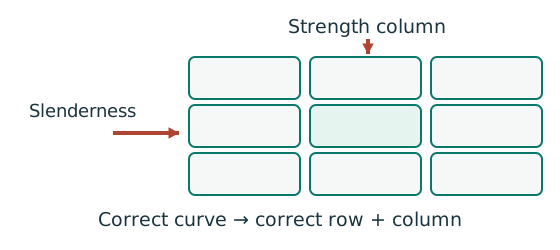
Prediction, then explanation. A different flange thickness can select a lower design strength even when the steel grade name remains unchanged.
Match the complete section designation. Read the relevant axis and unit. For strength tables, select material, thickness and curve before interpolating.
Given values come from the question. Lookup values come from a named table. Assumed values require an explicit condition.
Scope. A missing row or omitted restraint cannot be recovered from a schematic’s scale. Keep the result conditional when required data are absent.
Check and takeaway. Record the table, row, column and unit beside the substitution. That makes a later check possible.
Apply the reasoning to this section’s data and conditions
| Input | Origin |
|---|---|
| Given loads | dead, imposed, arrows through dashed centroidal axis. |
| Given geometry | The left sketch labels L; connected-leg width , centroid distance and . |
| Design choice | Lecturer tries fillet and final side lengths (X), (Y), shown at right. |
| Lookup | Table 9.2a, S355 row/Class 42 column: . Throat . |
Why this method applies
Use the same mechanism: The weld resists through its throat. At fixed weld strength, doubling the leg doubles throat and line resistance in this model. Detailing limits can prevent that choice.
Apply the reasoning to this section’s data and conditions
The weld closer to the load line carries more force.
Therefore that side needs a longer weld of the same size.
The two parallel weld lines share the tensile force across the separation.
Force equilibrium gives .
Moment equilibrium about X gives .
Equal weld lengths would move the connection resultant away from the angle centroid.
1. Factored tensile force
Keep load categories separate
A floor carries permanent material and changing occupancy loads. Find the design load for the stated check.
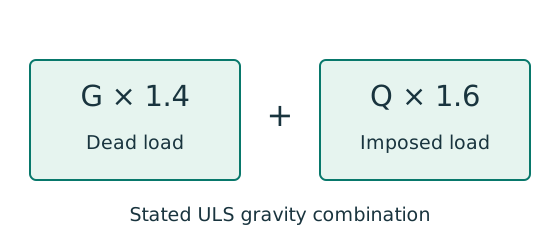
Prediction, then explanation. Increasing imposed load changes its own term. It does not change the dead-load factor or the steel stiffness.
First convert mass to weight where required. Next collect G and Q in compatible units. Apply the combination specified by the course problem.
G is characteristic dead load; Q is characteristic imposed load. Wu is the design load for this course gravity combination.
Scope. This combination is not universal. Use the specified service load for deflection and the stated factors for other standards or cases.
Check and takeaway. Illustration: G = 10 kN and Q = 5 kN give 22 kN. Factoring their sum by one guessed factor loses the distinction.
Apply the reasoning to this section’s data and conditions
Mechanism detailsFrom characteristic to design load
The complete mechanism is explained below.
Read each stage together with its stated conditions; playback and interaction are not required.
G is permanent load; Q is imposed load.
A surface load and a line load also have different units.
This illustration uses the course gravity case .
Other combinations in the original text retain their own factors.
- For illustrative , the separate load contributions show what changes when Q increases.
Do not carry this ULS total automatically into deflection.
Follow the stated SLS load case.
2. Select a trial leg and find capacity per length
Use the same mechanism: The weld resists through its throat. At fixed weld strength, doubling the leg doubles throat and line resistance in this model. Detailing limits can prevent that choice.
Use the same mechanism: A table value has conditions. A different flange thickness can select a lower design strength even when the steel grade name remains unchanged.
Apply the reasoning to this section’s data and conditions
Physical interpretation: Why the weld throat is smaller than its leg
The shortest cut through the weld is thinner than the outside leg.
Sketch, not to scale; use the original dimensions.
- For the stated equal-leg 90° fillet, throat is approximately 0.7 × leg.
- Multiply throat area by the matching weld design strength.
- For force per length, use a one-millimetre weld strip.
Remember: Choose strength from both the steel grade and electrode class.
The angle edge thickness is .
Therefore, the source maximum edge-weld leg permits this selection.
The supporting plate thickness is not given.
Its effect on the minimum weld-size rule remains a detailing condition.
Mechanism detailsFrom fillet leg to effective throat
The complete mechanism is explained below.
Read each stage together with its stated conditions; playback and interaction are not required.
- An equal-leg fillet between perpendicular plates has an approximately right-triangular section.
For this geometry, throat .
It is shorter than the leg.
Effective resisting area = .
With here, capacity per length is .
- Use the course end allowances, minimum size and length rules; increasing the geometric length alone does not resolve every detailing check.
3. Share force and effective length between the sides
Unequal lever arms require unequal forces
Two longitudinal welds must transfer a tensile force through the angle centroid without an unintended moment.
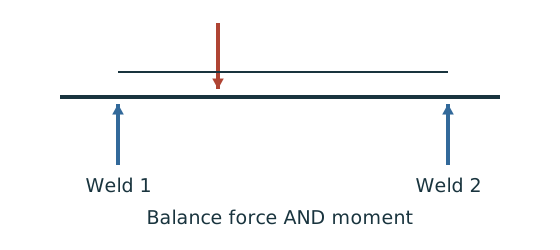
Prediction, then explanation. The weld with the shorter lever arm must carry more force to balance the longer-arm weld’s moment.
Use force balance and moment balance together. Then divide each force by its own line resistance to find required effective length.
P, F₁ and F₂ are forces. z₁ and z₂ are perpendicular distances from the load line. Use consistent length units.
Scope. Equal force shares apply only to the symmetric case. Physical terminated weld length also needs the supplied end deductions.
Check and takeaway. If the two lever arms become equal, the equations return equal forces. That limiting case checks the force distribution.
Use the same mechanism: The weld resists through its throat. At fixed weld strength, doubling the leg doubles throat and line resistance in this model. Detailing limits can prevent that choice.
Apply the reasoning to this section’s data and conditions
Physical interpretation: Why two weld lengths can be unequal
Two side welds must balance the load about its actual line of action.
Sketch, not to scale; use the original dimensions.
- Find the load line and the lever arm to each weld.
- Balance moments as well as the total force.
- Convert each weld’s force into its own required length.
Remember: Equal-looking legs do not justify equal weld forces without equilibrium.
Check: the forces sum and the required lengths sum .
The larger opposite lever arm produces the larger SideX force.
Mechanism detailsBalance two weld forces
The complete mechanism is explained below.
Read each stage together with its stated conditions; playback and interaction are not required.
- The angle centroid/load line is generally not halfway between the two weld runs.
.
Both weld runs contribute to the applied force.
.
The run nearer the load line carries more force.
For equal throat resistance per length, the required effective lengths follow the same ratio.
Add detailing allowances afterwards.
4. Add end allowances, round up and check the actual lengths
Use the same mechanism: The weld resists through its throat. At fixed weld strength, doubling the leg doubles throat and line resistance in this model. Detailing limits can prevent that choice.
Use the same mechanism: Unequal lever arms require unequal forces. The weld with the shorter lever arm must carry more force to balance the longer-arm weld’s moment.
Apply the reasoning to this section’s data and conditions
Physical interpretation: Drawn length and useful length differ
The start and end of a weld are not credited as fully effective in this course model.
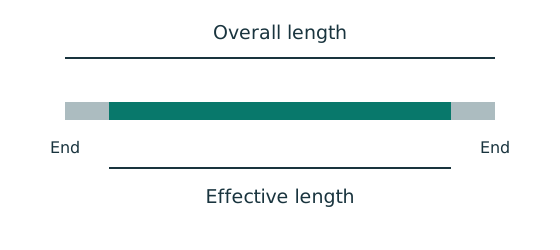
Sketch, not to scale; use the original dimensions.
- Find the effective length required by strength.
- Add the specified end allowance to each separate run.
- Round up, then check minimum size, spacing and returns.
Remember: Strength alone does not prove a weld detail is acceptable.
Each effective length exceeds .
The physical side lengths and also exceed the transverse separation, matching the source detailing check.
The extra rounding increases available resistance.
The actual force split still follows equilibrium.
End-return/support-plate details are not fully specified.
Therefore, this is the completed requested side-weld strength/length design, not a complete fabrication detail.
Mechanism detailsFrom fillet leg to effective throat
The complete mechanism is explained below.
Read each stage together with its stated conditions; playback and interaction are not required.
- An equal-leg fillet between perpendicular plates has an approximately right-triangular section.
For this geometry, throat .
It is shorter than the leg.
Effective resisting area = .
With here, capacity per length is .
- Use the course end allowances, minimum size and length rules; increasing the geometric length alone does not resolve every detailing check.
Result and concise exam wording
Use the same mechanism: The weld resists through its throat. At fixed weld strength, doubling the leg doubles throat and line resistance in this model. Detailing limits can prevent that choice.
Apply the reasoning to this section’s data and conditions
.
Use fillet, .
Force split X/Y=/.
Required effective lengths /.
Add to each and provide (X), (Y); effective capacities / exceed the assigned forces.
Misconceptions and checks
One connected leg does not load both legs equally
An angle carries tension through only one leg. Determine how much section area the design rule permits.
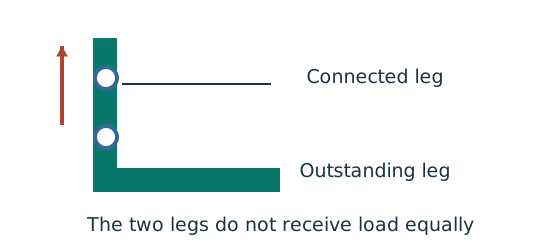
Prediction, then explanation. Keeping the same gross area does not guarantee the same tension resistance when the connection arrangement changes.
Separate connected and outstanding leg areas. Include the actual holes. Then use the supplied single-angle or double-angle effective-area rule.
Ae is the effective area from the applicable angle rule in mm². py is the relevant design strength in N/mm².
Scope. Do not assume the whole gross area is effective. Symmetry, connected leg and connection type determine which rule applies.
Check and takeaway. The outstanding leg contributes through load transfer; the rule need not either count all of it or discard all of it.
Use the same mechanism: The weld resists through its throat. At fixed weld strength, doubling the leg doubles throat and line resistance in this model. Detailing limits can prevent that choice.
Apply the reasoning to this section’s data and conditions
- Read the angle label: the source says thick, not .
- Use the opposite centroid lever arm when allocating weld force.
- Add separately to both weld runs.
- Do not use total capacity alone if one side is too short.
How the method transfers to a new variant
Use the same mechanism: The weld resists through its throat. At fixed weld strength, doubling the leg doubles throat and line resistance in this model. Detailing limits can prevent that choice.
Apply the reasoning to this section’s data and conditions
- Locate the centroidal load line and both weld lines.
- Factor loads and select a permitted trial weld leg.
- Use force and moment equilibrium for the two side forces.
- Divide each force by weld strength per length.
- Add individual end deductions back, round up, and recheck each side.
Prediction with explained answer
Use the same mechanism: The weld resists through its throat. At fixed weld strength, doubling the leg doubles throat and line resistance in this model. Detailing limits can prevent that choice.
Apply the reasoning to this section’s data and conditions
Prediction and explained answer.
Suppose the same force acts midway between the -spaced weld lines.
What physical length is required on each side for weld?
Answer and reasoning
Each side takes .
Required effective length.
Add ; choose each.
Centred loading makes equal lengths appropriate.
Mechanism detailsBalance two weld forces
The complete mechanism is explained below.
Read each stage together with its stated conditions; playback and interaction are not required.
- The angle centroid/load line is generally not halfway between the two weld runs.
.
Both weld runs contribute to the applied force.
.
The run nearer the load line carries more force.
For equal throat resistance per length, the required effective lengths follow the same ratio.
Add detailing allowances afterwards.