2014–2019 · Reference answers
2018-05 (day not printed) — floor and foundations
Solve the complete compulsory question, using the original diagram beside the calculation.
Independent teaching answer, not an official solution or marking scheme.
Printed marks are retained.
Read the source conditions beside each result.
Read the load path first
Vertical bending can trigger sideways motion
A beam has enough local bending resistance. Check whether its compression flange can move sideways and twist.
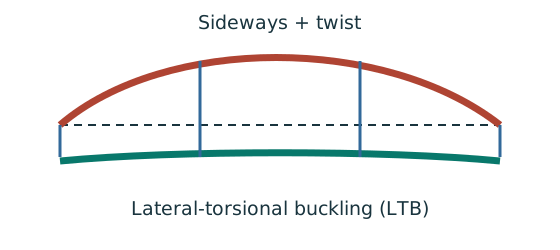
Prediction, then explanation. Adding a valid lateral restraint shortens a stability segment. It need not change the beam’s vertical reaction or moment diagram.
Identify the compressed flange and effective restraints. Calculate the specified slenderness, read buckling strength and compare resistance with the segment demand.
LE and ry use the same length unit. pb uses N/mm²; Sx uses mm³; Mb uses N·mm. mLT is dimensionless.
Scope. Use the specified section class, effective-length branch and loading condition. Load height alone does not prove a destabilizing case.
Check and takeaway. Removing a lateral restraint requires a new segment stability check. The old shorter-segment result cannot establish the longer segment’s adequacy.
Follow one strip of floor
An area load must become a beam load before beam reactions can be calculated.
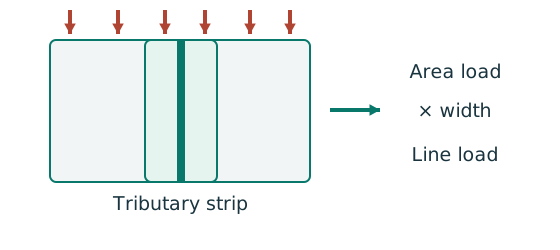
Prediction, then explanation. At fixed area load, twice the tributary width gives twice the line load. An end reaction remains a concentrated force.
Consider one metre along the beam. The associated floor area is b square metres. Multiply area load by that width.
q is area load in kN/m²; b is tributary width in m; w is line load in kN/m.
Scope. Determine b from slab spanning and supports. Add beam self-weight separately. A secondary-beam reaction is not automatically a UDL.
Check and takeaway. Illustration: . The width cancels one length unit.
Keep load categories separate
A floor carries permanent material and changing occupancy loads. Find the design load for the stated check.
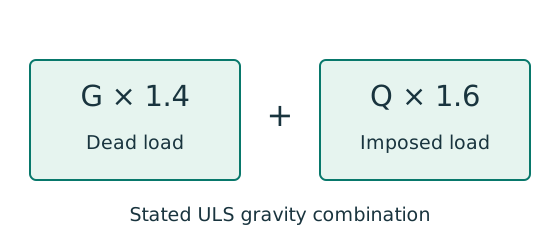
Prediction, then explanation. Increasing imposed load changes its own term. It does not change the dead-load factor or the steel stiffness.
First convert mass to weight where required. Next collect G and Q in compatible units. Apply the combination specified by the course problem.
G is characteristic dead load; Q is characteristic imposed load. Wu is the design load for this course gravity combination.
Scope. This combination is not universal. Use the specified service load for deflection and the stated factors for other standards or cases.
Check and takeaway. Illustration: G = 10 kN and Q = 5 kN give 22 kN. Factoring their sum by one guessed factor loses the distinction.
Apply the reasoning to this section’s data and conditions
The slab arrows point across adjacent B1 beams.
Each interior B1 collects half the 2.6 m bay on either side: tributary width 2.6 m.
Its labelled span is 5.5 m.
The supporting B2 spans 5.2 m between the drawn columns and receives 1 B1 end reaction(s), at its middle.
Beams aligned directly with a column deliver their end reaction to that column, not as an extra midspan load on B2.
The B2 point load is already factored.
Do not factor it again.
The slab gives full compression-flange restraint.
Therefore, this is section resistance rather than an LTB design.
Units: 1 kN = 1,000 N; 1 m = 1,000 mm; 1 cm³ = 1,000 mm³; 1 cm⁴ = 10,000 mm⁴.
Demand is the load effect.
Resistance is the permitted capacity for the selected failure mode.
Compare matching units.
Physical interpretation and limits
Think of a tray resting on small bars, then on two larger edge bars.
Follow where each bar ends: that determines which reaction goes onto the next bar.
In this paper B1 means Beam A and B2 means Beam B in the working below.
Section classes [4 marks]
Find which plate buckles first
Before using plastic bending resistance, check whether the flange and web can sustain the required stress distribution.
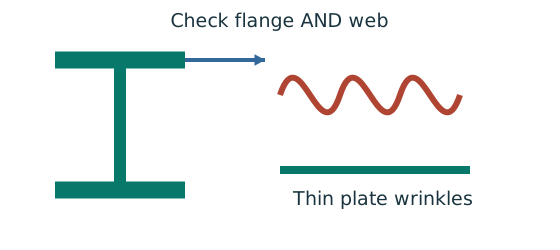
Prediction, then explanation. At fixed width, a thinner plate has a larger width-to-thickness ratio. Local buckling then becomes more restrictive.
Calculate the flange and web ratios separately. Compare each with the limits for its stress condition. The worse class governs.
py is the design yield strength in N/mm². ε is a dimensionless scale used in the supplied classification limits.
Scope. Pure bending and uniform compression use different web limits. Class 2 allows plastic resistance but not the Class 1 rotation capability.
Check and takeaway. A Class 1 web and Class 2 flange give a Class 2 section. Do not average the class numbers.
Apply the reasoning to this section’s data and conditions
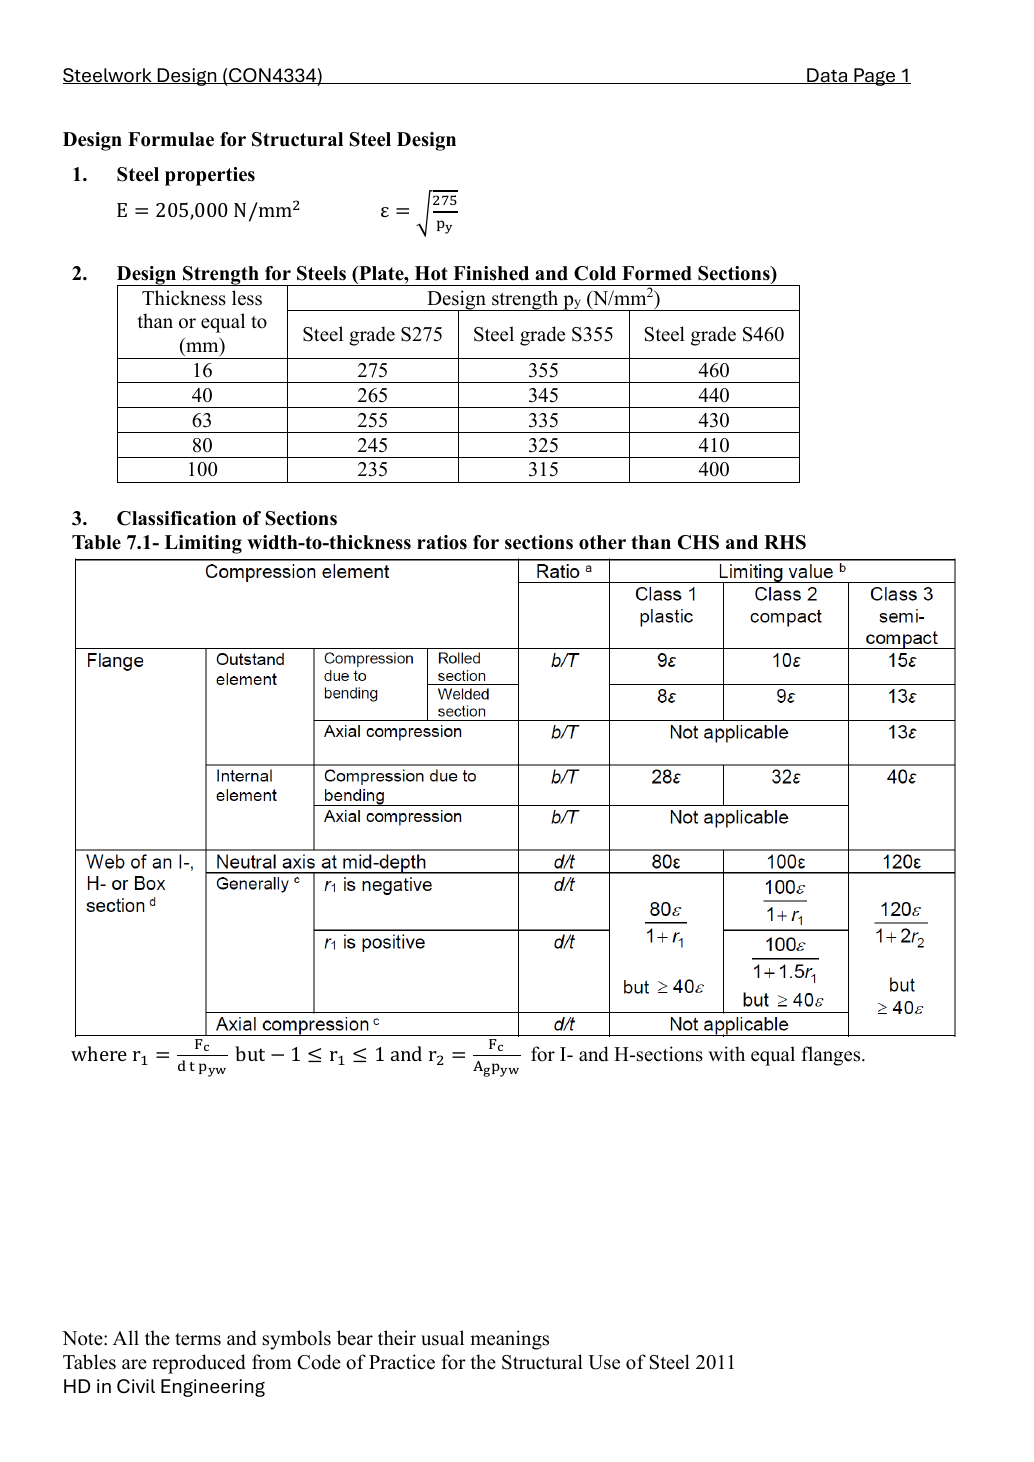
S355 design strength depends on the actual flange thickness.
Local classification decides whether plastic bending resistance is allowed.
In pure bending the web limit is different from uniform compression.
Compare the flange class with the web class.
Use the more restrictive class.
Class 1 or 2 permits the capped plastic modulus.
Class 3 uses the elastic modulus.
S355 design strength depends on the actual flange thickness.
Local classification decides whether plastic bending resistance is allowed.
In pure bending the web limit is different from uniform compression.
Compare the flange class with the web class.
Use the more restrictive class.
Class 1 or 2 permits the capped plastic modulus.
Class 3 uses the elastic modulus.
Result and concise exam wording — key result lines
Compare the flange class with the web class.
Use the more restrictive class.
Class 1 or 2 permits the capped plastic modulus.
Class 3 uses the elastic modulus.
Load intensity [4 marks]
Use the same mechanism: Keep load categories separate. Increasing imposed load changes its own term. It does not change the dead-load factor or the steel stiffness.
Apply the reasoning to this section’s data and conditions
Given slab thickness 175 mm, finishes 1.5 kN/m², imposed load 5 kN/m².
Convert thickness to metres.
Permanent area load includes concrete and finishes; beam weight is added later as a line load.
Result and concise exam wording — key result lines
Given slab thickness 175 mm, finishes 1.5 kN/m², imposed load 5 kN/m².
Convert thickness to metres.
Permanent area load includes concrete and finishes; beam weight is added later as a line load.
Beam actions [8 marks]
Use the same mechanism: Follow one strip of floor. At fixed area load, twice the tributary width gives twice the line load. An end reaction remains a concentrated force.
Balance the isolated beam
Find the two vertical reactions before calculating internal shear or moment.
Prediction, then explanation. Move the same load toward B. Reaction B increases because the load has a larger moment arm about A.
Take moments about A. Reaction A has zero lever arm there. Then use vertical force balance to find reaction A.
P, RA and RB are forces in kN. L is support spacing and a is load position, both in m.
Scope. These expressions describe one point load on a simply supported beam. Add other loads through equilibrium; keep their actual positions.
Check and takeaway. Illustration: P = 60 kN, L = 6 m and a = 2 m give RB = 20 kN and RA = 40 kN.
A table value has conditions
Find a design property without mixing a row, column or standard from a different case.
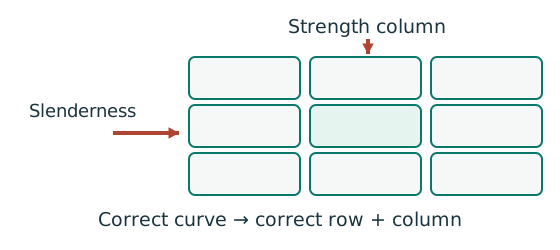
Prediction, then explanation. A different flange thickness can select a lower design strength even when the steel grade name remains unchanged.
Match the complete section designation. Read the relevant axis and unit. For strength tables, select material, thickness and curve before interpolating.
Given values come from the question. Lookup values come from a named table. Assumed values require an explicit condition.
Scope. A missing row or omitted restraint cannot be recovered from a schematic’s scale. Keep the result conditional when required data are absent.
Check and takeaway. Record the table, row, column and unit beside the substitution. That makes a later check possible.
Apply the reasoning to this section’s data and conditions
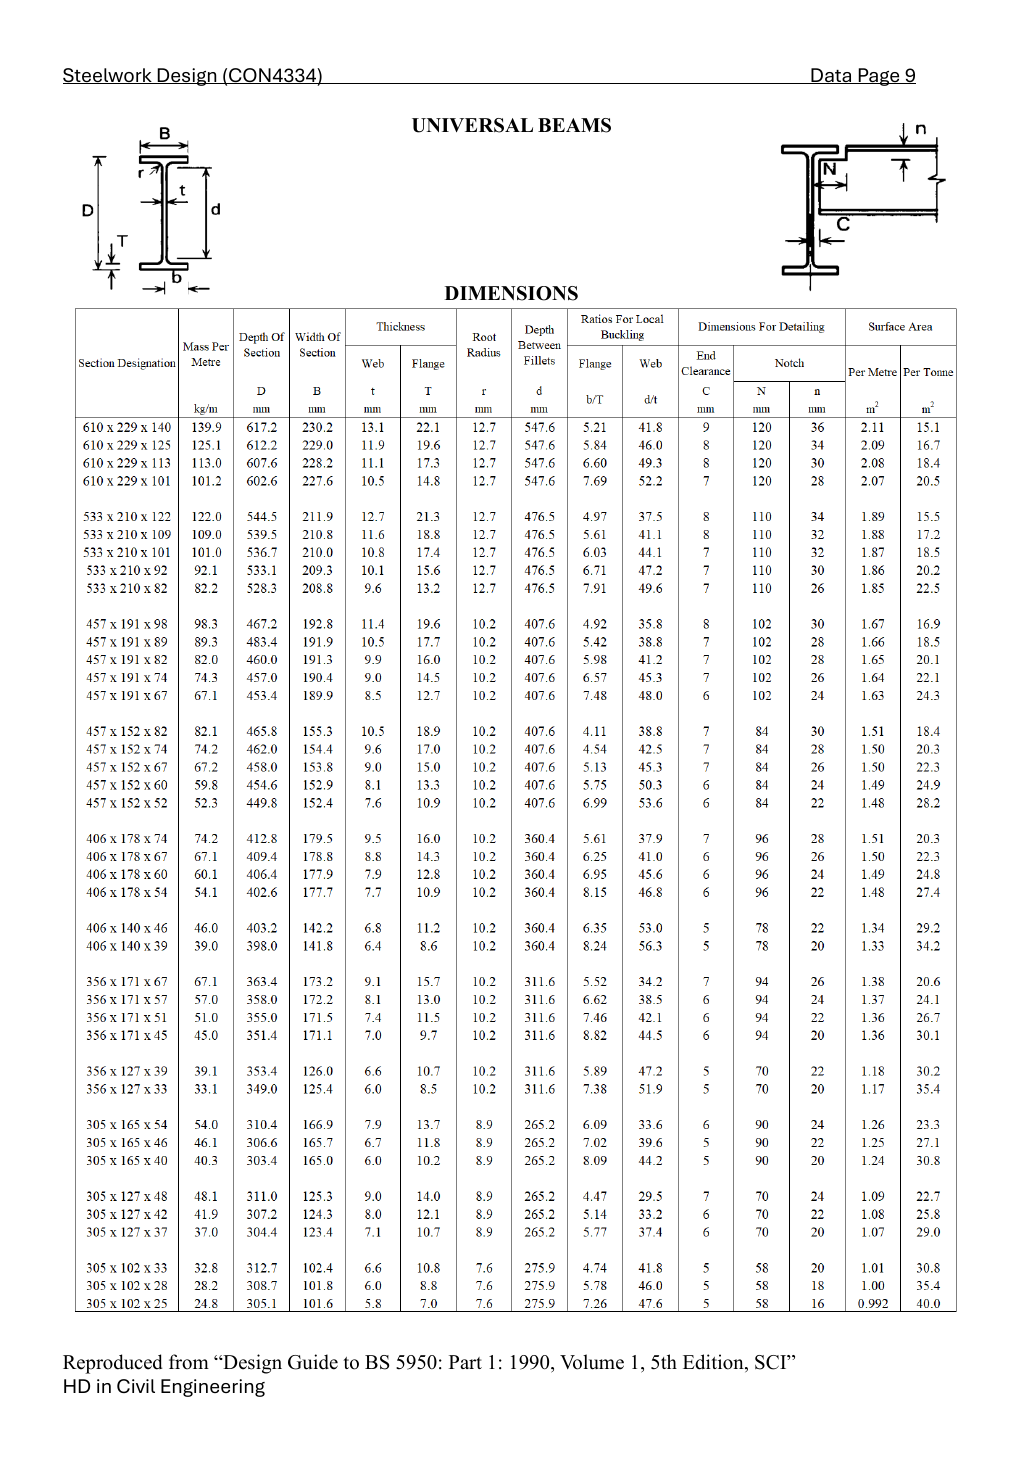
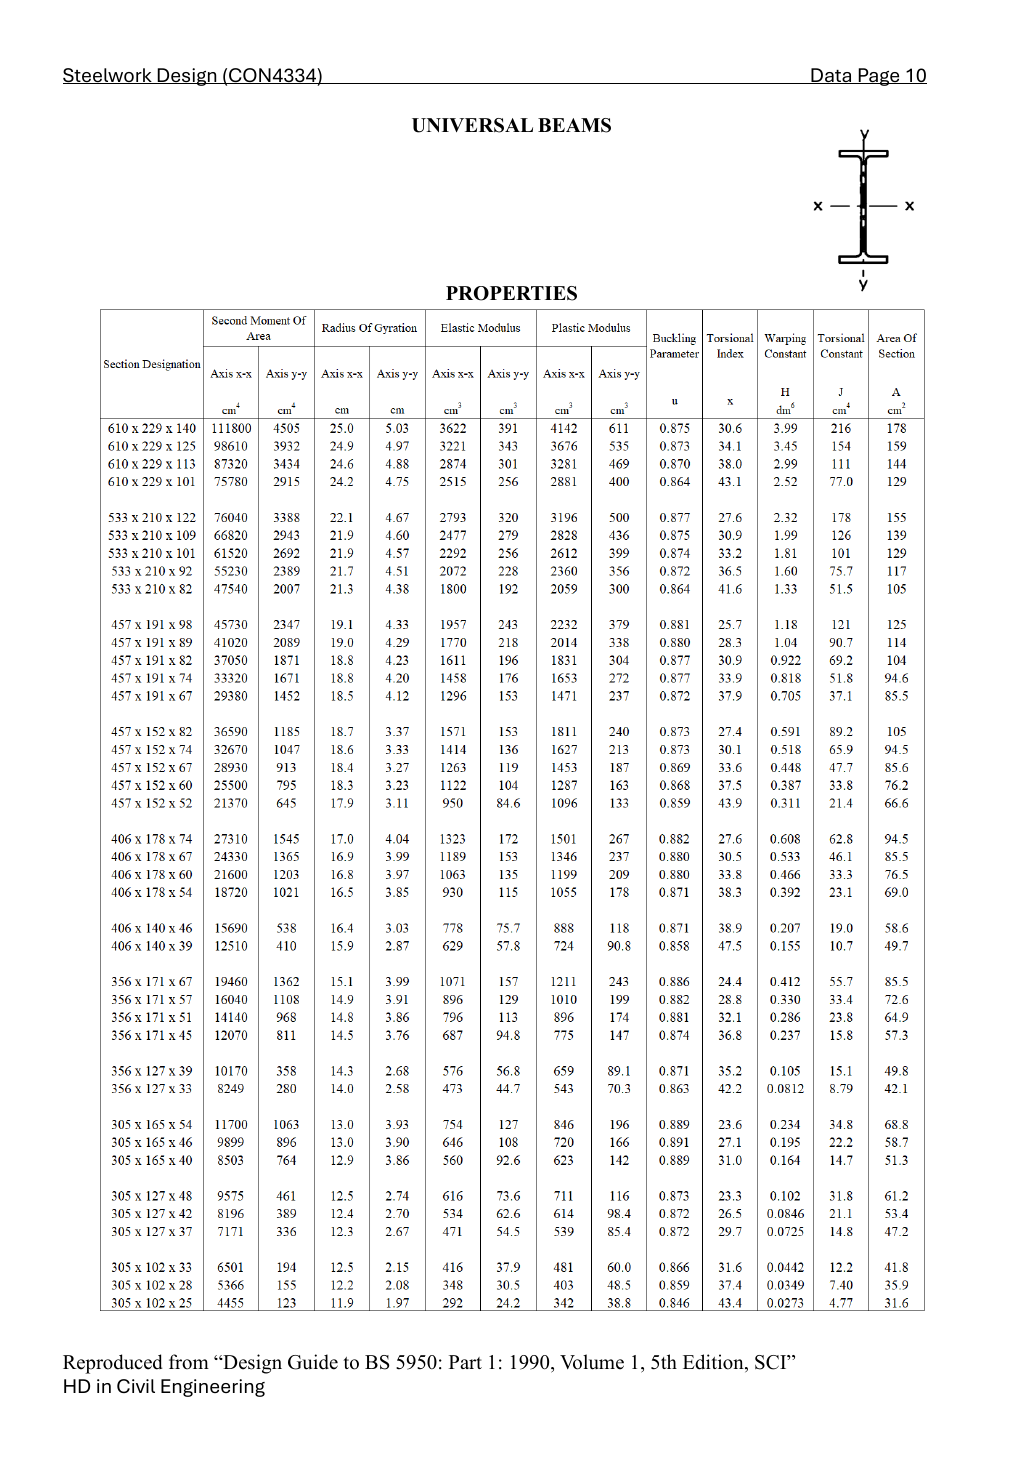
Lookup the exact 305 × 165 × 40 UB row.
Read dimensions first, properties second.
D = overall depth; t = web thickness; T = flange thickness; d = clear web depth.
The designation identifies a section-table row.
Read exact dimensions from that row.
Lookup the exact 356 × 171 × 51 UB row.
Read dimensions first, properties second.
D = overall depth; t = web thickness; T = flange thickness; d = clear web depth.
The designation identifies a section-table row.
Read exact dimensions from that row.
Lookup mass in kg/m and multiply by g/1000 to get kN/m.
Multiply the slab area load by the tributary width, not by the full slab area.
For B2 use superposition: the B1 point reactions plus B2 self-weight.
Equilibrium divides the symmetric total load equally between the supports.
Result and concise exam wording — key result lines
For B2 use superposition: the B1 point reactions plus B2 self-weight.
Equilibrium divides the symmetric total load equally between the supports.
Both beam checks [24 marks]
The web carries the shear check
Compare the applied shear with the resistance of the prescribed shear area.
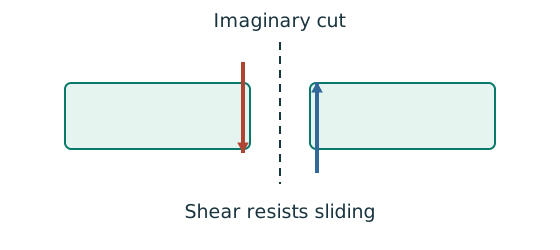
Prediction, then explanation. At fixed design strength and depth, increasing web thickness increases this shear resistance.
Calculate the prescribed shear area. Multiply by the design shear stress from the course rule. Then compare matching force units.
D is overall depth; t is web thickness, in mm. Av uses mm². py uses N/mm², giving Vc in N.
Scope. Apply this area definition to the stated rolled section. Check web slenderness separately. The factor 0.6 is the low-shear threshold, not this resistance coefficient.
Check and takeaway. A shear pass alone does not prove bending, deflection or local support-web adequacy.
Internal tension and compression resist moment
Find which section resistance applies before comparing it with the moment demand.
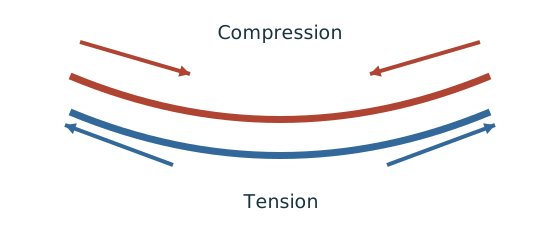
Prediction, then explanation. A larger appropriate section modulus raises resistance at fixed strength. Local plate buckling can restrict the usable modulus.
Classify the section first. At low shear, use the elastic expression for Class 3 or the prescribed capped plastic expression for Classes 1 and 2.
py uses N/mm². S is plastic modulus and Z is elastic modulus, both in mm³. Mc then uses N·mm.
Scope. This is section resistance, not whole-member LTB resistance. High shear and Class 4 require their appropriate treatment.
Check and takeaway. Selecting the larger of the two capped terms defeats the cap. Use their minimum.
A safe beam can still sag too far
Check whether the beam displacement exceeds the permitted service limit.
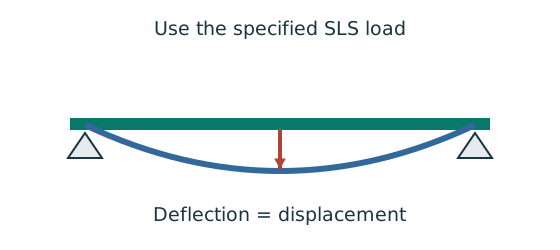
Prediction, then explanation. For the same UDL and stiffness, doubling span multiplies deflection by sixteen. Doubling I halves deflection.
Load bends each beam segment. The curvature accumulates along the span. Material stiffness E and geometric stiffness I resist that deformation.
Use w in N/mm, L in mm, E in N/mm² and I in mm⁴. The resulting midspan deflection is in mm.
Scope. The formula assumes a prismatic, simply supported, linear-elastic beam with full-span UDL. Use the stated service load and deflection limit.
Check and takeaway. A higher yield grade does not automatically increase E. Passing a strength check therefore does not prove acceptable deflection.
Apply the reasoning to this section’s data and conditions
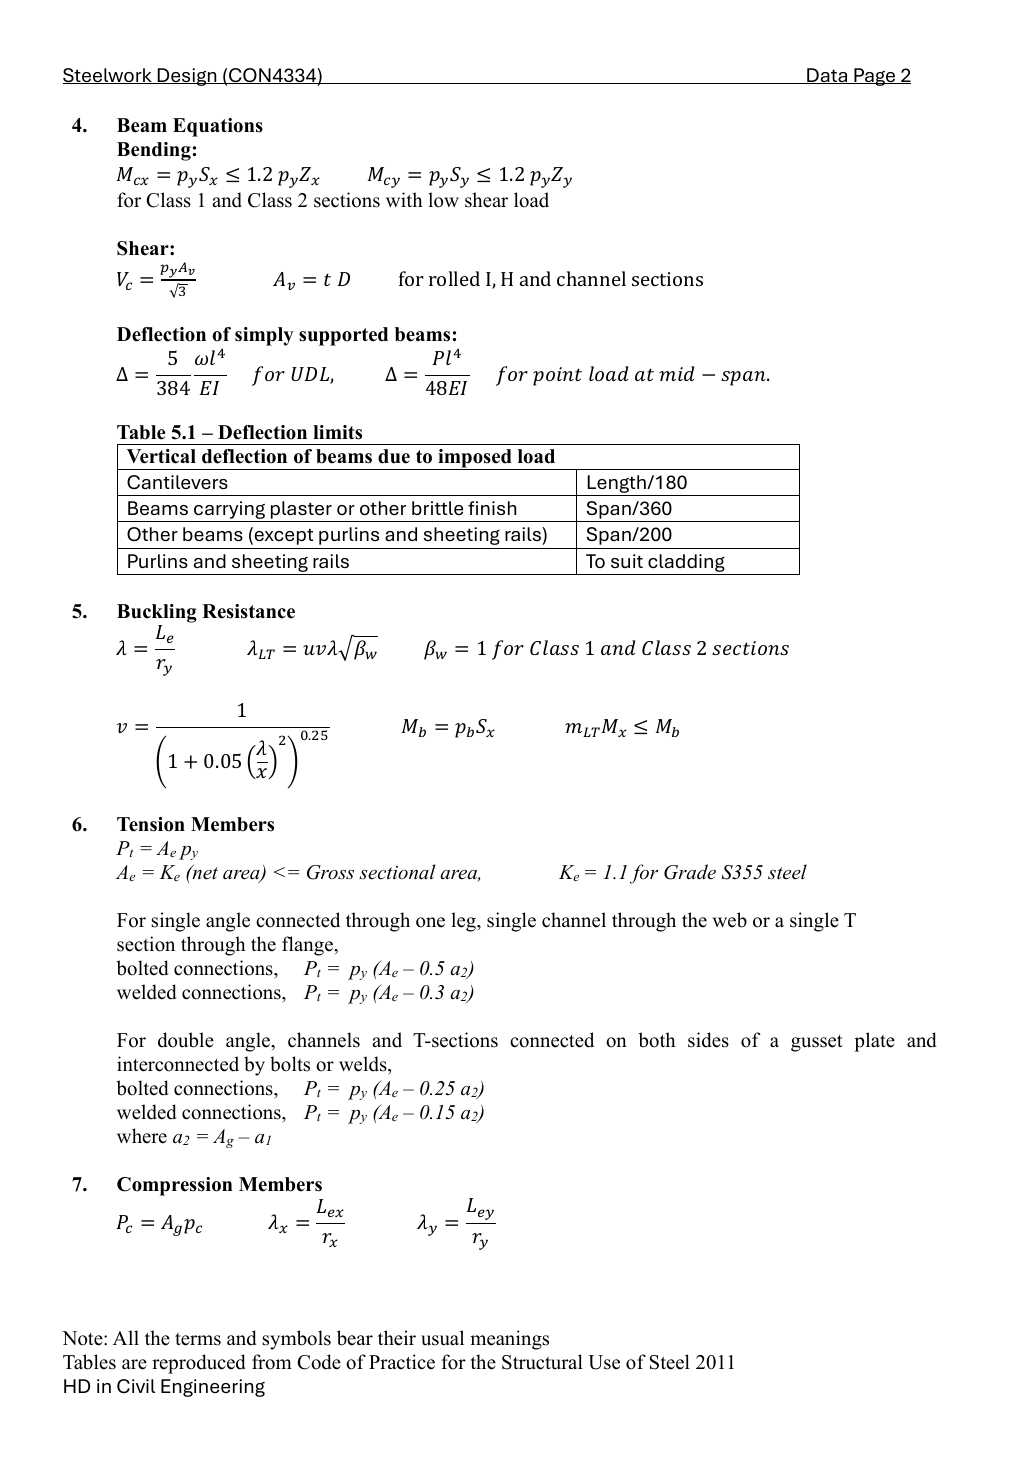
The following shear model assigns the shear area to the web.
For a rolled UB use Av = Dt, then the course shear resistance pyAv/√3.
The factor 0.6 defines the low-shear threshold below.
The shear-resistance coefficient remains the one in the displayed formula.
PASS
PASS
The maximum shear is below 0.6Vc.
Therefore every section satisfies this low-shear condition.
For serviceability use unfactored imposed load only, E = 205,000 N/mm², I in mm⁴ and span in mm.
Do not include the ULS factors or dead load in this course deflection limit.
PASS
The following shear model assigns the shear area to the web.
For a rolled UB use Av = Dt, then the course shear resistance pyAv/√3.
The factor 0.6 defines the low-shear threshold below.
The shear-resistance coefficient remains the one in the displayed formula.
PASS
PASS
The maximum shear is below 0.6Vc.
Therefore every section satisfies this low-shear condition.
For serviceability use unfactored imposed load only, E = 205,000 N/mm², I in mm⁴ and span in mm.
Do not include the ULS factors or dead load in this course deflection limit.
PASS
Result and concise exam wording — key result lines
PASS
Reusable exam procedure and mistakes
Use the same mechanism: A safe beam can still sag too far. For the same UDL and stiffness, doubling span multiplies deflection by sixteen. Doubling I halves deflection.
Use the same mechanism: Keep load categories separate. Increasing imposed load changes its own term. It does not change the dead-load factor or the steel stiffness.
Use the same mechanism: A table value has conditions. A different flange thickness can select a lower design strength even when the steel grade name remains unchanged.
Apply the reasoning to this section’s data and conditions
- Trace the slab arrows and count reactions before doing arithmetic.
Use each member’s exact table row.
Class 2 is not Class 1.
However, both allow capped plastic bending.
- Never factor an already factored reaction twice; never include beam dead weight in imposed-load deflection.
Explained variant — invented example
Use the same mechanism: A safe beam can still sag too far. For the same UDL and stiffness, doubling span multiplies deflection by sixteen. Doubling I halves deflection.
Ask two separate design questions
Decide whether the check concerns failure or unacceptable behaviour during use.
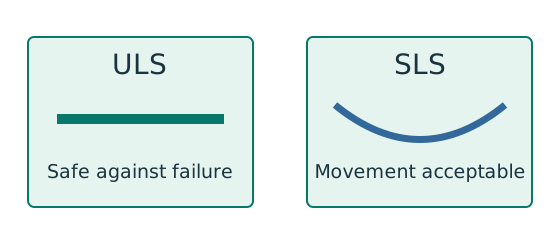
Prediction, then explanation. A larger section may improve both results, but a pass on one branch does not prove a pass on the other.
ULS addresses relevant strength and stability failure modes. SLS addresses specified service conditions such as deflection.
δ is the calculated displacement; δlimit is the permitted displacement. Both must use the same length unit.
Scope. Use each check’s own load combination and limit. A strength load factor does not change the physical stiffness.
Check and takeaway. Write separate conclusions for strength, stability and serviceability where requested. A single unexplained “safe” hides those distinctions.
Apply the reasoning to this section’s data and conditions
Invented variant: imposed load rises by 20%, with dead load unchanged.
What changes?
Hint
Separate permanent and imposed terms before changing a load.
Explained answer
Multiply imposed-only deflections by 1.2.
Rebuild ULS load as 1.4G + 1.6(1.2Q).
Do not multiply the total ULS action by 1.2.
Section capacities and classes stay unchanged.